Table of Contents
Advertisement
Quick Links
Advertisement
Table of Contents

Related Manuals for Flexitron Webdyn WebdynEasy LoRaWAN


Summary of Contents for Flexitron Webdyn WebdynEasy LoRaWAN
- Page 1 USER MANUAL WebdynEasy LoRaWAN LoRaWAN gateway with external or embedded server...
-
Page 2: Table Of Contents
USER MANUAL - WebdynEasy LoRaWAN CONTENTS Glossary ......................4 Notes on this manual ................... 6 Scope ......................6 Target group ....................6 Product and accessory references ............... 6 2.3.1 Safety instructions ................... 7 Regulations ....................8 General presentation ................... 9 The LoRaWAN protocol ................ - Page 3 USER MANUAL - WebdynEasy LoRaWAN 5.1.4 Alarms ....................35 5.1.5 Schedules ..................... 36 5.1.6 Modbus ....................40 5.1.7 Run actions ................... 44 5.1.7.1 Remote server connection request. Request ......... 44 5.1.7.2 Reboot request: Reboot ..............45 5.1.7.3 Log download: Download logs ............45 5.1.7.4 Manual time set: Set time ...............
-
Page 4: Glossary
USER MANUAL - WebdynEasy LoRaWAN 1 Glossary Name Description Activation By Personalization ABP activation forces to have the DevAddr and the security key for the peripheral hard-coded in the product. This strategy may seem simpler because the join procedure does not need to be known, but it has security disadvantages. - Page 5 USER MANUAL - WebdynEasy LoRaWAN Modbus Modbus is a communication protocol routinely used by industry to dialogue with industrial equipment over a network. Network Time Protocol Protocol used to synchronise the local hub clock with a time reference via a computer network.
-
Page 6: Notes On This Manual
USER MANUAL - WebdynEasy LoRaWAN 2 Notes on this manual This guide describes the hub assembly, installation and configuration as well as its remote operation. 2.1 Scope This technical description is valid for WebdynEasy LoRaWAN hubs from hardware version V1 and software version V1.0 onwards. -
Page 7: Safety Instructions
USER MANUAL - WebdynEasy LoRaWAN WG0307-D03-EU Sens'RF-LoRaWAN-TIC (no external power supply) WG0307-D08-EU Sens'RF-LoRaWAN-Analog (0-10V/4-20mA) (no external power supply) WG0307-D11-EU Sens'RF-LoRaWAN-Pulse (with external power supply) WG0307-D12-EU Sens'RF-LoRaWAN-Pressure Humidity and Temperature (with external power supply) WG0307-D13-EU Sens'RF-LoRaWAN-TIC (with external power supply) WG0307-D18-EU Sens'RF-LoRaWAN-Analog (0-10V/4-20mA) (with external power supply) 2.3.1 Safety instructions... -
Page 8: Regulations
USER MANUAL - WebdynEasy LoRaWAN To optimise radio and cellular modem reception sensitivity, it is imperative to leave 20 cm free space around the antennas. 2.4 Regulations The product complies with the European directives according to the EU Declaration of Conformity available from Webdyn or on website: www.webdyn.com Recycling:... -
Page 9: General Presentation
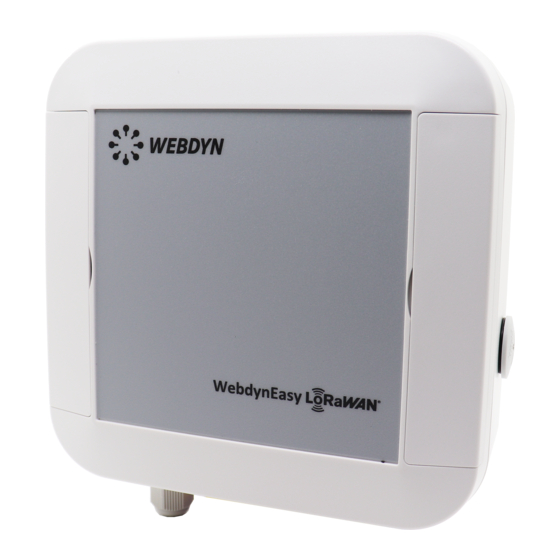
USER MANUAL - WebdynEasy LoRaWAN 3 General presentation The WebdynEasy LoRaWAN hub is part of a line of Webdyn hubs specific to wireless networks. The hub’s main function is to be a LoRaWAN gateway to create a LoRaWAN network and collect the data from the different LoRa sensors deployed nearby. -
Page 10: The Hub
USER MANUAL - WebdynEasy LoRaWAN located on the server which manages data redundancy, integrity checks, receipt confirmation and the adaptation of the sensor data rate and emission power. 3.2 The hub The purpose of the hub is to collect LoRaWAN and/or Modbus data and regularly send it to a remote server (IS) using Ethernet or 3G/4G. - Page 11 USER MANUAL - WebdynEasy LoRaWAN SIM card holder Reset button RJ45 connector and LEDs BLE Bluetooth (future use) Request button (identified FUNCTION on the board) Version 0.10...
- Page 12 USER MANUAL - WebdynEasy LoRaWAN LoRa RF radio SMA antenna Box output for the LoRa RF radio external antenna (option) Box RS485/422 output 1 RS485/422 port Indicators: LED 8: Power LED 3: Modem LED 1: CPU LED 7: LoRa Box output for external power supply Terminal block for external 12/24V power supply Box output for the 3G/4G modem external antenna (option) 3G/4G Modem SMA Antenna...
-
Page 13: Technical Specifications
USER MANUAL - WebdynEasy LoRaWAN Modem Lights when the Modem sets up an IP connection Lights for 1 second on receipt of a text message Following a long press on the Request button, it indicates the received signal level (RSSI) using a number of flashes (0 to 5 times) 0 –... -
Page 14: Technical Specifications
USER MANUAL - WebdynEasy LoRaWAN Values Parameters External power supply +12/24V DC from an external power supply Consumption 10 Watts maximum Flash memory 50 Mb (shared between compressed and uncompressed files) Dimensions 160 x 150 x 55 mm ASA IP67 box Weight 0.450 kg Operating temperature... -
Page 15: Lora Specifications
USER MANUAL - WebdynEasy LoRaWAN 3G 900 MHz (B8) 880–915 MHz 23 dBm class 3b 4G 2100 MHz (B1) 1920–1980 MHz 23 dBm class 3 4G 1800 MHz (B3) 1710–1785 MHz 23 dBm class 3 4G 2600 MHz (B7) 2500–2570 MHz 23 dBm class 3 4G 900MHz (B8) 880–915 MHz... -
Page 16: Installation And Maintenance
USER MANUAL - WebdynEasy LoRaWAN 4 Installation and Maintenance 4.1 Unpacking 4.1.1 Product contents Start by checking the contents before starting any installation work. If there are missing or damaged items, contact Webdyn support. (see section8: “Support”) WebdynEasy LoRaWAN hub (Ref.: WG0610-A01) The following are shipped with the hub: •... -
Page 17: Assembly
USER MANUAL - WebdynEasy LoRaWAN Top view Underside view WG0610-A01 WW/YY S/N: XXXXXXXXXXXX Product CE label MAC: 00:05:F3:00:00:00 Identification label This label features: • Product name (WG0610-A01) • The date of manufacture (in WW/YY format at the top right) • The serial number in character and 128 barcode format. •... -
Page 18: Opening/Closing The Box
USER MANUAL - WebdynEasy LoRaWAN To optimise Modem and LoRa radio reception sensitivity, it is essential to leave 20 cm free space around the antennas. 4.2.1 Opening/closing the box Follow these steps to open the hub box: If the box is wall-mounted: 1. -
Page 19: Sim Card
USER MANUAL - WebdynEasy LoRaWAN If the WebdynEasy hub were to be installed in a metal box or in a location that does not have proper signal reception, the use of a remote antenna is strongly recommended. Be careful to use an antenna compatible with the connector and frequencies used. Internal Antenna External antenna SMA connector... -
Page 20: Lora
USER MANUAL - WebdynEasy LoRaWAN SIM card To insert the SIM card into the product, slide the holder flap to the right (in the OPEN direction). Slide the SIM card into the flap. Then close the flap by sliding it to the left (in the LOCK direction) Webdyn does not supply any SIM cards. -
Page 21: Connection
USER MANUAL - WebdynEasy LoRaWAN the product. To do this, unscrew the cap on the box and fit a M16*1.5 cable gland (not included). To optimise the radio range, it is important to install the radio antenna as high as possible and to place it carefully, avoiding obstacles as far as possible. -
Page 22: Rs485/Rs422 Bus
USER MANUAL - WebdynEasy LoRaWAN Terminal block for external 12V/24V power supply 12V/24V terminal Earth External power supply cable gland Make sure the power supply wires are connected to the proper terminals. Product power consumption varies depending on its configuration. Make sure the power supply used can provide a minimum power of 10Watts. -
Page 23: Ethernet
USER MANUAL - WebdynEasy LoRaWAN The maximum RS485 bus length is 1000 metres. Recommendations for RS485/RS422 BUS wiring: • The modules must be connected one after the other. • Star connections are prohibited. • The cables must either be screened or shielded, twisted pair per pair (see above: “cable type for RS485 bus connection”). - Page 24 USER MANUAL - WebdynEasy LoRaWAN To configure the hub, first open the box to access the RJ45 connector (see section 4.2.1: “Opening/closing the box”). Once open, connect the hub to the computer using an Ethernet cable. Ethernet cable A static IP address needs to be configured on the computer in the same IP address range and the same subnet as the WebdynEasy LoRaWAN hub.
- Page 25 USER MANUAL - WebdynEasy LoRaWAN 6. Enter IP address 192.168.1.xxx (xxx between 1 and 254 and not equal to 12) and the subnet mask 255. 255. 255.0. 7. Click “Add”. 8. To validate the settings, click OK in each one of the three windows. 9.
-
Page 26: Configuration
USER MANUAL - WebdynEasy LoRaWAN 5 Configuration The first time the WebdynEasy LoRaWAN hub is configured, the Web interface embedded in the product is used. Embedded web interface To access hub’s embedded web interface, proceed as follows: Launch the web browser The web interface is compatible with the latest versions of the following browsers: Firefox, Chrome and Edge. -
Page 27: Hub Connectivity
USER MANUAL - WebdynEasy LoRaWAN The “Overview” tab provides an overall view of WebdynEasy LoRaWAN operation If web pages are accessed during the hub initialisation phase, the logo is displayed. Wait for the hub to be fully initialised to access the web pages 5.1.1 Hub connectivity The “Connectivity”... -
Page 28: Ethernet
USER MANUAL - WebdynEasy LoRaWAN Off: The SIM card PIN code must be disabled Pin Mode Manual: The SIM card PIN code must be entered in the PIN Code box PIN Code The SIM card PIN code must be entered if Manual is selected in PIN Mode Your mobile operator’s APN name (required for an IP connection) Login Your mobile operator’s user name (optional depending on the operator) -
Page 29: Ftp
USER MANUAL - WebdynEasy LoRaWAN Your Ethernet network subnet mask. This mask limits the Ethernet network Netmask to defined IP addresses and separates the network ranges from each other. Your Ethernet network gateway address. The gateway address is the IP Gateway address for the device that connects to the internet. -
Page 30: Ntp
USER MANUAL - WebdynEasy LoRaWAN 5.1.1.4 NTP Parameters Description Alarm Difference in seconds between the hub time and the NTP synchronisation threshold (s) time beyond which an alarm is issued NTP servers Addresses of the NTP servers used for the hub clock synchronisation At the first connection, NTP synchronisation is carried out and the next NTP synchronisation will be carried out during another connection after a minimum period of time. -
Page 31: Lorawan
USER MANUAL - WebdynEasy LoRaWAN The hub uploads the data using FTP in XML format for each data type. Data upload must be linked to a Schedule by entering its unique configured identifier (see section 5.1.5: “Schedules”). Refer to section 6.2: “The configuration” to for the configuration, monitoring, alarm and data file format and content The directory tree structure is to be created on the remote FTP server before any files are uploaded. -
Page 32: Lorawan Server
USER MANUAL - WebdynEasy LoRaWAN Keepalive interval [s] Time in seconds to send a keep alive frame Push timeout [ms] Maximum waiting time in milliseconds to acknowledge the frame sent to the LoRaWAN server. The supported Packet Forwarder is the Semtech forwarder. 5.1.2.2 LoRaWAN server The LoRaWAN server manages the LoRaWAN sensors as a private network. - Page 33 USER MANUAL - WebdynEasy LoRaWAN The hub NetID is calculated relative to its MAC address. This makes it possible to use several WebdynEasy LoRaWANs to create your own network without needing to change their NetID. It is strongly recommended not to change it. To optimise sensor batteries and LoRaWAN bandwidth, it is strongly recommended to leave ADR enabled along with the default Margin and uplink count configuration...
-
Page 34: System
USER MANUAL - WebdynEasy LoRaWAN AppEUI is not used by the embedded hub server. The LoRaWAN sensor data is uploaded in XML format (see section 5.1.1.5: “Upload”) to the DATA directory on the remote FTP server (see section 6.3 “The data”) 5.1.3 System When the Modbus protocol is enabled on the RS485 port, the serial port parameters must be defined. -
Page 35: Alarms
USER MANUAL - WebdynEasy LoRaWAN 5.1.4 Alarms The hub can generate system alarms. There are 3 types of system alarm: • Modem IP: alarm generated if the IP address obtained during a modem connection changes • MSISDN: alarm generated if the SIM card inserted in the hub is replaced •... -
Page 36: Schedules
USER MANUAL - WebdynEasy LoRaWAN The fault codes to be transferred by the hub at the next connection can be listed in the Delayed box. If several fault codes are entered, they must be separated by a comma “,”. 5.1.5 Schedules The scheduler is in charge of all regular tasks. - Page 37 USER MANUAL - WebdynEasy LoRaWAN Count Number of occurrences (at least 1) Parent Reference to the parent schedule for a “Follower” type schedule. Configuring the different schedule types: “Daily” type schedule: Every day, the first occurrence is given by the time entered in the “Time” field. The number of events in the day is given by the “Count”...
- Page 38 USER MANUAL - WebdynEasy LoRaWAN Number of occurrences “Count” X Count 1 Count 2 Schedule Schedule Schedule Interval between each schedule “Interval (s)” “Interval (s)” Start day & time “Day of Month” & “Time” The “Day of week” is between Monday and Sunday The Time format is the following: HH:MM:SS (for example 09:30:00) The “Count”...
- Page 39 USER MANUAL - WebdynEasy LoRaWAN Number of occurrences “Count” X Count 1 Count 2 Schedule Schedule Schedule Interval between each schedule “Interval (s)” “Interval (s)” Start Month & Start time “Day of Month” & “Time” The “Day of month” format is between 1 and 31 included The Time format is the following: HH:MM:SS (for example 09:30:00) The “Count”...
-
Page 40: Modbus
USER MANUAL - WebdynEasy LoRaWAN The “Date & Time” format is the following: YEAR-MM-DDTHH:MM:SS (for example, for a first occurrence on 11 February at 13:00: Time = 2019-02-11T13:00:00). The “Count” value is between 1 and 2,147,483,647 included The “Interval” value is between 0 and 2,147,483,647 included “Count”... - Page 41 USER MANUAL - WebdynEasy LoRaWAN If Modbus RTU slaves are used, the Modbus protocol must be enabled on the RS485/RS422 port (see section 5.1.3: “System”) On the local web interface “Modbus” tab, you can configure the maximum response time for the Modbus RTU and TCP protocols.
- Page 42 USER MANUAL - WebdynEasy LoRaWAN A dataset defines the variables available on a Modbus slave and how to retrieve them. Dataset configuration: Parameters Description Unique Modbus data set identifier (integer) Label Data set name (for information) Polling Continuous Modbus slave polling Variable configuration, each variable being defined by the following parameters: Parameters Description...
- Page 43 USER MANUAL - WebdynEasy LoRaWAN • is_status • is_alarm Threshold low Low threshold value (optional) Threshold high High threshold value (optional) Threshold hysteresis Hysteresis applied to both thresholds (optional) The “Polling” variable is used to enable continuous Modbus slave polling. When disabled, the Modbus slave is only polled when the associated schedule is triggered.
-
Page 44: Run Actions
USER MANUAL - WebdynEasy LoRaWAN little_endian Interprets registers in little-endian no_opt A Modbus request will be used to read this variable signed The variable contains a signed value is_status Indicates that the variable contains an information status is_alarm All changes to the status variable will trigger an alarm When the “is_status”... -
Page 45: Reboot Request: Reboot
USER MANUAL - WebdynEasy LoRaWAN The “Request” button has the same effect as the physical button on the front of the product. When this button is pressed, a pop-up window appears displaying all the connection steps, in particular NTP synchronisation, the INBOX directory check, and indicates all the uploaded files. 5.1.7.2 Reboot request: Reboot This button is used to reboot the hub. -
Page 46: System File Upload: File Upload
USER MANUAL - WebdynEasy LoRaWAN By clicking the “Update” button, the computer date and time are copied into the form in the correct format. If you want to enter the date and time manually, the format must be the following: YEAR-MM-DDThh:mm:ss Where: •... -
Page 47: Operation
USER MANUAL - WebdynEasy LoRaWAN 6 Operation 6.1 The remote server The hub communicates with a remote server using the FTP protocol. This server is used to manage the hub remotely. The remote server has several roles: • Report data and alarms collected locally by the hub: Each time a connection is made to the server, whether by manual request, the triggering of an alarm or the triggering of the Connection Schedule, the hub takes advantage of the connection to the server to upload its stored data. -
Page 48: Operation
USER MANUAL - WebdynEasy LoRaWAN Below the root directory, the FTP server must have the following directories: Name Rights Description CONFIG/ Write Contains the configuration image. The configuration is saved in a file called: “<uid>.xml” DATA/ Write Contains the collected data. The data file name is in the following format: “<uid>-<timestamp>.xml.gz”... -
Page 49: File Format
USER MANUAL - WebdynEasy LoRaWAN The files exchanged with the remote server comply with the formats described in the schema files (XSD files). Each firmware version is delivered with its associated schema files and is available on our web site (see section 8: “Support”) The XML schemas specifying the different XML file formats used by the hub may change in future versions when new functions are added. - Page 50 USER MANUAL - WebdynEasy LoRaWAN • Remotely: Upload the configuration file to the FTP “INBOX” directory on your hub (“INBOX/<uid>/”, where <uid> is your hub identifier). On the next connection to the FTP server, the hub will carry out 3 steps: 1.
-
Page 51: The Data
USER MANUAL - WebdynEasy LoRaWAN Refer to “Appendix A – Variable list” to see the list of variables and their possible values. 6.3 The data The data is uploaded to the “DATA/" directory on the FTP server in XML format files compressed to Gzip “.gz”... -
Page 52: Commands
USER MANUAL - WebdynEasy LoRaWAN The alarm file format is described by the alarm XSD file. XSD files may change depending on firmware versions. They are shipped with every update. Alarms can be configured to be uploaded immediately they are triggered (On), at the next connection (Delayed) or disabled (Off). -
Page 53: Reboot" Command
USER MANUAL - WebdynEasy LoRaWAN • cid: command identifier Commands will be rejected if the included uid parameter does not match the hub uid. The cid can be freely chosen by the command issuer. It will be included with any associated download. -
Page 54: Factory" Command
USER MANUAL - WebdynEasy LoRaWAN 6.5.2 “Factory” command The "factory" command is used to restore the hub factory settings. There is no return/acknowledgement after this command is sent. No subcommands or parameters are required for this command. Example: • By XML file: <commands xmlns="http://www.webdyn.com/GWL_command_20190719"... -
Page 55: Log" Command
USER MANUAL - WebdynEasy LoRaWAN Example: • By XML file: <commands xmlns="http://www.webdyn.com/GWL_command_20190719" xmlns:xsi="http://www.w3.org/2001/XMLSchema-instance" xsi:schemaLocation="http://www.webdyn.com/GWL_command_20190719 command.xsd"> <cmd cid="status cmd 1"> <status /> </cmd> </commands> • By text message: cmd=status cid=status cmd 1 6.5.6 “log" command The "log" command is used to retrieve the hub log. The log is uploaded to the remote server “SUPERVISION/”... - Page 56 USER MANUAL - WebdynEasy LoRaWAN The slave addresses must be in the following format: • Modbus RTU: <modbus_address>/<register_type>@<register_address> Example: 45/S3@0x0056 • Modbus TCP: <device_ip>:<modbus_address>/<register_type>@<register_address> Example: 192.168.0.17:223/S3@0x0F52 Example: • By XML file: <commands xmlns="http://www.webdyn.com/GWL_command_20190719" xmlns:xsi="http://www.w3.org/2001/XMLSchema-instance" xsi:schemaLocation="http://www.webdyn.com/GWL_command_20190719 command.xsd"> <cmd> <modbus subcmd="write" data="0xFF"> <address>45/S4@0x0056</address>...
-
Page 57: Update
USER MANUAL - WebdynEasy LoRaWAN 7 Update The WebdynEasy LoRaWAN hub can be updated locally or remotely. The latest firmware version (“GatewayLoRaWAN_x.x.x.cwe”) is available for download from our web site at the following address: https://www.webdyn.com/support/lorawan/ 7.1 Local To update the hub locally, use its web interface and go to the “Actions” tab and then follow the “File Upload”... -
Page 58: Support
USER MANUAL - WebdynEasy LoRaWAN 8 Support If there are technical problems related to our products, contact WEBDYN support: Webdyn SA 26 Rue des Gaudines 78100 Saint-Germain-en-Laye Phone: +33 1 39 04 29 40 email support@webdyn.com https://www.webdyn.com Please have the following elements to hand: •... -
Page 59: Appendix A: Xml Configuration File Variables
USER MANUAL - WebdynEasy LoRaWAN Appendix A: XML configuration file variables All the "names +tree structures" highlighted in blue are lists and can be created multiple times. Name + tree structure Description Type Default value Not used (future use) /uid Hub identifier Hexadecimal 3 bytes 3 last bytes of the... - Page 60 USER MANUAL - WebdynEasy LoRaWAN /com/ws/address Web Services server address ● /com/ws/login Web Services server login ● /com/ws/password Web Services server password ● /com/ws/webservice_proxy Proxy server address (optional) ● /com/ws/trust_model Secure mode operating mode: ● • Trust peer Verify peer /com/ws/upload_path Web Services root directory ●...
- Page 61 USER MANUAL - WebdynEasy LoRaWAN /upload/data/method Data file management List: • none communication protocol • ftp • ws /upload/data/format Data file format for data List: • xml /upload/data/schedule Schedule identifier for sending Integer (min 1 max data 65535) /upload/commun/size_limit Maximum non compressed data Integer (min 0 max 30) file size in Mb /alarm/sources/modem_ip...
- Page 62 USER MANUAL - WebdynEasy LoRaWAN /scheduler/schedules/schedule/start/dayofmonth Trigger day in the month for the Integer (min 1 max 31) first schedule iteration for a “monthly” type schedule /scheduler/schedules/schedule/interval Interval between occurrences (in Integer (min 0 max seconds) 4,294,967,295) /scheduler/schedules/schedule/count Number of occurrences Integer (min 1 max 65535) /modbus/tcp/timeout...
- Page 63 USER MANUAL - WebdynEasy LoRaWAN /system/password/install Installer password Text medium /system/password/data User password Text /system/ports/rs485/mode RS485 port configuration List: • Off • Modbus /system/ports/rs485/baudrate RS485 port speed (in bauds) List: 19200 • 4800 • 9600 • 19200 • 38400 • 57600 •...
- Page 64 USER MANUAL - WebdynEasy LoRaWAN /lorawan/packet_forwarder/public Type of LoRaWAN public network Boolean (true, false) true preamble (public: 0x34, private: 0x12) (do not modify, only used for testing) /lorawan/server/netid LoRaWAN network identifier (see Hexadecimal 3 bytes Calculated LoRaWAN specification) If you automatically from its enter 0, when the hub reboots, it MAC address...
Need help?
Do you have a question about the Webdyn WebdynEasy LoRaWAN and is the answer not in the manual?
Questions and answers