
Subscribe to Our Youtube Channel
Related Manuals for California Instruments iL Series


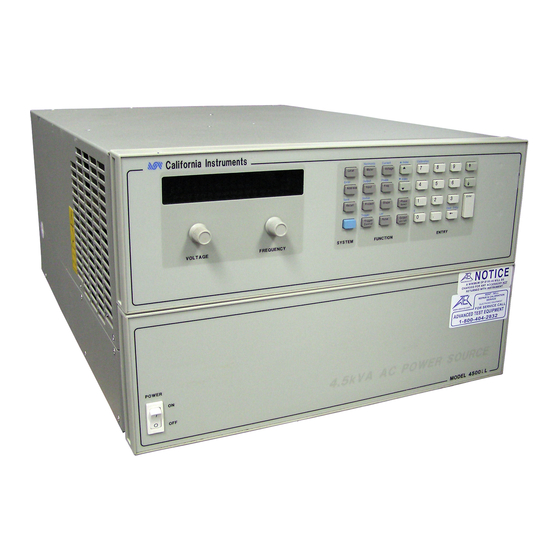
Summary of Contents for California Instruments iL Series
- Page 1 Revision B April 1996 Copyright © 1995,1996 by California Instruments. All rights reserved. P/N 5001-967 iL-Series AC Power Source / Analyzers User Manual...
- Page 2 Series User Manual User's Manual AC Power Source/Analyzers California Instruments Models : • 3000iL • 3000iL-400 • 4500iL • 4500iL-400 • 4801iL • 4801iL-400 ©Copyright 1995 California Instruments, Rev B, April, 1996 April 1996 Rev B California Instruments...
- Page 3 Series User Manual Manual conventions The following symbols are used on the product and throughout this manual: This sign denotes hazardous voltages. Instruction manual symbol. The instrument will be marked with this symbol when it is necessary for you to refer to the instruction manual in order to protect against damage to the instrument.
- Page 4 Failure to comply with these precautions or with specific warnings elsewhere in this manual violates safety standards of design, manufacture, and intended use of the instrument. California Instruments assumes no liability for the user's failure to comply with these requirements.
-
Page 5: Table Of Contents
Series User Manual Table of contents Introduction ........................1 About this chapter ......................1 Document Reference ......................1 Safety Considerations......................2 General Description ......................2 Options and Accessories ....................6 User-replaceable Parts ......................7 Installation ........................8 About this chapter ......................8 Inspection...........................8 Packaging Material ......................8 Items Supplied ........................8... - Page 6 Series User Manual Troubleshooting ......................69 Introduction........................69 Localizing the Problem ....................69 Troubleshooting Procedure .................... 70 Firmware Revisions ......................71 Principles of Operation....................76 Introduction........................76 General Description......................76 Assembly Descriptions ....................76 Replaceable Parts....................... 80 Introduction........................80 Replaceable Assemblies ....................
- Page 7 Series User Manual Table of Figures Figure 1: AC Source Functional Elements ................2 Figure 2: AC Source Output Characteristic ................5 Figure 3: AC Source VA Capabilities..................6 Figure 4 Outline Diagram ......................9 Figure 5 Connecting the Power Cord ..................11 Figure 6 Output Connections....................
- Page 8 Table 33 : Programming a Voltage Pulse transient..............44 Table 34 : Programming Transient Lists ................45 Table 35 : iL Series performance specifications ..............54 Table 36 : IEC Measurement Specifications ................55 Table 37 : iL Series typical specifications................57 Table 38 : Required Calibration equipment................
- Page 9 Series User Manual page intentionally left blank California Instruments Rev B...
-
Page 11: Introduction
This chapter covers general information concerning the AC power source/analyzer and also provides and overview of related documentation that is supplied with the iL Series products. Options and accessories available for the iL Series are listed as well as replacement parts. 1.2 Document Reference This manual describes the operation of the California Instruments iL Series AC Source/Analyzers .The following documents are shipped with your AC source:... -
Page 12: Safety Considerations
Series User Manual 1.3 Safety Considerations This AC source is a Safety Class 1 instrument, which means it has a protective earth terminal. That terminal must be connected to earth ground through a power source equipped with a ground receptacle. Refer to the Safety Summary page at the beginning of this manual for general safety information. -
Page 13: Table 2: Il Series Model Numbers
Series User Manual The following descriptions apply to all models in the California Instruments iL Series product line. Specifically, the following models are included: Table 2: iL Series model numbers Model Maximum Operating Modes power output 3000iL 3000 VA Single or Three phase. - Page 14 AC source status registers permit remote monitoring of a wide variety of AC source operating conditions Refer to the iL Series SCPI Programming Manual (part number 5001-969) for further information about remotely programming the AC source. 1.4.4 Output Characteristic Ranges The AC source's output characteristic is shown in the following figure.
-
Page 15: Figure 2: Ac Source Output Characteristic
Series User Manual Vrms 300 V 150 V Irms 16A (4801iL) 32A (4801iL) 5A (4500iL) 10A (4500iL) 3.33A (3000iL) 6.67A (3000iL) Figure 2: AC Source Output Characteristic Output VA Capability The output capability of each output phase is limited by VA (volts-amps) rather than power (watts). -
Page 16: Options And Accessories
Series User Manual Figure 3: AC Source VA Capabilities Note: Chapter 5 documents the AC source's specifications and supplemental characteristics. 1.5 Options and Accessories Option Description -400 Input power 360-440 Vac, three-phase, 47-63 Hz Table 3 : Options Item... -
Page 17: User-Replaceable Parts
Series User Manual 1.6 User-replaceable Parts The following table lists some common operator-replaceable parts: Description CI Part No. Rack slides see "Accessories" Rack mount ears see "Accessories" 7-terminal sense connector plug 410637 Sense connector cover 250578 4-terminal digital connector plug... -
Page 18: Installation
2. Installation 2.1 About this chapter This chapter provides information on unpacking and installing the iL Series AC power source. If you are setting up this instrument for the first time, please study this chapter carefully before proceeding. If the AC source has already been setup, this chapter can be used for periodic inspection of the setup. -
Page 19: Bench Operation
Do not block the fan exhaust at the rear of the unit. Figure 4 Outline Diagram 2.6 Rack Mounting Due to their size and weight, iL Series AC power sources are frequently rack mounted. The three iL models weigh 87.7 kg (193 lbs). Note: Obtain adequate help when moving or mounting the unit in the rack. -
Page 20: Input Connections
In order to maintain phase current balancing, the power service should be a dedicated line with only iL Series AC sources drawing current from it. A disconnect box located near the AC source is recommended for all installations and is mandatory for direct-wired installations. -
Page 21: Figure 5 Connecting The Power Cord
Series User Manual Figure 5 Connecting the Power Cord 2.7.2 Output Connections The power output terminal block has a termination for each of the output phases and a floating neutral line for the phase return connections. A separate earth ground terminal is located near the output terminals. -
Page 22: Table 6 : American Wire Gage (Awg) Characteristics
Series User Manual 2.7.3 Wire Considerations Current Ratings Fire Hazard: To satisfy safety requirements, load wires must be large enough not to overheat when carrying the maximum short- circuit current of the AC source. If there is more than one load, then any pair of load wires must be capable of safely carrying the full-rated current of the AC source. -
Page 23: Figure 7 Remote Sense Connections
Series User Manual 2.7.4 Remote Sense Connections During operation, the AC source senses the output voltage at the output terminals on the back of the unit. External sense terminals on the back of the unit allow the output voltages to be sensed at the load, which compensates for impedance losses in the load wiring. -
Page 24: Ovp Considerations
Series User Manual 2.8 OVP Considerations The overvoltage protection circuit senses voltage near the output terminals, not at the load. Therefore the signal sensed by the OVP circuit can be significantly higher than the actual voltage at the load. When using remote sensing, you must program the OVP trip voltage high enough to compensate for the voltage drop between the output terminals and the load. -
Page 25: Controller Connections
Figure 8 FLT/INH Examples 2.12 Controller Connections The iL Series comes standard equipped with both IEEE-488 and RS232C remote control interfaces, both of which are accessible from the rear panel. Either interface can be used to connect the AC source to a controller. - Page 26 Table 8 lists the pinout assignment of the DB-9 RS232C port located on the back of the unit. A suitable cable to connect the iL Series power source to a standard 9 pin PC serial port is shown in Figure 9...
-
Page 27: Figure 9 Rs232C Pc To Ac Source Cable Wiring Diagram
Series User Manual Input/Output Description Output Reserved for service use Input Receive Data (RxD) Output Transmit Data (TxD) Output Data Terminal Ready (DTR) Signal ground Input Data Set Ready (DSR) no connection no connection Output Reserved for service use... - Page 28 Series User Manual Control-C is the equivalent to the IEEE-488 device clear command. For the control-C character to be recognized by the power source while it holds DTR false, the bus controller must first set DSR false. Response Data Terminator All RS-232C response data sent by the AC source is terminated by the ASCII character pair <carriage return><newline>.
-
Page 29: Turn-On Checkout
Series User Manual 3. Turn-On Checkout 3.1 Preliminary Checkout Successful tests in this chapter provide a high degree of confidence that the AC source is operating properly. For verification tests, see section 6.2 . This chapter provides a preliminary introduction to the AC source front panel. See chapter 6 for more details. -
Page 30: Output Checkout
Series User Manual These keys let you select the previous or the next parameter for a specific command. If the command has a numeric range, these keys increment or decrement the existing value. ← Key The backspace key is an erase key. If you make a mistake entering a digit and have not yet pressed Enter, you can delete the digit by pressing ←. -
Page 31: Figure 10 Verification Connections
Series User Manual Figure 10 Verification Connections Step Procedure Display Explanation Meter mode is active and the Dis Turn the unit on. Meter mode annunciator should be on. VOLT 0.00 Press Voltage Display indicates the default settings. If you are verifying a three phase source, all phase annunciators should be on. -
Page 32: Table 9 : Connection Verification Steps
Series User Manual Step Procedure Display Explanation VOLT:PROT Press Protect, Programs the OVP to a value scroll to the greater than the output voltage of VOLT:PROT the Unit. Note: You cannot clear an OVP trip until you have first... -
Page 33: In Case Of Trouble
Series User Manual 3.4 In Case of Trouble 3.4.1 Error Messages AC source failure may be detected during power-on selftest or during operation. In either case, the display may show an error message that indicates the reason for the failure. - Page 34 Series User Manual If any fuses are defective, replace all three with fuses of the same type (see section 1.6). Turn on the AC source and check the operation. If it is normal, replace the fuse cover. Note: It is recommended that new line fuses be installed every four years.
-
Page 35: Front Panel Operation
4. Front Panel Operation 4.1 Introduction This chapter covers front panel operation of the iL Series AC power sources. Instrument control is accomplished using a combination of function keys, numeric data entry and a set of rotary knobs. Specifically, this chapter covers the following areas: •... -
Page 36: Table 11 : Display Annunciator Descriptions
Series User Manual Annunciator Description The AC source output is in an unregulated state. In three phase mode, UNR from any phase overrides display of CV or CC from the other phases. The AC source output is disabled (off). - Page 37 Series User Manual California Instruments Rev B...
-
Page 38: System Keys
Series User Manual 4.3 System Keys Refer to the examples later in this chapter for more details on the use of these keys. Shift This is the blue, unlabeled key, which is shown as Shift in this manual. Pressing this key accesses the alternate or shifted function of a key (such as Error). -
Page 39: Function Keys
Series User Manual 4.4 Function Keys Refer to the examples later in this chapter for more details on the use of these keys. Figure 12 Function Keys 4.4.1 Immediate Action Keys Immediate action keys immediately execute their corresponding function when pressed. -
Page 40: Table 14 : Phase Selection Display Annunciators
Series User Manual Annunciator On Phase Selected Ø1, Ø2, Ø3 All phases selected (phases coupled ALL) Ø1 Phase #1 selected (phases coupled NONE) Ø2 Phase #2 selected (phases coupled NONE) Ø3 Phase #3 selected (phases coupled NONE) Table 14 : Phase selection display annunciators Does not apply to Meter or Harmonic functions. -
Page 41: Table 15 : Measurement Display Readouts
Series User Manual 4.4.2 Scrolling Keys Scrolling keys let you move through the choices in the presently selected function menu. s and t These scroll keys let you move through the choices in a command list. Press t to bring up the next command in the list. -
Page 42: Table 16 : Harmonic Measurement Display Readouts
Series User Manual Input Press this key to select the input coupling for the meter function. The parameter selections allow the meter functions to display measurements that include AC components only, DC components only, or AC+DC components. Display Command Function... -
Page 43: Table 18 : Current Limit Display Readouts
Series User Manual Notes: reading = the returned measurement index = a numeric value that represents the harmonic number from 0 to 50 value = a numeric value char = a character string parameter s and t scroll through the command list. -
Page 44: Table 20 : Phase Control Display Readouts
Series User Manual Shift Phase Press this key to access the phase menu list. Display Command Function Phase selectable PHASE <value> Set immediate output phase. PHASE:T <value> Set triggered output phase. PHASE:M <char> Select the phase mode. (FIXED, STEP, PULSE or LIST) -
Page 45: Table 23 : Output Menu List Display Readouts
Series User Manual Display Command Function *RST Execute *RST command to place the AC source in the factory-default state. TTLT:SOUR <char> Select Trigger Out source (BOT, EOT or LIST). beginning of transient end of transient LIST TTLT trigger list (see SCPI Programming Manual) TTLT:STATE <char>... -
Page 46: Table 24 : Protection Menu List Display Readouts
Series User Manual 4.4.5 Protection and Status Control Keys The Protect and Status keys control the protection functions and status registers of the AC source. Refer to chapter 6 of the SCPI Programming manual for more information on the status registers. -
Page 47: Entry Keys
Series User Manual Trigger Control Press this key to access the trigger control list. Display Command Function INIT:IMMED Initiate the transient trigger sequence immediately. INIT:CONT <char> Set continuous trigger initiation (ON or OFF). TRIG:SOUR <char> Select transient trigger source (BUS, EXT, TTLT or IMM). -
Page 48: Figure 14 Entry Keys
Series User Manual Figure 13 Entry Keys ↑ and ↓ These keys let you scroll through choices in a parameter list that applies to a specific command. Parameter lists are circular; you can return to the starting position by continuously pressing either key. -
Page 49: Examples Of Front Panel Programming
Series User Manual Shift E This key specifies an exponential power of 10. For example, the value for 100µs can be entered either as . 0 0 0 1 or as 1 E - 4. Shift - This key is the minus sign. -
Page 50: Table 28 : Setting The Output Voltage Amplitude
Series User Manual Step Action Display VOLT 0 On the Function keypad, press Voltage. You can set the voltage in any of three ways: VOLT 120 On the Entry keypad, press 1 2 0 Enter. This is the easiest way to enter an accurate value. -
Page 51: Table 29 : Setting Individuals Output Phases In Three Phase Mode
Series User Manual Step Action Display Press Phase Select once. The Ø2 annunciator will light, 180 V 60 HZ indicating that you are now monitoring phase 2. Press Phase Select once. The Ø3 annunciator will light, 235 V 60 HZ indicating that you have returned to monitoring phase 3. -
Page 52: Table 31 : Setting Protection Parameters
Series User Manual Step Action Display On the Entry keypad, press ↑ once to scroll to the ON CURR:PROT parameter and press Enter. The OCP annunciator will light, indicating that the overcurrent protection circuit is DELAY .1 If you wish to set a time delay between the detection of the fault and the disabling of the output, scroll to the delay command on the protection menu. -
Page 53: Figure 15 Pulse Transients
Series User Manual Step Action Display mode parameters. When you have STEP, press Enter. INIT:IMMED Press Trigger Control and Enter. This initiates (or enables) one immediate trigger action. 102 V 60 HZ Press Shift Trigger Control. This sends the AC source an immediate trigger signal to change the output voltage. -
Page 54: Figure 16 List Transients
Series User Manual Step Action Display to change the duty cycle to 33 %. PER .0166 Access the Pulse menu and press t to access the pulse period command. From the Entry keypad press .0 1 6 6 Enter to enter the period for 60 Hz (approximately 16.6 ms). -
Page 55: Trigger Delays And Phase Synchronization
Series User Manual Step Action Display On the Entry keypad, press ↑ or ↓ to scroll through the VOLT:M mode parameters to obtain LIST and press Enter. LIST COUNT 2 Access the List menu (by pressing Shift List). The first menu command is the list count. -
Page 56: Figure 17 Trigger Delays And Phase Synchronization
Series User Manual • In example , the output transient is triggered immediately at the receipt of the ‚ trigger signal. In example , a delay time of approximately 16.7 milliseconds elapses between the occurrence of the trigger and the start of the output transient. - Page 57 Series User Manual • This example uses the default trigger parameters. Step Action Display VOLT 120 First, access the Voltage menu and program the VOLT:T 150 immediate and triggered voltage levels, followed VOLT:M STEP by the voltage transient mode...
-
Page 58: Programming Slew Rates
Series User Manual Figure 17 Phase Synchronization on Three Phase Sources „ This example synchronizes a change at 90º on phase 1. Step Action Display VOLT 120 First, access the Voltage menu and program the VOLT:T 150 immediate and triggered voltage levels, followed VOLT:M STEP by the voltage transient mode. -
Page 59: Figure 19 Programming Slew Rates
Series User Manual Figure 18 Programming Slew Rates • In example , an immediate slew rate of 50 volts/second is used whenever a new ‚ output voltage is programmed. In example , a triggered slew rate of 50 volts/second steps the voltage level to its new value. 50 volts/second becomes the ƒ... - Page 60 Series User Manual • This example uses the immediate slew rate. Step Action Display VOLT:M FIXED First, access the Voltage menu and press t until you access the mode command. On the Entry keypad, press ↓ to obtain FIXED. Press Enter.
-
Page 61: Measuring Peak Inrush Current
Series User Manual Step Action Display Trigger. „ When the voltage slew mode is set to LIST, the slew rates are set by the values in the voltage slew list. Refer to the List Transient example for more information on how to program lists. -
Page 62: Setting The Ieee-488 Address And Rs-232C Parameters
Series User Manual CURR:LEV 10 Make sure the rms current limit is set to a high value. In the Current menu, access the current level command. If necessary, reset the current limit to a higher value. (The CI 3000iL has a low- range current limit of 6.67 A in three phase mode,... -
Page 63: Saving And Recalling Operating States
Series User Manual Step Action Display PARITY EVEN the RS-232C interface. The baudrate command lets you select the baudrate. The parity command lets you select the parity Use the ↑ and ↓ keys to select your interface, baudrate, or parity 4.11 Saving and Recalling Operating States... -
Page 64: Specifications
AC Input Voltage Range (Vac): 180-254 Vac (3Ø) 180-254 Vac (3Ø) 180-254 Vac 360-440 Vac (3Ø) 360-440 Vac (3Ø) (3Ø) 360-440 Vac (3Ø) AC Input Frequency: 47 - 63 Hz Table 35 : iL Series performance specifications Rev B California Instruments... -
Page 65: Iec Measurement Specifications
Series User Manual 5.2 IEC Measurement Specifications (4801iL only)* Parameter Range Accuracy (±) Frequency 50 / 60 Hz Current (Low range) Fundamental 0 - 3.2 A 0.03 % + 3 mA Harmonics 2 - 49 0.03 % + 2 mA + 0.2%/KHz... -
Page 66: Typical Specifications
Series User Manual 5.3 Typical Specifications Typical specifications as listed in Table 37 are not warranted but are descriptions of typical performance determined either by design or type testing. Parameter CI 3000iL CI 4500iL CI 4801iL Input Ratings Maximum Input Current (rms): 180 -254 Vac (3Ø) -
Page 67: Table 37 : Il Series Typical Specifications
262.6 mm (10.3 in.) add 12.7 mm (0.5 in.) for feet Width: 425.5 mm (16.75 in.) Depth: 602 mm (23.7 in.) Net weight: 87.7 kg (193 lbs.) Shipping weight: 104 kg (230 lbs.) Table 37 : iL Series typical specifications California Instruments Rev B... -
Page 68: Calibration And Performance Verification
Series User Manual 6. Calibration and performance verification IMPORTANT Perform the verification procedures before calibrating your AC source. If the AC source passes the verification procedures, the unit is operating within its calibration limits and does not need to be recalibrated. -
Page 69: Operation Verification
Series User Manual Figure 19 Verification and Calibration Test Setup Note: Connect and program each phase individually. Never connect more than one phase at a time. Note: When performing the verification tests from an IEEE-488 controller, you may have to consider the relatively slow settling times and slew rates of the AC source as compared to computer and system voltmeters. -
Page 70: Table 39 : Voltage Programming Readback Test Steps
Series User Manual Step Action Expected Result Make sure the AC source is turned off. Connect a DVM across the sense terminals. CV annunciator Turn on the AC source with no load on the output. Program the output for a 150 volt, 60 Hz sinewave, external sense. -
Page 71: Table 40 : Current Programming Readback Test Steps
Series User Manual Step Action Expected Result Change the voltage range of the unit from the 300 volt range to the 150 volt range. Program the output for 5 volts and the High Current value specified in Table 41. -
Page 72: Verification Test Checklist
Series User Manual 6.3 Verification Test Checklist The following table provides a convenient checklist for test verification purpose. Model Report No. Date Test Description Minimum Recorded Maximum Specification Results Specification Voltage Programming and Readback Low Voltage (150 V) 149.48 V 150.53 V... - Page 73 Series User Manual The following parameters may be calibrated: • AC output voltage • realtime output voltage (4801iL only) • output voltage readback • over voltage protection • AC output current • output current readback (4801iL only) • output impedance (4801iL only) 6.4.1 Front Panel Calibration Menu...
- Page 74 Series User Manual The following procedures assume you understand how to operate front panel keys as explained in chapter 4. Step Action Display Enable Calibration Mode *RST Reset the unit by selecting Output, scrolling to the *RST command, and pressing Enter.
- Page 75 Series User Manual Step Action Display CAL:LEV P1 Press Shift Calibration, scroll to the CAL LEV P1 command, and press Enter to select the first calibration point. CAL:DATA 0.00 Press Shift Calibration, scroll to the CAL DATA command, and use the Entry keypad to enter the voltage value displayed on the DVM.
-
Page 76: Table 42 : Front Panel Calibration Procedure Steps
Series User Manual Step Action Display Press Phase Select to select the next phase and repeat steps 19 through 24 for phases 2 and 3. (The phase annunciators indicate which phase is active.) Calibrating RMS Current Measurement Values (4801iL only) -
Page 77: Table 43 : Changing The Calibration Password
Series User Manual 6.4.3 Changing the Calibration Password The factory default calibration password is 0. You can change the password when the AC source is in calibration mode (which requires you to enter the existing password). Proceed as follows:... -
Page 78: Figure 21 Calibration Switches
Series User Manual 6.4.4 Calibration Configuration Switch An internal set of DIP switches control access to calibration commands. The four DIP switches are located on the A8 DSP board and are accessible by removing the top cover. Switches 1 and 2 set the calibration configuration. Figure 20 shows the three different switch settings for switches 1 and 2. -
Page 79: Troubleshooting
Series User Manual 7. Troubleshooting 7.1 Introduction WARNING: Shock Hazard The troubleshooting procedure in this chapter must be performed with power applied and protective covers removed. These procedures should be done only by trained service personnel aware of the hazard from electrical shock... -
Page 80: Troubleshooting Procedure
Series User Manual 7.3 Troubleshooting Procedure Table 45 gives the troubleshooting procedure to isolate a fault to a circuit board or particular circuit. Step Symptom Corrective Action No output voltage/front panel display and fan off go to Figure 21... -
Page 81: Firmware Revisions
If needed, you can confirm the firmware revision of your AC Power Source with the GPIB *IDN? query command. The Windows program supplied with the iL Series AC source can be used to do this. Use the command line found in the Source interface menu. - Page 82 Series User Manual Step Procedure Indication Action Turn off AC mains, disconnect load and connect sense terminals for local sensing. Remove the top cover as follows: Remove 9 screws from the top and 3 screws from the each side.
-
Page 83: Table 46 : Ac Power Source Troubleshooting Procedure
Series User Manual Step Procedure Indication Action Swap the suspected faulty A1, A2, or A3 with a good A1, A2, or A3 amplifier module. Check the +/- 15 bias voltages at A10J2. +15V at pins 1,2,5,6,9,10,13,14,23,24. -15V at pins 15,19,20. -
Page 84: Figure 22 Troubleshooting Diagram For No Output Present
Series User Manual Figure 21 Troubleshooting Diagram for No Output Present Rev B California Instruments... -
Page 85: Figure 23 Troubleshooting Diagram For One Or More Outputs Missing
Series User Manual Figure 22 Troubleshooting Diagram for One or More Outputs Missing California Instruments Rev B... -
Page 86: Principles Of Operation
Series User Manual 8. Principles of Operation 8.1 Introduction Figure 23 is a block diagram showing the major circuits within the AC Power Source. The AC Power Source consists of the following circuits: • A1, A2, A3 Switching Amplifier Modules •... - Page 87 Series User Manual 8.3.3 A5 Relay/Filter Assembly The A5 assembly consists of the output voltage filters, the output voltage range relays, A5K1, A5K2, and A5K3, the output voltage disconnect relays, A5K5, A5K7, A5K8, and A5K9, the remote sense relays, A5K4 and A5K6, the paralleling relays, A5K10 and A5K11, and other associated circuits.
- Page 88 Series User Manual C1, a phase loss detection circuit and the undervoltage/overvoltage detection circuits. When ON/OFF switch, S1, is closed, a single phase is used to power three bias transformers on the A14 Bias board. The A14 bias board provides +16 VDC, +15 VDC, -5 VDC, +12 VDC for protection circuits, and +24 VDC to current limit relays K1 and K2.
-
Page 89: Figure 24 Ac Power Source Block Diagram
Series User Manual Figure 23 AC Power Source Block Diagram California Instruments Rev B... -
Page 90: Replaceable Parts
Series User Manual 9. Replaceable Parts 9.1 Introduction This section lists the replaceable electrical and mechanical parts for the iL Series AC Power Sources. 9.2 Replaceable Assemblies Reference CI Part No. Description Desig. ELECTRICAL PARTS A1-A3 5001-412-1 Switching Amp Assembly... -
Page 91: Other User-Replaceable Parts/Options
Series User Manual 240541 Switch 211171 Knob 211090 Foot Table 48 : Replaceable assemblies 9.3 Other User-Replaceable Parts/Options The following table lists some common operator-replaceable parts: Description CI Part No. Rack slides see "Accessories" Rack mount ears see "Accessories"... -
Page 92: Diagrams
10. Diagrams This chapter contains drawings and diagrams for troubleshooting and maintaining the California Instruments iL family of AC power sources. Unless otherwise specified in the drawings, a drawing or diagram applies to all models. Figure 24 Auxiliary Power Supply Parts Location... -
Page 93: Figure 26 Ac Input Board Parts Location
Series User Manual Figure 25 AC Input Board Parts Location California Instruments Rev B... -
Page 94: Figure 27 Mother Board Parts Location
Series User Manual Figure 26 Mother Board Parts Location Rev B California Instruments... -
Page 95: Error Messages
Series User Manual 11. Error Messages This appendix gives the error numbers and descriptions that are returned by the AC power source. Error numbers are returned in two ways: • Error numbers are displayed on the front panel •... - Page 96 Series User Manual Error Error String -168 Block data not allowed -170 Expression error -171 Invalid expression -178 Expression data not allowed -200 Execution error [generic] -222 Data out of range [e.g., too large for this device] -223 Too much data [out of memory; block, string, or expression too long]...
-
Page 97: Table 53 : Standard Event Status Register (Esr) Error Codes
Series User Manual Error Error String Ingrd input buffer overrun Outgrd output buffer overrun RS-232C receiver framing error RS-232C receiver parity error RS-232C receiver overrun error Ingrd inbuf count sync error Front panel uart overrun Front panel uart framing... - Page 98 Series User Manual Index CV .............. 27 AC source ............ 2 accessories ..........6, 85 DFI.............. 14 Addr ............27 diagrams............. 86 Address key ..........29 dimensions ........... 9 air circulation..........9 Dis .............. 27 annunciator Addr ............27 Cal............
- Page 99 Series User Manual blue ............29 principles of operation ........ 80 calibration..........43 amplifier modules ........80 clear entry ..........43 auxiliary power supply ......82 current............ 35 bias power supply........82 enter..........20, 42 BNC assembly........82 error ............29 display assembly ........
- Page 100 Series User Manual trigger system..........49 troubleshooting........... 73 Voltage key ..........34 Unr.............. 27 wire table ............12 California Instruments Rev B...
Need help?
Do you have a question about the iL Series and is the answer not in the manual?
Questions and answers