
Related Manuals for OriPower H1107

Summary of Contents for OriPower H1107
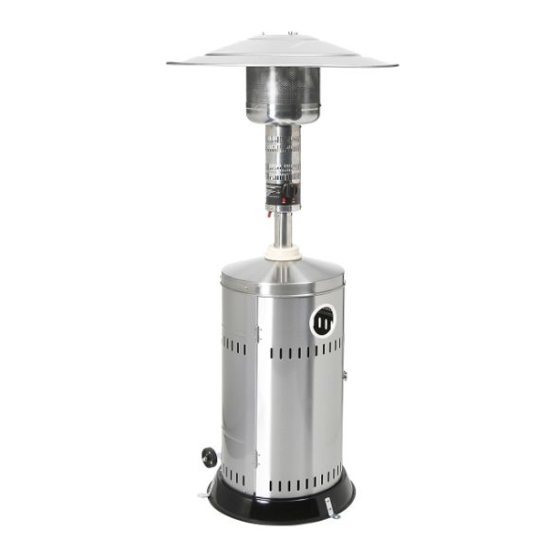
- Page 1 INSTRUCTION MANUAL INNOPOWER OUTDOOR PATIO HEATER MODEL NO. H1107 & H1207 WARNING: FOR OUTDOOR USE ONLY PLEASE KEEP THE MANUAL FOR FUTURE REFERENCE! - 0 -...
-
Page 2: Table Of Contents
TABLE OF CONTENTS Patio Heater Safety Warnings -------------------------------------------- Part List ------------------------------------------------------------------------ Patio Heater Assembly ----------------------------------------------------- Diagrammatical Representations ---------------------------------------- Operating Instructions ------------------------------------------------------ Leak Testing ------------------------------------------------------------------- Gas Requirement ------------------------------------------------------------ Connecting To a Gas Cylinder -------------------------------------------- Securing a Gas Cylinder--------------------------------------------------- Important Safety Rules ----------------------------------------------------- Maintenance ------------------------------------------------------------------ Servicing ----------------------------------------------------------------------- Storage -------------------------------------------------------------------------... - Page 3 Use only the type of gas specified by the manufacturer. Repairs should be done by a qualified person. In case of violent wind, particular attention must be taken against tilting of the appliance. To check that the regulator seal is correctly fitted and able to fulfil its function. To close the gas supply at the valve of the gas cylinder or the regulator after use.
-
Page 4: Part List
PART LIST ASSEMBLY PARTS SUPPLIED: 5pcs bolts M5 x 12 and 5pcs M5 washers for rear panel of housing and base. 5pcs bolts M5 x 12 and 5pcs M5 washers for rear panel of housing and housing lid. 4pcs bolts M5 x 12 and 4pcs M5 washers for the post and housing lid. 3pcs round cap nuts M6 and 3pcs M5 washers for reflector. -
Page 5: Patio Heater Assembly
PATIO HEATER ASSEMBLY ASSEMBLY INSTRUCTIONS List of Required Tools: Philip Screwdriver / Adjustable Spanners / Wrenches Leak Detection Solution one part detergent and three parts water Assemble all nuts and bolts loosely at first. Tighten all connections after completion of assembly. This eases your work and increases the stability of your appliance. - Page 6 Optional base stand Base stand assembly parts: 6pcs bolts M5 x 8 for base stands and base. Attaching 3pcs stands to the base with bolts and nuts firstly, then strike suitable hook bolts or rawlbolts through the stand holes into the ground or floor. (See Figure 3) FIGURE 3 Optional water box Remove cap from base water box and fill with water, sand or if temperatures fall below 0℃, fill with RV anti-freeze...
-
Page 7: Diagrammatical Representations
- 6 -... - Page 8 - 7 -...
-
Page 9: Operating Instructions
OPERATING INSTRUCTIONS BEFORE FIRST USE AND AFTER EVERY GAS CYLINDER CHANGE, GAS DELIVERY SYSTEM MUST BE PURGED OF AIR BEFORE IGNITING! TO DO THIS, TURN THE CONTROL KNOB ANTI-CLOCKWISE TO THE PILOT SETTING. PRESS KNOB IN AND HOLD FOR 3 MINUTES BEFORE ATTEMPTING IGNITION. TO LIGHT THE PILOT Check all connections prior to each use. -
Page 10: Gas Requirement
GAS REQUIREMENTS The pressure regulator and hose assembly to be used must conform to local standard codes. Never use a gas cylinder with a damaged body, valve, collar, or foot ring. A dented or rusty gas tank may be hazardous and should be checked out by a gas supplier. Never connect this appliance to an unregulated gas source. -
Page 11: Important Safety Rules
IMPORTANT SAFETY RULES Ceiling/Overhang For use outdoors or in amply ventilated areas. An amply ventilated area must have a minimum of 25% of the 915mm Dia.765mm surface area open. The surface area is the sum of the walls surface. 915mm The use of this appliance in enclosed areas can be dangerous and is PROHIBITED. -
Page 12: Servicing
SERVICING Please consult your local dealer for servicing this appliance and replacement of its parts. The servicing of the appliance shall be carried out only by authorised personnel. Caution: do not use unauthorized parts or components for this appliance, only use original equipment replacement parts and components. -
Page 13: Trouble Shooting
TROUBLE SHOOTING IF THE PROBLEM IS: AND THIS CONDITION EXISTS: THEN DO THIS: Cylinder valve is closed Open valve Blockage in orifice or pilot tube Clean or replace orifice or pilot tube Open gas line and bleed it (pressing Air in the gas line control knob in) for not more than Pilot won’t light 1-2 minutes or until you smell gas... -
Page 14: Technical Data
TECHNICAL DATA Model number: H1107 & H1207 Gas type: propane Nominal GC: 40.5MJ/h By-pass GC: 20.00MJ/h Test point pressure: 2.75kPa Injector size: 1.80mm - 13 -...
Need help?
Do you have a question about the H1107 and is the answer not in the manual?
Questions and answers