Advertisement
Quick Links
Advertisement

Related Manuals for Highland P140 -4PC

Summary of Contents for Highland P140 -4PC
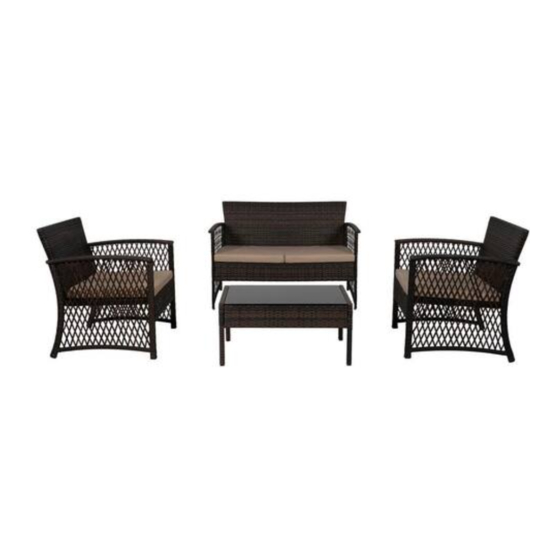
- Page 1 INSTRUCTION MANUAL 4 - Piece Woven Rattan Wicker Seating Set SKU:P140 -4PC...
-
Page 2: Tools Required
NOTICE Do not overtighten screws. (Insert all screws before tighten screws.) • Please do not exceed the weight limitations of this item. • Do not stand on or use any part of this item as a step ladder. • Firmly secure all bolts, screws and nuts before use. •... - Page 3 PARTS LOVESEAT BACKREST SEAT CUSHION CHAIR SEAT 1 PC 4 PCS 2 PCS TABLE LEG TABLE SIDE CHAIR BACKREST 2 PCS 2 PCS 2 PCS TABLE TOP 1 PC Page 2 of 7...
- Page 4 PRODUCT ASSEMBLY - CHAIR Attach the part F Chair Seat to part G Chair Backrest with 2 PCS of part 1 bolt and part 2 washer. Attach the assembled part ( F + G ) to part B Chair Left Side with 4 PCS of part 1 bolt and part 3 washer.
- Page 5 PRODUCT ASSEMBLY - CHAIR Attach part A Chair Right Side to part C Chair Seat and part D Seat Backrest with 4 PCS of part 1 bolt and part 2 washer. Place part E Seast Cushion into the seat to finishe the assembly.s Do the same to assemble the other chair.
- Page 6 PRODUCT ASSEMBLY - LOVESEAT Attach the part C Chair Seat to part D Seat Backrest with 2 PCS of part 1 bolt and part 2 washer. Attach the assembled part ( C+D ) to part B Chair Left Side with 4 PCS of part 1 bolt and part 2 washer.
- Page 7 PRODUCT ASSEMBLY - LOVESEAT Attach part A Chair Right Side to part C Chair Seat and part D Seat Backrest with 4 PCS of part 1 bolt and part 2 washer. Place part E Seast Cushion into the seat to finishe the assembly. Page 6 of 7...
- Page 8 PRODUCT ASSEMBLY - COFFEE TABLE Attach part I Table Side to part H Table Leg with 8 PCS of part 1 bolt and part 2 washer. Put part J Table Top onto the frame to finishe the assembly. Page 7 of 7...
Need help?
Do you have a question about the P140 -4PC and is the answer not in the manual?
Questions and answers