Table of Contents
Advertisement
Quick Links
Advertisement
Table of Contents

Related Manuals for SMARTSCAN ST Series


Summary of Contents for SMARTSCAN ST Series
- Page 1 MACHINERY SAFETY SYSTEMS ST SERIES SAFETY LIGHT CURTAINS INSTALLATION GUIDE...
- Page 2 Failure to read and follow the instructions provided on the Installation Sheet and Installation Guide can lead to the incorrect application or use of the ST series safety light curtain. This could lead to personal injury and damage to equipment. All applicable machine safety standards and regulations should be taken into account when installing the ST series safety light curtain or any machine safety product.
-
Page 3: Table Of Contents
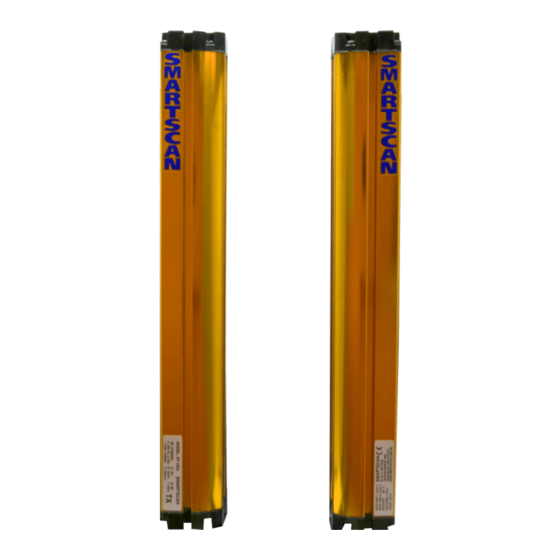
Safety Light Curtain - ST Series Installation Guide Contents: Figure A – Unpacking ............................. 4 Figure B – Mounting Information ........................5 Figure C – Dimensional Information ......................6 Figure D – Operating Requirements ......................7 Figure E – Important Installation Considerations ..................9 Figure F - Electrical Connections –... - Page 4 Safety Light Curtain - ST Series Installation Guide ST Series (Model No. ST-xxx) Safety Light Curtain Installation Sheet (CD1001 - 111220) Figure A – Unpacking Remove all packaging material and retain it Locate and keep the delivery note ...
- Page 5 Use 4mm bolts for mounting and ensure they are fixed so as to prevent any movement or loosening of the safety light curtain. The ST series does not use cable connectors. Both the transmitter (Tx) and receiver (Rx) units come complete with 5m cables attached.
- Page 6 Safety Light Curtain - ST Series Installation Guide Figure C – Dimensional Information Figure C describes important parameters associated with the safety light curtain such as detection zone width (DZ). Measurements are shown for the safety light curtain’s overall length (including mounting brackets), fixing centres and detection zone width.
- Page 7 Safety Light Curtain - ST Series Installation Guide Figure D – Operating Requirements Humidity <95% Temperature range between 0°C and +50°C Vibration: Frequency <55Hz Max. Movement <0.35mm Do not use equipment in explosive atmospheres (contact the manufacturer for further ...
- Page 8 Safety Light Curtain - ST Series Installation Guide Object Detection Capability (ODC) The minimum size of object guaranteed to be detected when placed in the light curtain’s infrared sensing field. A test piece of appropriate size is provided to test that the light curtain object detection capability is within the parameter specified for the particular model number.
- Page 9 Safety Light Curtain - ST Series Installation Guide Figure E – Important Installation Considerations 1. Consider reflective surfaces that may give rise to an optical ‘short circuit’ from the direct path of the safety light curtain’s infrared beams as shown in the first illustration of Fig.
- Page 10 Safety Light Curtain - ST Series Installation Guide 4. Ensure the light curtain transmitter (TX) and receiver (RX) units are mounted accurately in- line with each other and are both perpendicular and parallel to each other within the parameters shown for each axis.
- Page 11 Safety Light Curtain - ST Series Installation Guide Figure F - Electrical Connections – Reset Mode (Manual/Latched) File Number: CD1001 page 11 Date: 11 December, 2020...
-
Page 12: Power Supply
Earth (PE). Manual (Latched) Reset The ST series provides a manual (latched) reset for applications where it is a requirement that the safety outputs cannot be reinstated without the operator first checking that the dangerous area is clear of personnel and therefore safe. -
Page 13: External Device Monitoring (Edm)
Safety Light Curtain - ST Series Installation Guide The reset switch must be a Normally Open spring-return contact block, either push button or key switch, depending on the customer risk assessment. The Green wire on the Receiver (RX) head cable needs to be connected to one side of the Normally Open contact block and the other side to 24V DC (L+). -
Page 14: Communication Link
Safety Light Curtain - ST Series Installation Guide cause the OSSDs to go to an OFF state and initiate a machine stop condition. The connections are provided via the Grey wire (OSSD1) and the Orange wire (OSSD2) on the Receiver (RX) head cable. - Page 15 Safety Light Curtain - ST Series Installation Guide Figure G - Electrical Connections – Auto Reset Mode File Number: CD1001 page 15 Date: 11 December, 2020...
-
Page 16: Power Supply
Warning Do not disconnect the cables from the Transmitter (TX) or Receiver (RX) head with the power still connected to the ST series light curtain. Any wiring or re-wiring of the light curtain must be done with the power supply disconnected. -
Page 17: External Device Monitoring (Edm)
Safety Light Curtain - ST Series Installation Guide will depend on the customer’s risk assessment for the machine. The Yellow wire on the Receiver (RX) head cable must be connected to 0V DC (L-) and the Green wire on the Receiver (RX) head to the 24V DC (L+). -
Page 18: Communication Link
Safety Light Curtain - ST Series Installation Guide 500mA. LED indicators located on the Receiver (RX) head show the status of the OSSDs. Green LED ON = OSSD1 and OSSD2 active ON Red LED ON = OSSD1 and OSSD2 inactive OFF Communication Link The Transmitter (TX) and Receiver (RX) heads communicate via DATA-Link. - Page 19 Safety Light Curtain - ST Series Installation Guide Figure H – Identification Labels Examples are shown below of the identification labels that are affixed to the bottom of the transmitter (TX) and receiver (RX) columns. File Number: CD1001 page 19...
-
Page 20: Receiver (Rx) Status Indicators
Installation Guide Figure I – Status and Diagnostic Indication The ST series has status indication LEDs on the Receiver (RX) head and a 7 segment display panel located at the bottom of the Receiver (RX) head. They provide a range of functions to help in the set-up of the safety light curtain and in fault diagnosis. -
Page 21: Receiver (Rx) Diagnostic Display Panel
Safety Light Curtain - ST Series Installation Guide The CLEAR (Red LED) provides two functions, RED LED ‘on’ = Light curtain safety off. OSSD1 and OSSD2 are ‘OFF’ e.g. when the light curtain detection zone is ‘blocked’. RED LED ‘on’ = Power connected to the light curtain. - Page 22 At the other end of the scale F indicates that the infrared signal strength is at it’s strongest. The ST series signal strength is monitored from the bottom block of 2 beams, those nearest the cable entry.
- Page 23 RX display even when the light curtain is upside down. RX Display – Standard to Inverted Disconnect the 24V supply to the ST series light curtain. Connect the RX head cable Yellow wire to 24V DC. Connect the RX head cable Green wire to 24V DC.
- Page 24 Safety Light Curtain - ST Series Installation Guide Power up the ST series and the RX head display will flash, E5. Disconnect the 24V supply to the ST series light curtain. Wire the ST series for normal use and proceed with installation as normal.
-
Page 25: Testing The Safety Light Curtain With The Test Piece
Safety Light Curtain - ST Series Installation Guide Figure J – Test and Maintenance Testing the safety light curtain with the test piece The test procedure should be carried out frequently as indicated by the risk assessment for the particular installation. -
Page 26: Maintenance
Safety Light Curtain - ST Series Installation Guide up through the detection zone parallel to the transmitter. Now sweep the test piece down through the detection zone equal distance between the transmitter and receiver. Now sweep the test piece up through the detection zone 150mm and parallel to the receiver unit. - Page 27 Safety Light Curtain - ST Series Installation Guide Figure K – Operation Cycle o Before installation read and understand the Installation Sheet provided paying particular attention to the information provided in Fig. E o Refer to Fig. J for test and maintenance...
- Page 28 Figure L – Product Return Procedure If a fault occurs that cannot be resolved or the equipment is damaged return the equipment to the nearest Smartscan distributor or Smartscan Ltd. Indicate the nature of the fault and the symptoms displayed on the form provided.
- Page 29 Safety Light Curtain - ST Series Installation Guide Figure M – Model List Fig. M shows the ST series safety light curtain model numbers with their corresponding number of Infrared beams, detection zone width (DZ), fixing centres (CTR), overall length (L), and object detection capability (ODC).
- Page 30 Safety Light Curtain - ST Series Installation Guide ST series Resolution: 44mm Range: 0.3m ~ 6m Protection Zone Overall Length Install Length Assembly Length Model Beams (DZ) mm (B) mm (CTR) mm (L) mm ST-401 ST-402 ST-403 ST-404 ST-405 ST-406...
- Page 31 Safety Light Curtain - ST Series Installation Guide STA series Resolution: 34mm Range: 0.3m ~ 6m Protection Zone Overall Length Install Length Assembly Length Model Beams (DZ) mm (B) mm (CTR) mm (L) mm ST-301 ST-302 ST-303 ST-304 ST-305 ST-306...
- Page 32 Safety Light Curtain - ST Series Installation Guide STB series Resolution: 24mm Range: 0.3m ~ 6m Protection Zone Overall Length Install Length Assembly Length Model Beams (DZ) mm (B) mm (CTR) mm (L) mm ST-201 ST-202 ST-203 ST-204 ST-205 ST-206...
- Page 33 Safety Light Curtain - ST Series Installation Guide STC series Resolution: 14mm Range: 0.3m ~ 6m Protection Zone Overall Length Install Length Assembly Length Model Beams (DZ) mm (B) mm (CTR) mm (L) mm ST-101 ST-102 ST-103 ST-104 ST-105 ST-106...
- Page 34 Figure N – Declaration of Conformity CD1001/111220 EC Declaration of Conformity Product: Smartscan ST Light C urtain, Model ST- *** series. Manufacturer: Smartscan TW Limited , 2F, No.5, 10 th Road, Tai chung Indu strial park, Taichung City, Taiwan R .O.C.
- Page 35 Safety Light Curtain - ST Series Installation Guide Figure O – Glossary of Words and Language Translation File Number: CD1001 page 35 Date: 11 December, 2020...
-
Page 36: Appendix 1 - Important Safety Information
machine stop time performance is reliable and within the specified parameters. Do not repair or modify the Smartscan safety light curtain. Smartscan products can only be repaired by the manufacturer. Any work carried out on the product that is not done by the manufacturer will invalidate the warranty terms. -
Page 37: Appendix 2 - Certifications
Installation Guide Appendix 2 - Certifications Company Certificate No: 79Q13722 Smartscan Limited has a certified quality assurance system in compliance with ISO 9001:2015. Certificate number: 79Q13722. Products Smartscan safety light curtains are developed and manufactured in compliance with the European Machinery Directive 2006/42/EC and International Legislation and Standards. -
Page 38: Appendix 3 - Mirrors
Safety Light Curtain - ST Series Installation Guide Appendix 3 - Mirrors Reflector mirrors can be provided enabling two or three sides of a machine to be safeguarded with, what is effectively a single light curtain. When mirrors are employed it is essential that the mounting of the transmitter unit, receiver unit and mirrors themselves are sufficiently rigid. - Page 39 Perimeter curtains will be easier to align, curtains over 900mm may be more difficult to align. Check with the Smartscan technical department prior to ordering for a particular application, support@smartscan.com, Tel: 886 - 4 - 23598885, Fax: 886 - 4 - 23599423...
- Page 40 Safety Light Curtain - ST Series Installation Guide Alignment though one mirror 1. Secure the transmitter, receiver and mirror units in the position in which they are intended to be used. 2. Ensure all units are perfectly upright in all planes by using a sprit level.
- Page 41 Safety Light Curtain - ST Series Installation Guide Alignment though two mirrors Follow instruction 1-4 10. A second person must adjust the position of the first mirror to the left and to the right until the entire length of the second mirror is reflected in the first mirror.
- Page 42 Safety Light Curtain - ST Series Installation Guide in turn to ensure the infra-red energy from the transmitter unit is being reflected through the mirror(s) to the corresponding receiver unit. Alignment of the light curtain using mirrors Note: The mirror length must be a minimum of 100mm longer than the overall length of the light curtain to be installed e.g.
-
Page 43: Appendix 4 - Specification Table
Safety Light Curtain - ST Series Installation Guide Appendix 4 – Specification Table ST : 3 – 48, STA : 4 – 64, STB : 6 – 96, STC : 12 – 192 Number of beams Object detection ST : 44mm, STA : 34mm, STB : 24mm, STC : 14mm,... - Page 44 Safety Light Curtain - ST Series Installation Guide OUTPUTS Safety Outputs 2 x electronic switches (PNP), each rated at 24V DC, 500mA OSSD1 & OSSD2 Synchronization I/O INPUTS Safety Monitoring (EDM) Reset (Manual/Automatic) Synchronization I/O File Number: CD1001 page 44...
-
Page 45: Notes
Safety Light Curtain - ST Series Installation Guide Notes File Number: CD1001 page 45 Date: 11 December, 2020...
Need help?
Do you have a question about the ST Series and is the answer not in the manual?
Questions and answers