Table of Contents
Advertisement
Quick Links
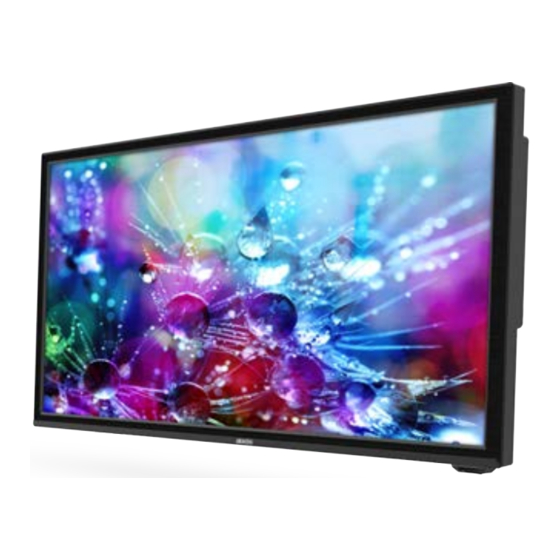
AX1824S Series 2 / AX1832S
12/24V LED DVD/SMART TV
SPECIFICATIONS
PANEL
- Display Size: 60cm (23.6") - AX1824S
81cm (32") - AX1832S
- Full High Definition LED TV - AX1824S
- High Definition LED TV - AX1832S
- Aspect Ratio: 16:9
- Resolution: 1920 x 1080 - AX1824S
1366 x 768 - AX1832S
- Brightness: 220cd/m2 - AX1824S
250cd/m2 - AX1832S
- Contrast:
3000:1 - AX1824S
1200:1 - AX1832S
- Viewing Angle: 176(H) x 176(V) - AX1824S
178(H) x 178(V) - AX1832S
POWER
- Input: 9-36V DC / 4A @12V
- Optional AC Adapter: 240V 50Hz/60Hz
- Stand-by Power Consumption: 0.5W
CABINET
- Conformal Coated Circuit Board
- Size: 550 x 50 x 336mm - AX1824S
735 x 82 x 442mm - AX1832S
- Enhanced Strength VESA Mounting
- Net weight: 3.9 kg - AX1824S
5.1 kg - AX1832S
MULTIMEDIA & FEATURES
- TIMESHIFT: Pause, Rewind & Fast-Forward
Live TV (using PVR)
- USB Reader
- PVR (Personal Video Recorder)
- EPG (Electronic Program Guide)
SMART TV
- Android 7.1.1 OS
- Built-In WiFi
- Downloadable Apps
- Included Apps: Browser, Stan, YouTube,
Freeview FV, ABC iview, Tenplay, SBS On Demand
TUNER
- DVB-T Digital HD Tuner
- Analogue Tuner
- DTV Video System: MPEG-1MP@ML, H.264,
MPEG-4 (Video Codes)
- DTV Sound System: MPEG-1 Layer 1/2,
- ATV Video System: PAL
- ATV Sound System: BG, DK, I
SYSTEM
- MPEG-4 Video System
- OSD: Multi-languages
- Number of Channels: 99
- Comb Filter: 3D - AX1824S Only
- Teletext: ATV/1000 Pages
- Speakers: 2 x 3W Stereo - AX1824S
2 x 8W Stereo - AX1832S
DVD/CD PLAYER
- Built-In DVD Player
- Supports DVD/VCD/CD/MP3/DIVX/JPEG
- Supports DVD±R/DVD±RW/CD-R/RW
INSTRUCTION MANUAL
INPUTS
- RF / Antenna: 1
- Mini AV: 1
- Mini YPbPr: 1
- HDMI: 2
- VGA: 1
- USB: 3 (2 Smart)
- PC Audio: 1
- Ethernet: 1
OUTPUTS
- Headphone: 1 (3.5mm)
- Digital Coaxial: 1
- Line Out: 1
INCLUDED
- Remote Control
- Cig Lead Car Power Adaptor
- Wall Mounted Screws
- Mini YPbPr Lead
- Mini AV Adaptor
OPTIONAL
- Desktop Stand Legs
- 240V AC Adaptor
2
YEAR WARRANTY
Advertisement
Table of Contents

Related Manuals for Audioxtra axis AX1824S Series 2


Summary of Contents for Audioxtra axis AX1824S Series 2
- Page 1 INSTRUCTION MANUAL AX1824S Series 2 / AX1832S 12/24V LED DVD/SMART TV SPECIFICATIONS PANEL SMART TV INPUTS - Display Size: 60cm (23.6”) - AX1824S - Android 7.1.1 OS - RF / Antenna: 1 81cm (32”) - AX1832S - Built-In WiFi - Mini AV: 1 - Full High Definition LED TV - AX1824S - Downloadable Apps - Mini YPbPr: 1...
-
Page 2: Table Of Contents
CONTENTS TV Operation Select Input Source ....................3 Initial Installation ....................3 Main Menu Operation ..................4 Channel Menu ......................4 Picture Menu ......................6 Sound Menu .......................7 Time Menu ......................8 Option Menu ......................9 Lock Menu ......................11 PVR ........................12 Media Operation Media Operation ....................13 Photo Menu ......................14 Music Menu ......................15 Movie Menu ......................16 Text Menu ......................17... -
Page 3: Tv Operation
TV Operation Select Input Source Press Source on the remote, then use the arrow keys to select your desired source. Press ENTER on the remote to select the source. Initial Installation Firstly connect an RF Antenna cable from the TV’s RF output to the TV Antenna socket. When you Reset the TV from the Setup menu, you will be presented with a number of dialogue boxes that will guide you through the TV tuning process. -
Page 4: Main Menu Operation
Main Menu Operation Press the Menu button on the remote to select the Main Menu. From there, you can use the buttons to select between the following sub-menus: - Channel - Picture - Sound - Time - Option - Lock Once you select a sub-menu, use the buttons to select an option in the sub-menu. - Page 5 ENTER Use the coloured buttons on the remote to edit the channels. First press the buttons on the remote to highlight the channel you want to select, then: Press the button to delete the channel from the program list. Press the Yellow button to move the channel in the list.
-
Page 6: Picture Menu
Picture Menu Picture Mode Press ▼/▲ buttons to select Picture mode, and go into next interface by pressing the ENTER button. Contrast, Brightness, Colour, Tint, Sharpness Note: You can only adjust the Contrast, Brightness, Colour, Tint & Sharpness settings can be adjusted when the User Picture Mode is selected. Press the ▼/ ▲... -
Page 7: Sound Menu
Sound Menu Sound Mode Press the ▼/▲ buttons to select Sound Mode. Then press the ENTER button to select from a list of sound modes. The sound mode can be switched between standard/music/movie/sports/ user using the ◄ / ► buttons. Custom Equaliser The frequencies adjust the following ranges: 120Hz - Bass, 500Hz - Midbass, 1.5KHz -Midrange, 5KHz - Upper Midrange, 10KHz - Treble... -
Page 8: Time Menu
TIME MENU Time Menu Clock The clock and date is automatically programmed from information received from DTV Channels. You should not need to use this sub-menu once you have received a DTV signal, however this can be manually changed if required. Off Time This setting allows you to set a specific time to turn the TV off. -
Page 9: Option Menu
Option Menu OSD Language Select OSD Language with the ▼/▲ buttons then press ENTER to adjust the on-screen language. TT Language This setting is not used in Australia & New Zealand Audio Languages Press ▼ /▲ to select Audio Language and select language with ▼/▲ or ◄... - Page 10 HDMI CEC HDMI CEC allows devices connected to the TV via HDMI to communicate back and forth with the TV. Please see below for specific CEC settings CEC Control: ◄ / ► buttons to turn CEC Control on of off. The default Press the setting is On.
-
Page 11: Lock Menu
Lock Menu Lock System Select Lock System with the ▼/▲ buttons and press ENTER. Then enter the password (default is “0000") to access the Block Program, Parental Rating Key Lock & Hotel Mode menus. SET Password Select Set Password with the▼/▲ buttons. Then press the ENTER button to enter the old password (default is “0000”) and then set a new password by entering it twice. -
Page 12: Pvr
RECORD Live TV Ensure you have a correctly formatted USB drive inserted in the TV before recording. If the USB drive is not formatted properly, the TV will display a message advising that the USB drive needs to be formatted. To do this, go to the Option Menu , select PVR File System and follow the steps in the PVR File System sub-menu to format the USB Drive. -
Page 13: Media Operation
Media OPERATION Note: Before operating Media menu, Plug in USB device, then press SOURCE button. ▼ / ▲ Press button to select Media in the Source menu, then press Enter button to enter. Press ◄ / ► button to select the type of media you wish to view in the Media menu, then press Enter button to enter. -
Page 14: Photo Menu
Photo Menu Press ◄ / ► button to select PHOTO in the main menu, then press button to enter. Enter button to return to the previous menu. Press Exit Press ◄ / ► button to select the desired file to watch in the file selecting menu, then press Enter to display the picture. -
Page 15: Music Menu
Music Menu Press ◄ / ► button to select MUSIC in the main menu, then press button to enter. Enter button to return to the previous menu. Press Exit Press ◄ / ► button to select drive disk you want to watch, then press button to enter. -
Page 16: Movie Menu
Movie Menu Press ◄ / ► button to select MOVIE in the main menu, then press Enter button to enter. button to return to the previous menu. Press Exit Press ◄ / ► button to select desired drive disk, then press Enter button to enter. -
Page 17: Text Menu
Text Menu Press ◄ / ► button to select TEXT in the main menu, then press button to enter. Enter button to return to the previous menu. Press Exit Press ◄ / ► button to select drive disk, then press button to enter. -
Page 18: Dvd
Auto Tuning ATV: Press MENU and then left arrow button to skip ATV tuning. DTV: Press MENU and then left arrow button to skip DTV tuning. is accessed by pressing the D.Setup button. Press to navigate the OSD Menu. Press Enter to confirm the change. Press D.Setup to leave the OSD Menu. - Page 19 Initial Installation Connect a RF cable to the TV’s input called “RF-In”. Select Language Press ◄ / ► button to select the language to be used for menus and message. Select Country ress button to highlight country menu. Press ◄ / ► b utton to select.
-
Page 20: Install Wizard
If you want to skip this wizard, press “HOME” key. If you have finished this wizard once, it will not auto-open again. If you do not want to choose your network, you can skip this step by pressing “Skip”. You will also find the network settings in function “Settings”... - Page 21 If you choose‘Wi-Fi’, select a Wi-Fi Access Point. If you choose ‘Ethernet’, the screen will show the Ethernet connection status. If the network is not connected, set up the date and time manually.
- Page 22 Set up data/time manually User can set up the Language, Network, Time Zone, Date/Time and adjust screen size here.
-
Page 23: 2.1. Main Launcher
Main Launcher 2.1. Main Launcher to enter the sub-screen to select the sub-screen and press Main Launcher screen contains: Time information (You can set time information in settings); USB/SD card/Ethernet/WiFi function status (White for working, grey for standby). App Menu allows you to view and select more apps. If App upgrade message is displayed, please press "cancel"... - Page 24 Main Launcher...
- Page 25 Main Launcher 2.2. Settings Restore factory default...
- Page 26 Main Launcher Local update: Net update: OTA network upgrade...
- Page 27 Main Launcher 2.3. Applications Install from USB Flash Drive 1. Open the “File Browsers” 2. Choose your USB flash drive or any other mass storage’s folder 3. Find you application, and press it 4. Press the install button 5. You can find the application in tab “Apps” after installation Download &...
-
Page 28: Notes
AX1824S/AX1832S...
Need help?
Do you have a question about the axis AX1824S Series 2 and is the answer not in the manual?
Questions and answers