Advertisement
Dear customer,
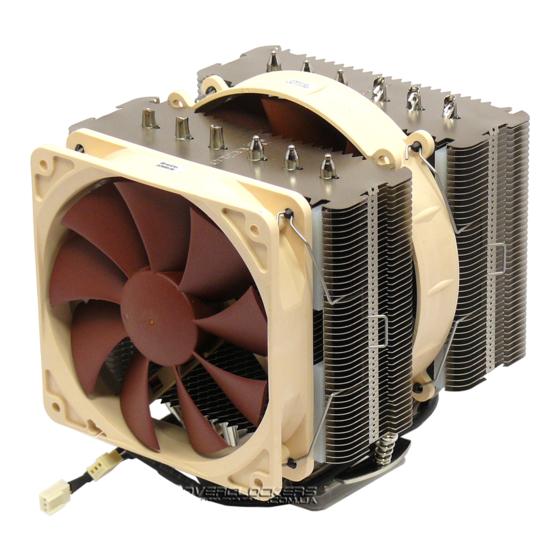
Congratulations on choosing the Noctua NH-D14 SE2011 for
your LGA2011 system. Having received more than 250 awards
and recommendations from the international press, our NH-D14
has become a benchmark in premium quality quiet cooling. Tens
of thousands of enthusiast users all over the world swear by its
quality and I'm confident that you will be satisfied as well. Enjoy
your Noctua NH-D14 SE2011!
Yours sincerely,
Roland Mossig, Noctua CEO
This manual will guide you through the installation process
of the SecuFirm2™ mounting system step by step. Prior to
installing the cooler, please consult the compatibility list on our
website and verify that the cooler is fully compatible with your
motherboard.
Should you encounter any difficulties, please check the FAQs on
our website and don't hesitate to contact our support team at
support@noctua.at. Noctua cannot be held responsible for any
damage or losses caused by compatibility issues.
Multilingual versions of this manual are available on our website:
www.noctua.at/manuals
Required mounting parts:
2x NM-IMB2 Mounting-Bars
4x NM-IBT2 Bolts
4x NM-ITS1Thumbscrews
Step 1:
Installing the mounting-bars
First screw the NM-IBT2 bolts into the screw threads of the
LGA2011 socket frame.
Noctua NH-D14 SE2011 | Installation Manual
Then put the NM-IMB2 mounting-bars onto the bolts.
Caution: Choose the alignment of the mounting bars according to
the desired final orientation of the cooler:
Orientation A
Orientation B
Caution: Make sure that the curved sides of the mounting bars are
pointing outwards.
Fix the mounting bars using the NM-ITS1 thumbscrews.
Caution: Gently tighten the screws until they stop, but don't use
excessive force.
Step 2:
Applying thermal paste
If there are residual traces of thermal paste or thermal pads on
your CPU, please clean them off first. Then press a small drop
(4-5mm diameter) NT-H1 onto the centre of the heatspreader.
Caution: Applying too much thermal paste will lower the heat
conductivity and cooling performance!
Step 3:
Fastening the heatsink to the CPU
Caution: If you're using the cooler for the first time, please take off
the protection cover at the bottom side of the heatsink first!
Put the heatsink onto the CPU and screw it to the screw threads
of the mounting bars.
Caution: Tighten the screws until they stop.
Caution: Due to the mass restrictions of the LGA2011 specifica-
tions, we recommend taking off the heatsink when moving or
transporting your PC. Noctua cannot be held responsible for any
damage that may arise due to excessive stress on the socket during
transportation if you keep the heatsink installed.
Step 4:
Installing the fan
Attach the fans to the heatsink using the steel clips. The NF-P12
120mm fan can be moved upwards or left off in order to improve
compatibility.
If you don't run the NF-P12 on the CPU cooler, you can use the
supplied fan screws or silicone Vibration-Compensators to install
it inside your case.
1.
Advertisement
Table of Contents

Related Manuals for Noctua NH-D14 SE2011


Summary of Contents for Noctua NH-D14 SE2011
- Page 1 Caution: Due to the mass restrictions of the LGA2011 specifica- tions, we recommend taking off the heatsink when moving or transporting your PC. Noctua cannot be held responsible for any Required mounting parts: damage that may arise due to excessive stress on the socket during Fix the mounting bars using the NM-ITS1 thumbscrews.
- Page 2 6 years and direct, fast and straightforward RMA service. Should you encounter any problems with your NH-D14, please don’t hesitate to contact our support team (support@noctua.at). Please also consult the FAQ section on our website: www.noctua.at/faqs.
Need help?
Do you have a question about the NH-D14 SE2011 and is the answer not in the manual?
Questions and answers