
Subscribe to Our Youtube Channel
Related Manuals for 3W 120i B2 F

Summary of Contents for 3W 120i B2 F
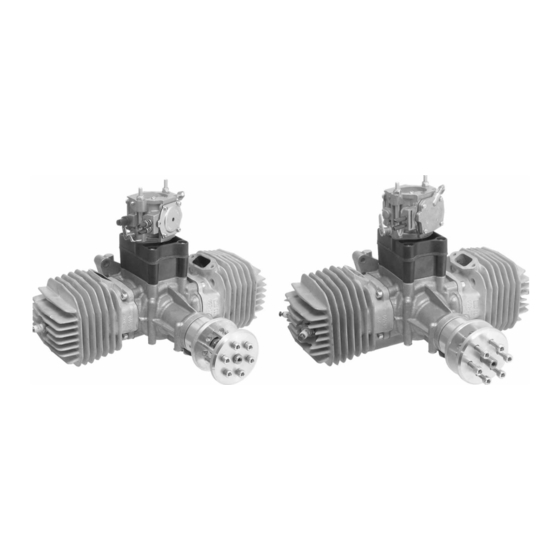
- Page 1 ENGINE MANUAL 120 - 150i B2 / TS / CS front and rear rear rear / TS front front / TS www.3w-modellmotoren.com...
-
Page 2: Dear Customer
120 - 150i B2 / TS / CS front and rear Engine Manual Dear customer, Thank you for placing your confidence in 3W. Our long experience (since 1985) in designing and producing model airplane engines, ranging from single up to six cylinder, has been utilized to provide you with the best engine possible. -
Page 3: Limited Warranty
In case of defect during the period of garantee, return this product to your nearest 3W-Dealer or to 3W -Germany direct, at your costs. The garantee is limited to the value of the product. The guarantee does not cover any damage caused by misuse or neglect, accidents, abrasion, exposure to extreme temperatures, solvents, acids, water, normal wear and tear or damage by common carrier. - Page 4 For your safety and for the safety of those around you -- also to learn what is required to maintain your warranty - we strongly advise you to read this entire manual carefully BEFORE you start using the engine. Safe Operation and 3W's Conditional Warranty For safe operation and to maintain your warranty you must: •...
-
Page 5: Engine Installation
Spacers can be made from hardwood dowels (3/4" to 1") or machined aluminum bar stock to adjust your down and side thrust. These spacers should go between the motor box and fuselage and not the motor box and engine. www.3w-modellmotoren.com... -
Page 6: Engine Cooling
Deflecting of the air (baffling) to and over the cylinder(s) is highly recommended for engine cooling. The idea is to get all of the cool air that is coming through the air intake opening(s) to hit the middle of the cylinder(s) directly, and then be forced over the cylinder(s), creating turbulent air moving www.3w-modellmotoren.com... -
Page 7: Operating Temperature
Important: The interior of the fuselage must be sealed to prevent damage from gasoline that sprays from the carburetor. Use a thin epoxy or other appropriate fuel proofing method. Do not overlook this step as gasoline will melt some materials like Styrofoam very quickly. www.3w-modellmotoren.com... - Page 8 Canister mufflers To prevent damage to the header(s) a flexible support bracket is required to mount the canister(s). The location for this bracket should be at the canister's center of gravity. 3W canisters have a reinforcement ring at this location.
-
Page 9: Carburetor Settings
Carburetor settings Before each engine is shipped it has to pass QC and is then test run. We do a basic adjustment of the carburetor needles at that point. www.3w-modellmotoren.com... -
Page 10: Carburetor Linkage
• Use a mixture of 32-1 or even 30-1 • Use this fuel mixture for approximately 2-3 hours of run time • Use a high Octane unleaded fuel (from 92 Octane is ideal) www.3w-modellmotoren.com... - Page 11 Use a high Octane unleaded fuel (from 92 Octane is recommended) • We use 3W 2-stroke oil in our engines here in Germany, but there are other high grade 2-stroke oils that will perform well. Note: The engine needs 12-20 hours running time for the break in process to be 100% complete.
-
Page 12: Additional Installation Notes
The spark plug cap must be firmly seated to the sparkplug. If the spark plug cap is not firmly seated there is a very good possibility that you will experience radio interference. • Use only ignition on/off switches recommended by 3W • 6 volts is required for the ignition. - Page 13 • Make sure that no gasoline will be splashed into the hot muffler(s). • Only 3W mufflers, or mufflers authorized by 3W with an acceptance (test) number, should be used. • Only 3W-ignition systems should be used for proper operation.
-
Page 14: Starting Procedure
4. If the idle RPM drops until the engine stops; the low needle (L) is too rich. Lean the low needle (L) until a constant idle RPM is achieved. 5. Check the transition with a quick throttle advance. The engine should not sound strained www.3w-modellmotoren.com... -
Page 15: Troubleshooting
Check the carburetor settings. Check to see if the propeller is too large. Verify that you have the correct muffler system. Check to see if the engine is overheating. Check the ignition timing. Check the spark plug for defect. Verify you have the correct gasoline, oil, and have mixed them with the correct ratio. www.3w-modellmotoren.com... - Page 16 120 - 150i B2 / TS / CS front and rear Engine Manual Metrics www.3w-modellmotoren.com...
- Page 17 120 - 150i B2 / TS / CS front and rear Engine Manual mounting bolt pattern rear induction ATTENTION: This drawing is in original size. Disable any Acrobat print setting to fit it into paper size. Check the printed pattern before drilling. www.3w-modellmotoren.com...
- Page 18 120 - 150i B2 / TS / CS front and rear Engine Manual mounting bolt pattern front induction ATTENTION: This drawing is in original size. Disable any Acrobat print setting to fit it into paper size. Check the printed pattern before drilling. www.3w-modellmotoren.com...
- Page 19 28x12, 29x12, 30x10 High = 2 1/4 R / TS 32x12 Low = 2 1/4 Universal Specifications Needle bearings on both ends à • Crankshaft 3 Ball bearings • Connection rod • Gasoline Version unleaded fuel (92 Octane is recommended) www.3w-modellmotoren.com...
-
Page 20: Engine Manual
è, valido solo contro presentazione di questo documento. Esta garantla só vale se for apresentada junta à prova de Questa garanzia è valida solo se compra (recibo da loja). presentata assieme alla prova d'acquisto. (Ricevuta del negoziante). www.3w-modellmotoren.com...
Need help?
Do you have a question about the 120i B2 F and is the answer not in the manual?
Questions and answers