
Related Manuals for Hark HK0522W


Summary of Contents for Hark HK0522W
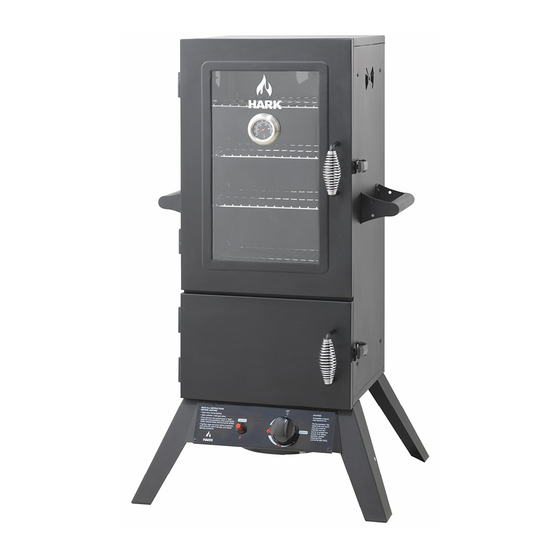
- Page 1 2 DOOR GAS SMOKER Owner’s Manual ASSEMBLY, CARE & SAFETY INSTRUCTIONS Item No. HK0522W HK0522 2 Door Gas Smoker-Manual_v45.indd 1 15/4/19 2:40 pm...
- Page 2 After Sales Support YEAR WARRANTY Telephone: 1300 799 787 (03) 9873 2711 Email: service@hark.com.au HK0522 2 Door Gas Smoker-Manual_v45.indd 2 15/4/19 2:40 pm...
-
Page 3: Outdoor Use Only
READ ALL SAFEGUARDS AND INSTRUCTIONS THOROUGHLY! YOUR SAFETY IS VERY IMPORTANT – FAILURE TO FOLLOW PROPER PROCEDURES AND SAFEGUARDS MAY RESULT IN PROPERTY DAMAGE OR PERSONAL INJURY. DANGER DANGER - This smoker is for OUTDOOR USE ONLY. - Avoid touching hot surfaces. Always wear protective - Never operate this smoker unattended. - Page 4 READ ALL SAFEGUARDS AND INSTRUCTIONS THOROUGHLY! YOUR SAFETY IS VERY IMPORTANT – FAILURE TO FOLLOW PROPER PROCEDURES AND SAFEGUARDS MAY RESULT IN PROPERTY DAMAGE OR PERSONAL INJURY. DANGER DANGER • Do not obstruct flow of combustion and • Always allow the hot water to cool completely ventilation.
-
Page 5: Hardware Pack
A. HARDWARE PACK NO. Description. Finish Note 1/4-20x1/2 Screw Black galvanized 19 Inside blister card 1/4-20 Flange Nut Black galvanized 8 10-24x1/2 Screw Black galvanized 11 10-24Nut Black galvanized 3 Inside blister card M5 spring washer Black galvanized 3 S hook for hose Chrome plated Inside blister card Zip tie... -
Page 6: Parts List
B. PARTS LIST Read all safeguards and assembly instructions before assembling and operating your smoker. Before assembling your new smoker, unpack all parts from the box. Carefully remove all packing material and lay out all the parts for easy access and identification. - Page 7 C. ASSEMBLY INSTRUCTIONS WARNING DO NOT HANDLE SMOKER BY THE CROSS BAR ON SMOKER CABINET. DO NOT LIFT OR MOVE USING THIS CROSS BAR. STEP 1 Locate: Cabinet (1), lower door (2) and upper door (3). Note: The doors are attached to the cabinet. Procedure: •...
- Page 8 STEP 3 Locate: Control Panel Assembly [5] and Burner Chamber Assembly [4], two 1/4-20x1/2” Screw [1a] (two remaining from previous step). Tools needed: Philips head screwdriver. Procedure: • Place the control panel assembly between the front legs as shown. There are slots on the control panel that fit around the legs and line up with the screw holes.
- Page 9 FLAME FAILURE DEVICE (FFD) The FFD is a safety feature of this unit that shuts off gas to the appliance if the flame is not continuously burning. Please note the sensor has been factory fitted to the burner and is already in its correct position. For FFD, the thermocouple copper wire from the burner has been factory fitted into the Control Panel valve.
-
Page 10: Low Setting
CORRECT POSITION OF THE FFD SENSOR The FFD Sensor is already factory fitted in the correct position and should not need adjusting. The sensor needs to be in the flame at all times. Please see the correct position of this sensor. LOW SETTING HIGH SETTING ADJUSTING SENSOR... - Page 11 STEP 5 Locate: Dampers [7], three 10-24x1/2” Screws [3c], 10-24 Nuts [4c], M5 Spring Washers [5c] From hardware Pack - Blister card. Tools needed: Philips head screwdriver and 3/8” wrench or shifter. Procedure: • From the outside of the cabinet, insert a 10- 24x1/2”...
- Page 12 STEP 6 Locate: Two Side Handles [18], eight 1/4- 20x1/2” Screw [1a], and eight 1/4-20 Flange Nuts [2a]. Tools needed: Philips head screwdriver and a 7/16” wrench or pliers. Procedure: • Use four 1/4-20x1/2” Screw [1a] and four 1/4-20 Flange Nuts [2a] to attach the handle on the right side of the smoker cabinet [1].
- Page 13 STEP 10 Locate: Door Latch Plate (17) and 4 x 10-24x1/2” Screws. Tools Needed: Phillips head screwdriver Procedure: • Attach each door latch plate (17) to the upper and lower doors using 2 x 10-24x1/2” screws. Each latch plate is fastened to the side of the doors using two screws.
- Page 14 Step 13 Locate: 2 x Grid Tracks (13), 1 x Water Bowl. Tools Needed: None Procedure: • Install one grid track (13) in each of the next holes up from the bottom hole, located in the grid support for both the left and right hand sides of the cabinet.
- Page 15 Assembly of your smoker is now complete. The following image shows how the assembled unit should look. IMPORTANT THE WATER BOWL AND WOOD CHIP BOX MUST BE INSTALLED IN THE UNIT DURING USE. EVEN IF YOU ARE NOT USING SMOKING CHIPS OR WATER, THESE MUST BE INSTALLED IN THE CORRECT POSITION TO STOP GREASE DRIPPINGS FROM FALLING ON THE BURNER.
-
Page 16: The Gas System
D. THE GAS SYSTEM DANGER ALL INSTRUCTIONS AND SAFEGUARDS MUST BE FOLLOWED TO PREVENT FIRE, PROPERT Y DAMAGE, OR PERSONAL INJURY. GAS AND REGULATOR INFORMATION CONNECTING THE HOSE AND REGULATOR TO THE GAS BOTTLE This smoker is designed for propane (LPG) gas •... -
Page 17: Leak Testing
Please note that the hose is already fitted to the valve on the underside of the control panel of the smoker. You do not have to adjust this connection but should leak test this once the hose and regulator are connected to the gas cylinder. DO NOT DISCONNECT HOSE FROM VALVE. - Page 18 GAS BOTTLE RESTRAINT Included is a strap with a hook at either end. This is to be used to secure the gas bottle to the smoker. Once you have fully assembled your smoker with the gas bottle connected, connect one end of the strap to the side handle of the smoker nearest to the gas bottle and the other end of the strap to the gas bottle handle.
- Page 19 E. OPERATION: BEFORE USE PRE-USE PROCEDURES: To add wood chips whilst the smoker is in use, use protective mitts and long tongs or pliers to remove the Prior to cooking in your smoker, it is important to box lid. Then add more wood chips without removing the “season”...
- Page 20 F. OPERATION: LIGHTING LP GAS LIGHTING PROCEDURE: 1. Check all connections for leaks using the leak test as explained on page 17. 2. Open the smoker door. WARNING NEVER ATTEMPT TO LIGHT THE SMOKER WITH THE DOOR CLOSED OPEN DOOR TO LIGHT SMOKER 3.
-
Page 21: Damper Adjustments
G. OPERATION: COOKING DAMPER ADJUSTMENTS • You are now ready to light the burner. Refer to the Lighting Procedure on the previous pages of this Temperature maintenance is best controlled manual. The heat from the burner will allow the wood chips to burn, causing the flavouring smoke by different damper adjustments. -
Page 22: After Use Safety And Maintenance
I. AFTER USE SAFETY AND MAINTENANCE WARNING • Use caution when lifting and moving the smoker to avoid strains or back injury. 2 people are recommended to lift or move the smoker. • DO NOT store the smoker near gasoline or other combustible liquids or where combustible vapour may be present. -
Page 23: Troubleshooting
IF YOU HAVE ANY QUESTIONS OR QUERIES ABOUT THE OPERATION OR MAINTENANCE OF YOUR GAS SMOKER PLEASE CALL THE CUSTOMER SERVICE NUMBER ON 1300 799 787 OR (03) 9873 2711 OR EMAIL SERVICE@HARK.COM.AU HK0522 2 Door Gas Smoker-Manual_v45.indd 23 15/4/19 2:40 pm... - Page 24 Diagrammatical Representation of "OUTDOOR AREAS" THIS APPLIANCE SHALL ONLY BE USED IN AN ABOVE GROUND OPEN-AIR SITUATION WITH NATURAL VENTILATION, WITHOUT STAGNANT AREAS, WHERE GAS LEAKAGE AND PRODUCTS OF COMBUSTION ARE RAPIDLY DISPERSED BY WIND AND NATURAL CONVECTION. THIS SMOKER IS NOT DESIGNED FOR MARINE USE.
- Page 25 — Within a partial enclosure that includes an overhead cover and more than two walls, the following shall apply: a) at least 25% of the total wall area is completely open, and b) at least 30% of the remaining wall area is open and unrestricted (Refer to examples 3, 4 and 5).
-
Page 26: Replacement Parts
This will protect your warranty coverage for parts replaced under warranty. AFTER SALES SERVICE Servicing must be carried out by Hark Enterprises’ authorized personnel. For all enquiries regarding servicing or spare parts, please call 1300 799 787. If you believe that your Smoker is not performing properly, please call our customer support line on 1300 799 787 for any queries. - Page 27 Hark Enterprises Pty Ltd Unit 11, 41-49 Norcal Rd, Nunawading, VIC 3131 T: 1300 799 787 E: service @ hark.com.au W: www.hark.com.au HK0522 2 Door Gas Smoker-Manual_v45.indd 27 15/4/19 2:40 pm...