Table of Contents
Advertisement
Quick Links
®
READ AND KEEP THESE INSTRUCTIONS FOR FUTURE REFERENCE
For answers to common questions, setup videos and troubleshooting tips,
please visit our support center at: support.polygroupstore.com,
or call Customer Service at: +1 (888) 919-0070
DO NOT RETURN PRODUCT TO STORE
Thank you for your Lark Outdoors purchase! Should you encounter any problems, please DO NOT return the product to your place of purchase.
For assitance with product setup, parts or troubleshooting, please visit support.polygroupstore.com, or call our customer service team at +1 (888) 919-0070.
All warranty claims and parts requests must be made directly to our service & support partner, Polygroup. Depending on the nature of the concern, you may
be asked to return all or part of the product for inspection or repair. Making it right is our top priority!
Sold & Distributed by Lark Outdoors, Austin, TX USA. Assembly & Service by Polygroup Trading Limited Unit 606, 6th Floor, Fairmont House, No.8 Cotton Tree Drive, Central, Hong Kong.
If you need help or encounter any problems, please call us at (888) 919-0070, between 8am - 5pm MST (extended operating hours may be available during holiday and peak seasons).
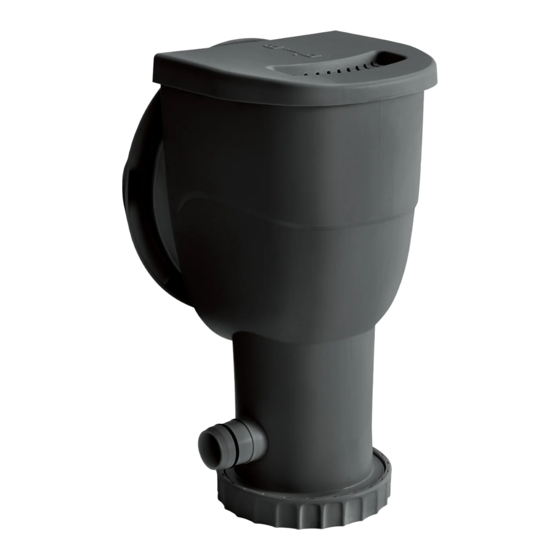
SKIMMERPLUS
FILTER PUMP
FOR ABOVE GROUND SWIMMING POOLS
SFX330 Model
OWNER'S MANUAL
®
To order parts, accessories,
and to learn more about our
products, please visit:
www.larkoutdoors.com
© 2020
Advertisement
Table of Contents

Related Manuals for Lark SKIMMERPLUS SFX330

Summary of Contents for Lark SKIMMERPLUS SFX330
- Page 1 Making it right is our top priority! Sold & Distributed by Lark Outdoors, Austin, TX USA. Assembly & Service by Polygroup Trading Limited Unit 606, 6th Floor, Fairmont House, No.8 Cotton Tree Drive, Central, Hong Kong.
-
Page 2: Table Of Contents
This Limited Warranty is not extended to close-outs, factory seconds, or resold products (i.e. garage sales, online auctions, or online retailers unaffiliated with Lark Outdoors or Polygroup ). Any issues with items purchased from these types of vendors / sellers will need to ®... -
Page 3: Warnings
OWNER’S MANUAL IMPORTANT SAFETY INSTRUCTIONS When installing and using this electrical equipment, basic safety precautions should always be followed, including the following: READ AND FOLLOW ALL INSTRUCTIONS Keep for future reference. Failure to follow these warnings and instructions can result in serious injury or death to users, especially children. WARNING DANGER WARNING... - Page 4 ® 6. CAUTION: For continued protection against possible electric shock, this unit is to be mounted to the base in accordance with the installation instructions. 7. Do not bury the cord. Locate cord to minimize abuse from lawn mowers, hedge trimmers, and other equipment. 8.
- Page 5 OWNER’S MANUAL First Aid 1. Keep a working phone and a list of emergency numbers near the pool. 2. Become certified in cardiopulmonary resuscitation (CPR). In the event of an emergency, immediate use of CPR can make a lifesaving difference. Special Warning 1.
- Page 6 ® ASME American Society of Mechanical Engineers Two Park Avenue, New York NY 10016-5990 Contact: 800-843-2763 (U.S. & Canada) 973-882-1170 (outside North America) www.asme.org NSPI National Spa and Pool Institute (see APSP) UL Underwriters Laboratories 333 Pfingsten Road,Northbrook IL 60062-2096 Contact: 877-854-3577 or 847-272-8800 www.ul.com NSF NSF International...
-
Page 7: Preliminary Steps, Important Notes & Pump Power Info
OWNER’S MANUAL PRELIMINARY STEPS 1. READ ALL INSTRUCTIONS CAREFULLY and get a thorough understanding of what is required to assemble your Filter Pump. 2. It is recommended to have some petroleum jelly (not included) on hand for lubricating the gaskets and o-rings. FILTER PUMP IMPORTANT NOTES 1. - Page 8 ® Outside Pool Wall Inside Pool Wall...
-
Page 9: Setup Instructions & Use Of Pump 9
OWNER’S MANUAL SETUP INSTRUCTIONS Before assembly, take a few minutes to identify and become familiar with all the parts. WARNING: CLIMBING HAZARD! PLEASE PREVENT CHILDREN FROM CLIMBING ON THE FILTER CANISTER TO GAIN ACCESS TO THE POOL. Skimmer Installation 1. Set up your pool following the pool Owner’s Manual instructions. Do NOT fill 2. - Page 10 ® Pump Installation 7. From inside the Skimmer Canister , snap the pins of the Weir into 8. Slide close the Top Cover onto the Skimmer Canister the pivot slots, one after another. The Weir should now stand upright but not stuck.
-
Page 11: Pump Motor Care & Maintenance
OWNER’S MANUAL PUMP MOTOR CARE IMPORTANT! This Skimmer Filter Pump is protected by a thermal switch, a safety device that stops the pump from running when it's overheated, to prevent pump damage and prolong service life. If your pump turns off automatically, it’s likely the pool water temperature is too high or the water flow through the pump is insufficient for cooling the pump down. -
Page 12: Pool Water Care
® POOL WATER CARE 1. The following items are required to get your pool ready for use. They are available at polygroupstore.com or your local pool supplies stores: a. Test kit – for checking the chlorine and pH levels of the pool water b. -
Page 13: Pump Servicing Instructions 13
OWNER’S MANUAL PUMP SERVICING INSTRUCTIONS The most efficient way to troubleshoot or replace the Pump is to disassemble the entire filtration system. Please drain the water level to below the pool’s Skimmer Opening, then disassemble the system following the steps below. CAUTION: 1. - Page 14 ® You may need to reach inside the Canister to free the Pump Motor. 5. Slowly take out the Motor Assembly . Be careful not to lose the Rubber Nozzle or Canister Gasket STEP 2: Rotor Inspection/Replacement The Pump is consisted of a Rotor Assembly and its related parts.
- Page 15 OWNER’S MANUAL STEP 3: Pump Replacement/Reassembly 1. Lubricate the Canister Gasket . Turn the Skimmer Canister upside IMPORTANT: make sure that the cord of the down, place the Gasket into the inner groove at the bottom. Motor Assembly is placed through the Motor Seal Nut BEFORE replacing the Pump.
- Page 16 ® 3. Once the Motor is correctly aligned, match the threads of the Motor Seal to that of the Canister, and tighten by twisting the Nut counterclockwise. IMPORTANT: make sure the Nut and Canister are not cross-threaded; otherwise leaks may occur.
-
Page 17: Troubleshooting Guide
OWNER’S MANUAL TROUBLESHOOTING GUIDE Problem Cause Solution A Plug the GFCI Power Cord Set to a grounded power outlet. Then press the RESET A Pump not plugged in button to start the Pump. B Reset your circuit breaker on the electrical panel. If problem persists, have the circuit checked 1. -
Page 18: Replacement Parts Ordering Info
® REPLACEMENT PARTS ORDERING INFORMATION Part # Description P58PP4511W05 Motor Seal Nut P58PP45118UN P58PP45117CN Rubber Nozzle P58P4179AK01 Pump Motor Assembly P58X0330C000 Canister Gasket / Motor Seal P58105001K01 P58PP4509W05 Top Cover P58PP45098UN P58PP45097CN Weir Foam P58SFX000W01 Filter Cartridge P581031035PR P58PP1956W05 Weir P58PP19568UN P58PP19567CN P58PP4510W05...
Need help?
Do you have a question about the SKIMMERPLUS SFX330 and is the answer not in the manual?
Questions and answers