Table of Contents
Advertisement
Available languages
Available languages
Quick Links
OWNER'S MANUAL
WASHING
MACHINE
Before beginning installation, read these instructions carefully.
This will simplify installation and ensure that the product is installed
correctly and safely. Leave these instructions near the product after
installation for future reference.
FH4A8FDHK(0-9)N
MFL69042588
www.lg.com
Advertisement
Table of Contents

Related Manuals for LG FH4A8FDHK4N


Summary of Contents for LG FH4A8FDHK4N
- Page 1 OWNER’S MANUAL WASHING MACHINE Before beginning installation, read these instructions carefully. This will simplify installation and ensure that the product is installed correctly and safely. Leave these instructions near the product after installation for future reference. FH4A8FDHK(0-9)N www.lg.com MFL69042588...
-
Page 2: Table Of Contents
TABLE OF CONTENTS This manual is produced for a group of products and may contain images or content different from the model you purchased. This manual is subject to revision by the manufacturer. SAFETY INSTRUCTIONS ........03 Important Safety Instructions ...............05 INSTALLATION ............08 Specifications ..................08 Accessories ..................08... -
Page 3: Safety Instructions
SAFETY INSTRUCTIONS The following safety guidelines are intended to prevent unforeseen risks or damage from unsafe or incorrect operation of the product. The guidelines are separated into ‘WARNING’ and ‘CAUTION’ as described below. This symbol is displayed to the indicate matters and operations that can cause risk. - Page 4 GROUNDING REQUIREMENTS WARNING For your safety, the information in this manual must be followed to minimize the risk of fire, explosion, or electric shock, or to prevent property damage, injury to persons, or death. • This appliance must be grounded. In the event of malfunction or breakdown, grounding will reduce the risk of electric shock by providing a path of least resistance for electric current.
-
Page 5: Important Safety Instructions
It can cause electric shock or injury. • Only an authorized repair person from LG Electronics service centre should • This appliance is heavy. Two or more disassemble, repair, or modify the people may be needed to install and product. - Page 6 This can cause fire. • In case of flood, stop using the product and contact the LG Electronics service • Remove the power plug when you clean centre. Contact with water can cause the product. Not removing the plug may electric shock.
- Page 7 Technical Safety for Using the Disposal Tumble Dryer • Before discarding an old appliance, unplug it. Render the plug useless. • Do not dry unwashed items in the Cut off the cable directly behind the appliance. appliance to prevent misuse. •...
-
Page 8: Installation
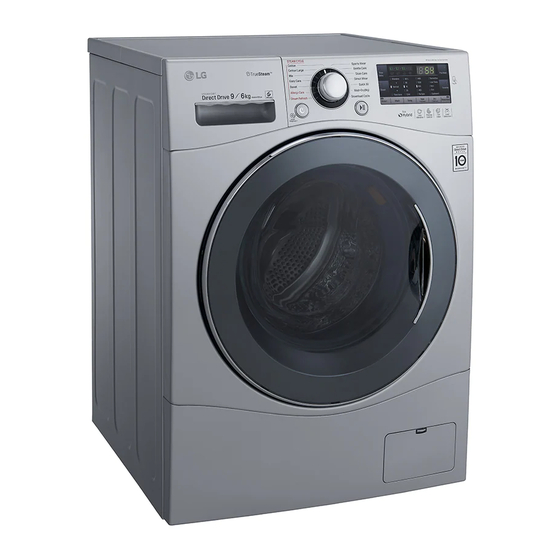
INSTALLATION Specifications Transit bolts Power plug Drawer Control panel Drum Door Drain hose Drain plug Drain pump filter Cover cap (Location may vary depending on products) Adjustable feet • Power supply : 220‒240 V~, 50 Hz • Size : 600 mm (W) X 640 mm (D) X 850 mm (H) •... -
Page 9: Installation Place Requirements
Installation Place Requirements • Do not install your washing machine in rooms where freezing temperatures may occur. Frozen hoses may Location burst under pressure. The reliability of the electronic control unit may be impaired at temperatures below freezing point. • Please ensure that when the washing machine is installed, it is easily accessible for an engineer in the event of a breakdown. -
Page 10: Unpacking And Removing Shipping Bolts
Unpacking and Removing Install the hole caps. Shipping Bolts • Locate the hole caps included in the accessory pack and install them in the shipping bolt holes. Lift the washing machine off the foam base. • After removing the carton and shipping material, lift the washing machine off the foam base. -
Page 11: Using Non-Skid Pads (Optional)
• It is most effective to install the non-skid pads • You can obtain rubber cups (p/no.4620ER4002B) from under the front legs. If it is difficult to place the the LG Service Centre. pads under the front legs, place them under the NOTE back legs. -
Page 12: Leveling The Washing Machine
Leveling the Washing Machine Connecting Inlet Hose If the floor is uneven, turn the adjustable feet as required • Water supply pressure must be between 100 kPa and (Do not insert pieces of wood etc. under the feet). Make 1000 kPa (1.0‒10.0 kgf/cm sure that all four feet are stable and resting on the floor •... - Page 13 Connecting Hose to Water Tap Push the adapter onto the end of the tap so that the rubber seal forms a watertight connection. Connecting screw-type hose to tap with thread Tighten the four fixing screws. Screw the hose connector onto the water supply tap. Push the inlet hose vertically upwards so that the rubber seal within the hose can adhere completely to the tap and then tighten it by screwing it to the...
- Page 14 Connecting Hose to Washing Machine Push the adapter onto the end of the tap so that the rubber seal forms a watertight connection. Make sure that there are no kinks in the hose and that Tighten the adapter ring plate and the four fixing they are not crushed.
-
Page 15: Installation Of Drain Hose
Installation of Drain Hose • The drain hose should not be placed higher than 100 cm above the floor. Water in the washing machine may not drain or may drain slowly. • Securing the drain hose correctly will protect the floor from damage due to water leakage. -
Page 16: Operation
OPERATION Using the Washing Machine Choose the desired washing cycle. • Press the Cycle button repeatedly or turn the Before the first wash, select a cycle (Cotton 60 °C, add cycle selector knob until the desired cycle is a half load of detergent), allow the washing machine selected. -
Page 17: Sorting Iaundry
Sorting Iaundry Caring before loading. • Combine large and small items in a load. Load Look for a care label on your clothes. large items first. • This will tell you about the fabric content of your • Large items should not be more than half the garment and how it should be washed. -
Page 18: Adding Cleaning Products
Adding Cleaning Products NOTE • Do not let the detergent harden. Detergent Dosage Doing so may lead to blockages, poor rinse performance or odour. • Detergent should be used according to the instruction of the detergent manufacturer and selected according •... - Page 19 • Do not leave the fabric softener in the detergent Using tablet drawer for more than 2 days (Fabric softener may Open the door and put tablets into the drum. harden). • Softener will automatically be added during the last rinse cycle.
-
Page 20: Control Panel
Control Panel Power button Programme Dial • Press the Power button to turn the washing • Programmes are available according to laundry machine on. type. • To cancel the Time Delay function, the Power • Lamp will light up to indicate the selected button should be pressed. -
Page 21: Washing Programme
Washing Programme Programme table Proper Maximum Programme Description Fabric Type Temp. Load 40°C Provides better performance by Cotton (Cold to Coloured fast garments (shirts, combining various drum motions. 95 °C) nightdresses, pajamas, etc) Rating and normally soiled cotton load 60°C Provides optimised washing (underwear). - Page 22 Proper Maximum Programme Description Fabric Type Temp. Load 40°C This cycle provides a nonstop process A small amount of laundry which can Wash+Dry 6.0 kg (Cold to of washing and drying in the same cycle. be dried. 95 °C) This cycle is for hand and machine 20 °C washable delicate clothes such as wool, hand washable clothes, delicate,...
- Page 23 Drying Programme Table Programme Description Fabric Type Maximum Load A special cycle to reduce water usage during the dry cycle. For cottons. Select this cycle to reduce Cotton or linen fabrics such as cotton Cupboard cycle time and energy usage during the Rating towels, t-shirts, and linen laundries.
- Page 24 Extra Options Time Steam Steam Time Programme Favorite Intensive Rinse+ Delay Wash Softener Wash Save ● ● ● ● ● ● ● ● ● Cotton ● ● ● ● ● ● ● ● Cotton Large ● ● ● ● ● ●...
- Page 25 Operating Data Programme Max RPM Cotton 1400 Cotton Large 1400 Easy Care 1000 1400 Allergy Care 1400 Direct Wear 1000 Steam Refresh Duvet 1000 Sports Wear Quick 30 1400 Gentle Care Wash+Dry 1400 Stain Care 1400...
-
Page 26: Option Cycle
Option Cycle Steam (Optional) Steam Wash features enhanced washing performance Time Delay with low energy consumption. Steam Softener sprays You can set a time delay so that the washing machine steam after a spinning cycle to reduce creases and will start automatically and finish after a specified time make the laundry fluffy. - Page 27 Favorite Temp. Favorite programme allows you to store a customized The Temp. button selects the wash and rinse wash cycle for future use. temperature combination for the selected cycle. Press this button until the desired setting is lit. All rinses use Press the Power button.
-
Page 28: Dry (Optional)
Dry (Optional) ( Child Lock ( Select this function to lock the buttons on the control Use the your Automatic cycles to dry most loads. assembly to prevent tampering. Electronic sensors measure the temperature of the exhaust to increase or decrease drying temperatures for faster reaction time and tighter temperature control. - Page 29 Drying Time Guide Woolen Articles • The drying time can be selected by pressing the Dry • Do not tumble dry woolen articles. Pull them to their original shape and dry them flat. button. • Drying course can last up to 340 min. Woven and Loopknit Materials •...
-
Page 30: Using Smart Function (Optional)
After selecting a desired function, follow the smart product. instructions shown on the display. Installation from App Store • Search ‘LG Smart Washing Machine’ on the app store Identifying Name of the Product Model from your device. Check the label affixed to the product. -
Page 31: Maintenance
MAINTENANCE Care and Cleaning of the Interior WARNING • Unplug the washing machine before cleaning to • Use a towel or soft cloth to wipe around the washing avoid the risk of electric shock. Failure to follow machine door opening and door glass. this warning may result in serious injury, fire, •... -
Page 32: Cleaning The Drain Pump Filter
Cleaning the Drain Pump Filter After cleaning, turn the pump filter and insert the drain plug. • The drain filter collects threads and small objects left in the laundry. Check regularly that the filter is clean to ensure smooth running of your washing machine. •... -
Page 33: Cleaning The Dispenser Drawer
Cleaning the Dispenser Drawer Tub Clean (Optional) Detergent and fabric softener may build up in the Tub Clean is a special cycle to clean the inside of the dispenser drawer. Remove the drawer and inserts and washing machine. check for buildup once or twice a month. A higher water level is used in this cycle at higher spin speed. -
Page 34: Caution On Freezing During Winter
Caution on Freezing During • After closing the tap, disconnect the cold inlet hose from the tap, and remove water while keeping the Winter hose facing downwards. • When frozen, the product does not operate normally. Make sure to install the product where it will not freeze during winter. - Page 35 How to Handle Freezing • When water is removed completely from the drum, close the hose plug used for removal of residual • Make sure to empty the drum, pour warm water of water, select Rinse and Spin, and press the Start/ 50–60 °C up to the rubber part inside the drum, close Pause button.
-
Page 36: Using The Smart Diagnosis™ Function
Use this function if you need an accurate diagnosis using the information transmitted for analysis. by an LG Electronics service centre when the product NOTE malfunctions or fails. Use this function only to contact •... -
Page 37: Troubleshooting
TROUBLESHOOTING • Your washing machine is equipped with an automatic error-monitoring system to detect and diagnose problems at an early stage. If your washing machine does not function properly or does not function at all, check the following before you call for service: Diagnosing Problems Symptoms Reason... - Page 38 Symptoms Reason Solution Electrical power cord may not be plugged in or connection may be • Make sure plug fits tightly in wall outlet. loose. • Reset circuit breaker or replace fuse. Do Washing machine does House fuse blown, circuit breaker not increase fuse capacity.
-
Page 39: Error Messages
Error Messages Symptoms Reason Solution Water supply is not adequate in • Check another tap in the house. area. Water supply taps are not • Fully open tap. completely open. Water inlet hose(s) are kinked. • Straighten hose(s). The filter of the inlet hose(s) are •... - Page 40 Symptoms Reason Solution • Close the door completely. Ensure door is not open. If ‘ ’ is not released, call for service. • Unplug the power plug and call for service. • Close the water tap. Water overfills due to the faulty •...
-
Page 41: Warranty
• Damage or failure caused by incorrect electrical current, voltage, or plumbing codes, commercial or industrial use, or use of accessories, components, or consumable cleaning products that are not approved by LG. • Damage caused by transportation and handling, including scratches, dents, chips, and/or other damage to the finish of your product, unless such damage results from defects in materials or workmanship. - Page 42 Not draining caused by clogging Clean the pump filter. of pump filter. Water is not coming because Clean the inlet valve filter water inlet valve filters are or reinstall the water inlet clogged or water inlet hoses are hoses. kinked. Inlet Filter Water is not coming because too Clean the detergent...
- Page 43 Level Service trips to deliver, pick The warranty covers up, install the product or for manufacturing defects instruction on product use. The only. Service resulting from removal and reinstallation of the improper Installation is not Product. covered. 1° If all screws are not installed Install 4 screws at each properly, it may cause excessive corner (Total 16EA).
- Page 44 Memo...
- Page 45 Memo...
- Page 46 Memo...
- Page 47 دليل المالك الغسالة .قبل البدء في تركيب الجهاز، اقرأ هذه التعليمات بعناية حيث سيبسط ذلك عملية التركيب ويضمن تركيب الجهاز بشكل صحيح وآمن. واحتفظ بهذه التعليمات .بالقرب من المنتج بعد التركيب للرجوع إليها في المستقبل FH4A8FDHK(0-9)N www.lg.com...
- Page 48 جدول المحتويات يتم إنتاج هذا الدليل لمجموعة من المنتجات وقد يحتوي على صور أو .محتوى يختلف عن الطراز الذي اشتريته .يخضع هذا الدليل للمراجعة من الشركة المص ن ّ عة 3............... إرشادات السالمة 5 ..................إرشادات السالمة الهامة 8................التركيب 8 ....................المواصفات 8 .....................
- Page 49 إرشادات السالمة يتمثل الغرض من إرشادات السالمة التالية في الحيلولة دون وقوع المخاطر غير المتوقعة أو األضرار الناجمة عن .التشغيل غير اآلمن أو غير الصحيح للمنتج .يتم تقسيم اإلرشادات إلى "تحذير" و"تنبيه" على النحو الموضح أدناه يتم عرض هذا الرمز لإلشارة إلى األمور وعمليات التشغيل التي يمكن أن تسبب مخاطر. اقرأ الجزء الذي .يحمل...
- Page 50 متطلبات التأريض تحذير ،من أجل سالمتك، يجب اتباع المعلومات الواردة في هذا الدليل للحد من خطر نشوب حريق، أو حدوث انفجار .أو التعرض لصدمة كهربائية، أو لمنع حدوث تلف في الممتلكات، أو إصابة األشخاص، أو الوفاة يجب تأريض هذا الجهاز. في حالة حدوث أي خلل أو عطل، سيحد التأريض من خطر التعرض لصدمة كهربائية من خالل •...
- Page 51 .يتسبب ذلك في التعرض لصدمة كهربائية أو اإلصابة يجب أن يقوم فني اإلصالح المعتمد من مركز خدمة • فقط بفك المنتج أو إصالحه أوLG Electronics هذا الجهاز ثقيل. قد يتطلب تركيب الجهاز ونقله وجود • تعديله. حيث قد تتسبب الخدمة غير السليمة في وقوع...
- Page 52 أو أسالك اإلطالة. حيث يمكن أن يتسبب ذلك في نشوب .حريق في حالة الفيضان، توقف عن استخدام المنتج واتصل • . حيث يمكن أنLG Electronics بمركز خدمة انزع قابس الطاقة عند تنظيف المنتج. يمكن أن ينتج • .تتسبب مالمسة الماء في التعرض لصدمة كهربية...
- Page 53 التخلص السالمة الفنية الستخدام مجفف المالبس قبل التخلص من جهاز قديم، قم بفصله. تخل عن القابس • .ال تجفف األغراض غير المغسولة في الجهاز • ً عديم الفائدة. اقطع الكابل الموجود خلف الجهاز مباشر ة يجب أن تغسل األغراض المتسخة بمواد مثل زيوت •...
- Page 54 التركيب المواصفات مسامير النقل قابس الطاقة درج لوحة التحكم ح ل ّ ة الغسل باب خرطوم التصريف سدادة التصريف فلتر مضخة التصريف غطاء الغالف (يمكن أن يختلف مكانه حسب )المنتجات أقدام قابلة للضبط مصدر الطاقة: 022‒042 فولت~، 05 هرتز • )الحجم: 006 مم...
- Page 55 متطلبات مكان التركيب ال تركب الغسالة في غرف يمكن أن تصل درجة حرارتها إلى التجمد. حيث • يمكن أن تنفجر الخراطيم المتجمدة تحت الضغط. يمكن أن تقل كفاءة وحدة الموقع .التحكم اإللكترونية في ظل درجات الحرارة األقل من درجة التجمد يرجى...
- Page 56 فك مسامير الشحن وإزالتها .تركيب أغطية الفتحات حدد مكان أغطية الفتحات المرفقة في حزمة الملحقات ثم ر ك ّ بها في • .ارفع الغسالة عن القاعدة اإلسفنجية .فتحات مسامير الشحن بعد إزالة الكرتون ومواد الشحن، ارفع الغسالة عن القاعدة • اإلسفنجية.
- Page 57 • 0264) منER4002B.p/no( يمكنك الحصول على األكواب المطاطية • أكثر فاعلية. إذا كان من الصعب وضع الحشيات المانعة لالنزالق .LG مركز خدمة .تحت األرجل األمامية، فضعها تحت األرجل الخلفية مالحظة هذا الجانب العلوي ،يضمن تحديد المكان والمستوى المناسبين للغسالة تشغيل لفترة طويلة...
- Page 58 توصيل خرطوم اإلدخال تسوية الغسالة يجب أن يكون ضغط إمداد الماء ما بين 1.0 ميجا باسكال و0.1 ميجا باسكال • إذا كانت األرضية غير مستوية، فأدر األقدام القابلة للضبط حسب الحاجة (ال )0.1‒0.01 كجم ثقلي/سم تضع قطع الخشب وما إلى ذلك تحت األقدام). تأكد من أن جميع األقدام األربعة مستقرة...
- Page 59 توصيل الخرطوم بصنبور الماء ادفع المحول إلى طرف الصنبور بحيث تشكل الحشية المطاطية وصلة .منيعة للماء. وأحكم ربط مسامير التثبيت األربعة توصيل الخرطوم اللولبي بالصنبور المزود بأسنان .ثبت موصل الخرطوم بصنبور إمداد الماء ادفع خرطوم اإلدخال بشكل عمودي ألعلى بحيث يمكن لمانعة التسريب المطاطية...
- Page 60 توصيل الخرطوم بالغسالة ادفع المحول إلى طرف الصنبور بحيث تشكل الحشية المطاطية وصلة .منيعة للماء .تأكد من عدم وجود التواءات في الخرطوم وأن الخرطوم غير مضغوط .أحكم ربط اللوحة الحلقية للمحول ومسامير التثبيت األربعة .عندما تحتوي الغسالة على صمامين يكون خرطوم المدخل المزود بموصل باللون األحمر خاص بصنبور الماء •...
- Page 61 تركيب خرطوم التصريف ال يجب وضع خرطوم التصريف على ارتفاع أعلى من 001 سم عن • األرض. حيث قد ال يتم تصريف الماء الموجود في الغسالة أو يمكن تصريفه .ببطء سيؤدي تثبيت خرطوم التصريف بطريقة صحيحة إلى حماية األرضية من •...
- Page 62 التشغيل استخدام الغسالة .اختيار دورة الغسيل المطلوبة اضغط على زر الدورة بشكل متكرر أو أدر مقبض اختيار الدورة • 06 درجة مئوية، وأضف نصفCotton( قبل الغسلة األولى، حدد الدورة .حتى يتم تحديد الدورة المطلوبة حمل من المنظف)، واترك الغسالة تعمل بدون وضع مالبس. سيؤدي هذا إلى .إزالة...
- Page 63 فرز الغسيل .العناية قبل وضع الحمولة اجمع بين األغراض الكبيرة والصغيرة في الحمولة. وضع • .ابحث عن ملصق العناية الموجود على مالبسك . ً األغراض الكبيرة أو ال .سيوضح لك هذا الملصق محتويات أقمشة مالبسك وطريقة غسلها • .ال يجب أن تزيد األغراض الكبيرة عن نصف إجمالي الحمولة •...
- Page 64 إضافة منتجات التنظيف مالحظة .ال تترك المنظفات تتصلب • مقدار المنظف حيث يمكن أن يؤدي ذلك إلى حدوث انسداد، أو ضعف في أداء .الشطف، أو رائحة يجب استخدام المنظف وف ق ً ا لتعليمات الشركة المصنعة للمنظف، واختيارها • .وف ق ً ا لنوع األقمشة، ولونها، ومدى اتساخها، ودرجة حرارة الغسيل .الحمولة...
- Page 65 استخدام األقراص ال تترك منعم القماش في درج المنظفات ألكثر من يومين (يمكن أن يتصلب • .)منعم القماش .افتح الباب وضع األقراص في حلة الغسل .سيتم إضافة المنعم تلقائ ي ًا خالل دورة الشطف األخيرة • .ال تفتح الدرج في أثناء اإلمداد بالماء •...
- Page 66 لوحة التحكم الخيارات )زر (الطاقة .يسمح لك ذلك بتحديد دورة إضافية وسيضيء عندما يتم تحديده • .اضغط على زر الطاقة لتشغيل الغسالة • استخدم هذه األزرار لتحديد خيارات الدورة المطلوبة للدورة • .، يجب الضغط على زر الطاقةTime Delay إللغاء وظيفة •...
- Page 67 جدول البرامج برنامج الغسيل درجة الحرارة الحد األقصى نوع القماش الوصف البرنامج للحمولة المناسبة 04 درجة مئوية يوفر أداء أفضل من خالل الجمع بين حركات حلة Cotton 95 (باردة تصل إلى .الغسل المختلفة )(القطن المالبس السريعة الملونة (القمصان، وفساتين )درجة مئوية تقديري...
- Page 68 درجة الحرارة الحد األقصى نوع القماش الوصف البرنامج للحمولة المناسبة 04 درجة مئوية توفر هذه الدورة عملية غسيل وتجفيف مستمرة في Wash+Dry 0.6 كجم 95 (باردة تصل إلى .كمية صغيرة من الغسيل يمكن تجفيفها )(غسيل + تجفيف .الدورة نفسها )درجة مئوية هذه...
- Page 69 برنامج التجفيف الحد األقصى للحمولة نوع القماش الوصف البرنامج .دورة خاصة لتقليل استخدام الماء في أثناء دورة التجفيف )(البيئة Cupboard أقمشة القطن أو الكتان مثل المناشف القطنية، والقمصان خاص باألقطان. اختر هذه الدورة لتقليل وقت الدورة تقديري .ذات النصف ك ُ م، والمالبس الكتانية .واستخدام...
- Page 70 خيارات إضافية Time Time Rinse+ Intensive Save Wash Favorite الغسيل Delay التنعيم بالبخار البرنامج )(تجفيف )+ (شطف )(غسيل مكثف (توفير (غسيل )(المفضل بالبخار (تأخير )الوقت )مبدئي )الوقت Cotton ● ● ● ● ● ● ● ● ● )(القطن Cotton Large ●...
- Page 71 بيانات التشغيل الحد األقصى لعدد الدورات في الدقيقة البرنامج 1400 ) (القطنCotton ) (مالبس قطنية كبيرةCotton Large 1400 1000 ) (عناية سهلةEasy Care 1400 ) (خليطMix 1400 ) (عناية ضد الحساسيةAllergy Care ) (االرتداء مباشرةDirect Wear 1000 ) (الترطيب بالبخارSteam Refresh 1000 )...
- Page 72 دورة الخيارات ) (البخار) (اختياريSteam تعزز ميزات الغسيل بالبخار أداء الغسيل مع استهالك منخفض للطاقة. ينشر ) (تأخير الوقتTime Delay التنعيم بالبخار البخار بعد دورة التنشيف للحد من الكرمشة ولجعل الغسيل يمكنك ضبط وقت التأخير بحيث تبدأ الغسالة تلقائ ي ًا وتنتهي بعد فترة زمنية .منفو...
- Page 73 ) (درجة الحرارةTemp. ) (المفضلFavorite مزج درجة حرارة الغسيل والشطف للدورة المحددة. اضغطTemp. يحدد الزر .يسمح لك البرنامج المفضل بتخزين دورة غسيل مخصصة لالستخدام المستقبلي على هذا الزر حتى يضيء اإلعداد المطلوب. تستخدم جميع دورات الشطف ماء .اضغط على الزر الطاقة .الصنبور...
- Page 74 ( ) (تجفيف) (اختياريDry ( ) (القفل ضد عبث األطفالChild Lock .حدد هذه الوظيفة لقفل األزرار في مجموعة التحكم لمنع التالعب بها استخدم الدورات التلقائية الخاصة بك لتجفيف معظم الحموالت. تقيس المستشعرات اإللكترونية درجة حرارة العادم لزيادة درجات حرارة التجفيف أو .خفضها...
- Page 75 دليل وقت التجفيف األغراض الصوفية ال تقلب األغراض الصوفية الجافة. واسحبها إلى شكلها األصلي وجففها على • .) (التجفيفDry يمكن تحديد وقت التجفيف من خالل الضغط على الزر • . ٍ سطح مستو .يمكن أن تستمر دورة التجفيف حتى 043 دقيقة •...
- Page 76 اإلرسال جي د ً ا. في بعض الحاالت، قد ال تتمكن الهواتف المزودة . من اإلرسال بنجاحNFC بخاصية LG" قد يختلف المحتوى الموجود في هذا الدليل وف ق ً ا إلصدار تطبيق • ."، وقد يتم تعديله دون إبالغ العمالءSmart Laundry...
- Page 77 الصيانة العناية والتنظيف من الداخل مالحظة .افصل الغسالة قبل التنظيف لتجنب خطر التعرض لصدمة كهربائية • استخدم فوطة أو قطعة قماش ناعمة لمسح المنطقة المحيطة بفتحة باب • قد يسبب عدم اتباع هذا التحذير إلى التعرض إلى إصابة خطيرة، أو .الغسالة...
- Page 78 تنظيف فلتر مضخة التصريف .بعد التنظيف، قم بتدوير فلتر المضخة وأدخل سدادة التصريف يجمع فلتر التصريف الخيوط واألغراض الصغيرة المتبقية في الغسيل. تحقق • .بانتظام من أن الفلتر نظيف حتى تضمن التشغيل السلس للغسالة اترك الماء ليصبح بار د ً ا قبل تنظيف مضخة التصريف، وتنفيذ التفريغ •...
- Page 79 ) (تنظيف الحوض) (اختياريTub Clean تنظيف درج الموزع .تنظيف الحوض هو دورة خاصة لتنظيف الغسالة من الداخل قد يتراكم المنظف ومنعم القماش في الدرج الموزع. أخرج الدرج والملحقات .وتحقق من وجود مواد متراكمة مرة أو مرتين في الشهر يستخدم مستوى ماء أعلى في هذه الدورة وسرعة تنشيف أعلى. وأجر ِ هذه .الدورة...
- Page 80 توخ الحذر من التجمد في أثناء الشتاء بعد غلق الصنبور، افصل خرطوم اإلدخال البارد من الصنبور، وأزل الماء • .في أثناء توجيه الخرطوم ألسفل في حالة التجمد، ال يعمل المنتج بشكل طبيعي. وتأكد من تثبيت المنتج في • .مكان لن يتجمد فيه في أثناء الشتاء إذا...
- Page 81 كيفية التعامل مع التجمد عند إزالة الماء بشكل كامل من الحوض، أغلق سدادة الخرطوم المستخدمة • في إزالة الماء المتبقي، وحدد شطف وتنشيف واضغط على زر بدء/إيقاف تأكد من تفريغ حلة الغسل، ثم صب ما ء ً داف ئ ً ا درجة حرارته 05-06 درجة •...
- Page 82 مركز االتصال الذي سيتمكن من مساعدتك باستخدام المعلومات استخدم هذه الوظيفة إذا كنت بحاجة إلى تشخيص دقيق من مركز خدمة .المرسلة للتحليل عند تعطل المنتج أو توقفه عن العمل. ال تستخدم هذهLG Electronics مالحظة .الوظيفة إال لالتصال بمندوب الخدمة، وليس أثناء التشغيل العادي...
- Page 83 استكشاف المشكالت وإصالحها تم تزويد غسالتك بنظام رصد الخطأ آل ي ًا لكشف المشكالت وتشخيصها في مرحلة مبكرة. وإذا لم تعمل الغسالة بشكل صحيح أو لم تعمل على اإلطالق، فتحقق من • :التالي قبل االتصال بالخدمة مشكالت التشخيص الحل السبب األعراض...
- Page 84 الحل السبب األعراض قد يكون سلك الطاقة الكهربية غير متصل أو أن .تأكد من تثبيت القابس بإحكام في مقبس الحائط • .السلك غير موصل بشكل ٍ محكم أعد ضبط قاطع التيار في الدائرة أو استبدل المصهر. ال • تزد من مقدار التيار في المصهر. إذا كانت المشكلة هي قد...
- Page 85 رسائل الخطأ الحل السبب األعراض .استخدم صنبورً ا آخر في المنزل .إمداد الماء غير كا ف ٍ في هذه المنطقة • .افتح الصنبور بشكل ٍ كامل • .صنابير إمداد الماء ليست مفتوحة بشكل ٍ كامل .)قم بتسوية الخرطوم (الخراطيم • .
- Page 86 الحل السبب األعراض .أغلق الباب تما م ًا • .تأكد أن الباب مغلق "، فاتصل بمركز " في حالة ظهور .الخدمة للحصول على المساعدة افصل قابس الطاقة واتصل بمركز الخدمة للحصول على • .المساعدة .أغلق صنبور الماء • ينتج الملء الزائد للماء عن وجود عيب في صمام .افصل...
- Page 87 .التكاليف المتعلقة بنقل المنتج الخاص بك من المنزل إلصالحه • وكتيبات دليلLG إزالة المنتج وإعادة تركيبه إذا تم تركيبه في مكان ال يمكن الوصول إليه أو لم يتم تركيبه وف ق ً ا لتعليمات التركيب المنشورة، في كل من دليل مالك •...
- Page 88 ال يدخل الماء إلى الغسالة بسبب انسداد فالتر قم بتنظيف فلتر صمام اإلدخال أو أعد صمامات إدخال الماء أو التواء خراطيم إدخال .تركيب خراطيم إدخال الماء .الماء فلتر اإلدخال ال يدخل الماء إلى الغسالة بسبب االستخدام .قم بتنظيف درج مو ز ّ ع المنظفات الموز...
- Page 89 مستوي يغطي الضمان عيوب التصنيع فقط. ال ،رحالت الخدمة لتوصيل المنتج، أو نقله يتم تغطية الخدمة الناجمة عن التركيب أو إعادة تركيبه، أو لتقديم تعليمات استخدام .غير الصحيح .المنتج. فك المنتج وإعادة تركيبه °1 إذا كانت جميع البراغي غير مثبتة بشكل قم...
- Page 90 مذكرة...
- Page 91 مذكرة...
Need help?
Do you have a question about the FH4A8FDHK4N and is the answer not in the manual?
Questions and answers