Advertisement
Table of Contents
Assembly Instructions
A
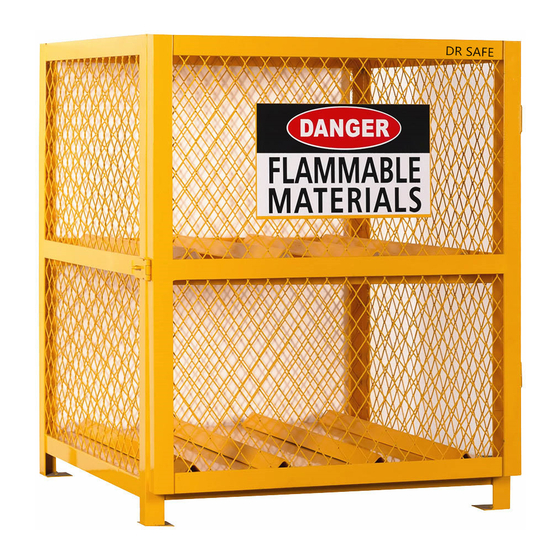
Back panel
1 PC
G
1/4 " × 3/4 "
Bolt and nut
26 Pairs
*Caution: Two person assembly is recommended.
1. In an open assembly area free of obstructions, place the base (B) upright as
shown. Assemble each side panel (D) by hand-tightening the bolts, washers, and
nuts provided (G & H). Side panels should be mounted such that the flat part of the
shelf support rail will face upward.
F
3. Connect the back panel (A) to side panels (D) using bolts, washers, and nuts
provided (G & H). Ensure the unit remains square and firmly tighten the nuts.
Note: out of square assembly will prevent the door from closing properly.
DR. SAFE
"For A safe Environment!"
B
C
.
.
.
Door
Base
1 PC
1 PC
H
Washer
26 PCS
CYLINDER STORAGE CABINET
MODEL: CCH004
D
Side panel
2 PCS
Flat edge of rail facing upward
2. Assemble the top panel (F) to the side panels (D). Hand-tighten the bolts,
washers, and nuts provided (G & H). Ensure the unit is square and firmly tighten
the bolts connecting the side panels to the base. Tighten the bolts connecting the
side panels to the top panel. Set unit upright.
Flat edge of rail facing upward
5CHL0
E
F
29"
Shelf
Top panel
1 PC
1 PC
D
A
B
Advertisement
Table of Contents

Related Manuals for DR. SAFE CCH004


Summary of Contents for DR. SAFE CCH004
- Page 1 CYLINDER STORAGE CABINET Assembly Instructions 5CHL0 MODEL: CCH004 29" Door Back panel Base Side panel Shelf Top panel 1 PC 1 PC 1 PC 2 PCS 1 PC 1 PC 1/4 " × 3/4 " Washer Bolt and nut 26 Pairs 26 PCS *Caution: Two person assembly is recommended.
- Page 2 CYLINDER STORAGE CABINET Assembly Instructions 5CHL0 MODEL: CCH004 4. Attach the door (C) to the assembly using bolts, washers, and nuts provided (G & H). Note: that the hinges are configured for a left-hand swing, but mounting hardware can be removed and reversed to a right-hand swing if desired. Hand-tighten nuts, adjust the door's position such that an even gap is maintained on all sides.
Need help?
Do you have a question about the CCH004 and is the answer not in the manual?
Questions and answers