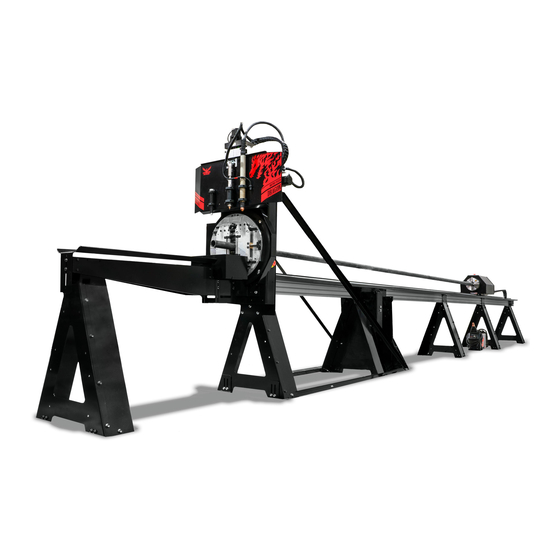
Summary of Contents for Bend-Tech Dragon Machines
- Page 1 Part 1 of 1 Dragon Machines Material Coolant System Assembly Manual Revision 7 | English ©2021 Bend-Tech LLC...
- Page 2 We are constantly working to improve and advance our products to increase performance, user satisfaction and experience. Bend-Tech LLC assumes no responsibility for errors or omissions regarding this manual. Bend-Tech LLC assumes no liability for damages resulting from the use of the information contained in this publication.
- Page 3 Dragon Machines Material Coolant System Assembly Manual Revision 7 English Original Instructions August 2021 Bend-Tech, LLC 729 Prospect Ave. Osceola, WI 54020 USA (651) 257-8715 www.bend-tech.com support@bend-tech.com Bend-Tech Dragon Material Coolant System Assembly Manual...
-
Page 4: Table Of Contents
2.2.8 Support Leg Braces ..14 2.2.9 Finishing the Coolant Tray Assembly ..... 15 Bend-Tech Dragon Material Coolant System Assembly Manual... -
Page 5: Contents
This warranty does not cover components subject to wear due to normal use of the machine such as belts, lights, tooling etc. This warranty is void if Bend-Tech, LLC has determined any failure is the result of mishandling, abuse, misuse, improper installation, improper storage, improper maintenance or unauthorized modification of the machine. -
Page 6: Customer Satisfaction Commitment
Contact Us Bend-Tech’s hours of operation are Monday - Friday, 8:00 - 5:00 EST. The Bend-Tech support team and sales team are always available during our hours of operation. Phone: 651-257-8715 Email: Sales team: sales@bend-tech.com... -
Page 7: Parts And Equipment
• Pipe (11) • Material Rollers (3) • Clear Silicone (1) • PVC Cement (1) • Cushion Clamps (6) • Leveling Feet (6) • Disposable Mesh Bags (2) • 8 in. zip ties (8) Bend-Tech Dragon Material Coolant System Assembly Manual... -
Page 8: Tools And Equipment
• ⅜ in. Ratchet • 7/16 in. socket • 9/16 in. socket • Cordless drill or driver with ⅜ in. drive or adapter • 9/16 in. wrench • ½ in. wrench • Flat head screwdriver Bend-Tech Dragon Material Coolant System Assembly Manual... -
Page 9: Material Coolant System Assembly
Utility knife • 7/16 in. socket • Rubber mallet or plastic dead • 9/16 in. socket blow hammer • Impact driver with 9/16 in. socket • Large channel lock pliers • 1/2 in. Wrench Bend-Tech Dragon Material Coolant System Assembly Manual... -
Page 10: Coolant Tray Components
Place a washer on the inside and thread a nut onto the Button Head Cap Screw. Use a 3/16 in. Allen wrench and 7/16 in. socket and ratchet to tighten the nut, securing the 1 in. Button Head gusset. Cap Screw Bend-Tech Dragon Material Coolant System Assembly Manual... -
Page 11: Leveling Feet
Thread the nuts on and snug them down. Do 4 Bolts not tighten the nuts at this time. per side Bend-Tech recommends enlisting a helper when assembling the Water Tray System. Bend-Tech Dragon Material Coolant System Assembly Manual... -
Page 12: Attach Water Tray To Parts Catcher
Beak Parts Catcher Support Leg Use a punch or small Phillips head screwdriver to help align the mounting holes in the Water Tray system. Bend-Tech Dragon Material Coolant System Assembly Manual... -
Page 13: Water Tray System Assembly
Ensure Support Leg Brace the heads of the screws are on the inside of the water tray and the nuts and washers are on the outside. Do not tighten. Support Leg Bend-Tech Dragon Material Coolant System Assembly Manual... -
Page 14: C-Bracket
Inside of Support the button head screw from the inside of the Leg (Flat End) coolant tray and the nut and washer are on the outside. Bend-Tech Dragon Material Coolant System Assembly Manual... -
Page 15: Finishing The Coolant Tray
Also thread one PVC coupler into the bung inside the parts catcher. This will allow the parts catcher to hold water to help cool parts. Teflon tape or plumber’s tape can help seal the male/female coupler in the drain bung. Bend-Tech Dragon Material Coolant System Assembly Manual... -
Page 16: Pvc Drain Installation
The material coolant system requires a water pump to be operational. Because customer needs can vary, Bend-Tech does not supply a water pump with the coolant system. The Customer will be required to supply a water pump to complete the coolant system. Refer to section 2.4.1 for water pump specifications. -
Page 17: Water Pump Requirements
Attach the wireless remote-control outlet to the Water Pump Outlet water pump power cord, and then the yellow GFCI power cable to the remote-control outlet. Bend-Tech Dragon Material Coolant System Assembly Manual... -
Page 18: Attaching The Hose To The Rail Beam
⅜ in. x 1 in. hex bolts. Tighten the bolts securely using a 9/16 in. socket and ratchet. 3/8 in. x 1 in. Bolts Bend-Tech Dragon Material Coolant System Assembly Manual... -
Page 19: Hose Reel
Remove the two screws at the front of the trolley cover, just above the chuck. Place the trolley hose mount on the trolley cover. Fasten to the trolley cover using the two trolley cover screws. Black Rubber Mat Bend-Tech Dragon Material Coolant System Assembly Manual... -
Page 20: Connect The Hose
Using the silicone sealant, place a bead of silicone around all gaps and seams in the coolant trays. Use a finger to spread the silicone evenly along the gaps and seams. Allow to cure before using the coolant system. Bend-Tech Dragon Material Coolant System Assembly Manual... -
Page 21: Control Box Guard
Fit the control box guard in the space above the control cox. The control box guard fits tightly in the space above the control box with no fasteners. Bend-Tech recommends Beam Control Box applying silicone around the edges of the... - Page 22 Material Coolant System Assembly Bend-Tech Dragon Material Coolant System Assembly Manual...
- Page 24 Bend-Tech, LLC 729 Prospect Ave. Osceola, WI 54020 1-651-257-8715 sales@bend-tech.com www.bend-tech.com...


Need help?
Do you have a question about the Dragon Machines and is the answer not in the manual?
Questions and answers