Advertisement
Quick Links
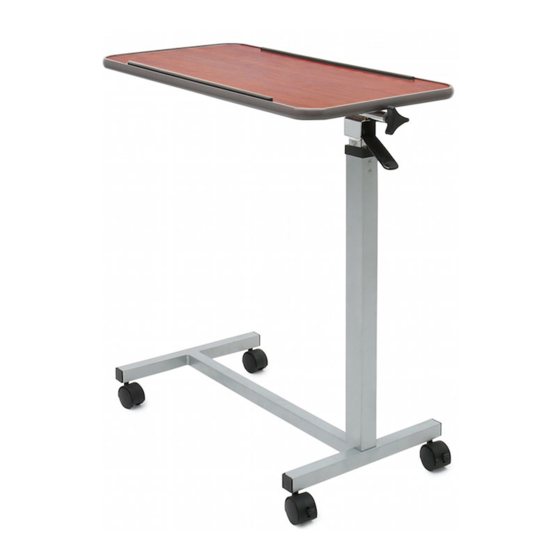
1. Remove contents from packaging and lay top board
upside down on flat surface with Mounting Tube (5)
facing upward. See Fig. 2.
2. Insert tube on Column Assembly through
Mounting Tube (5) on table top. See Fig. 4.
3. Install two Casters With Lock (8) into Base (7) which
connects to Column Assembly (2). Install two
Non-Locking Casters (9) into base opposite Column
Assembly (2). See Fig. 5.
Tilt-Top Overbed Table: MHFTAB
Assembly Instructions
4. Install two Bolt Sleeves (10) into upside down Base (7) and
then position two Bolts (12) through Bolt Plate(11) and
into Bolt Sleeves (10). Position Base (7) over Column
Assembly (2) and thread bolts into bottom of Column
Assembly (2) and tighten using 16mm wrench. See Fig. 6.
12
11
10
2
5. Turn the table upright and stand on casters.
6. CAUTION:
This step must be completed last to prevent
damage to the spring loaded mechanism. Remove the
Black Screw (13) in the Column Assembly
(2) collar labeled "Remove for Assembly" and replace it
with the Chrome Screw (14) contained in hardware
package. Do not remove Chrome Screw labeled "Do
Not Remove". See Fig. 7 and Fig. 8.
FIG. 7
WARNING
FOR SAFETY – DO NOT REMOVE BLACK SCREW (13) ON
COL-UMN ASSEMBLY (2) UNTIL THE TABLE IS FULLY
ASSEMBLED AND STANDING IN UPRIGHT POSITION. AFTER
REMOVING BLACK SCREW, REPLACE WITH CHROME SCREW
(14) INCLUDED IN HARDWARE PACKAGE.
THE BOTTOM CHROME SCREW WITH THE "DO NOT REMOVE"
LABEL SHOULD NEVER BE REMOVED AS IT WILL DAMAGE
THE UNIT AND VOID YOUR WARRANTY.
7
1
FIG. 6
Remove 13
Insert 14
FIG. 8
Advertisement

Related Manuals for MOBB Health Care MHFTAB


Summary of Contents for MOBB Health Care MHFTAB
- Page 1 Tilt-Top Overbed Table: MHFTAB Assembly Instructions 1. Remove contents from packaging and lay top board 4. Install two Bolt Sleeves (10) into upside down Base (7) and upside down on flat surface with Mounting Tube (5) then position two Bolts (12) through Bolt Plate(11) and facing upward.
- Page 2 Assembly Precautions This Overbed Table utilizes a high-tension spring loaded mech- anism to raise the table, DO NOT remove #13 Black Screw and replace with #14 Chrome Screw until table is fully assembled. DO NOT over tighten bolts, screws or use power tools when assembling this product.
Need help?
Do you have a question about the MHFTAB and is the answer not in the manual?
Questions and answers