
Subscribe to Our Youtube Channel
Related Manuals for Simmons Kids SlumberTime Melody 301030-001


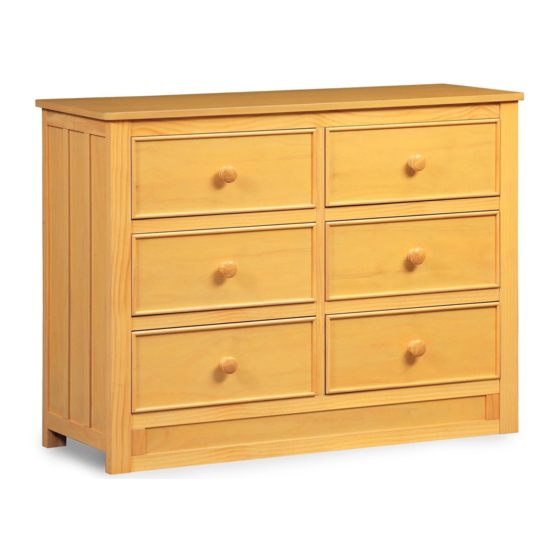
Summary of Contents for Simmons Kids SlumberTime Melody 301030-001
- Page 2 WARNING: Serious or fatal crushing injuries can occur from furniture tip-over. To help prevent tip-over: . Place heaviest items in the lowest drawers. . Unless specifically designed to accommodate, do not set TV’s or other heavy objects on the top of this product.
- Page 3 NOTAS SOBRE SU CUIDADO Y MANTENIMIENTO - No arañe ni desconche el acabado. - Inspeccione el producto con regularidad, póngase en contacto con Simmons Kids Furniture para el recambio de partes o para formular preguntas. - No guarde el producto ni ninguna de sus partes a temperaturas ni en condiciones extremas como un ático caluroso o un sótano húmedo y frío.
- Page 4 PARTS: MAKE SURE THAT ALL PRE-ASSEMBLED PARTS ARE TIGHT. D. Top Panel x1 C. Divider Frame x1 Panneau avant A. Left Side x1 B. Right Side x1 Cadre diviseur Panel superior Côté gauche Côté droit Marco divisor Part# 23207 Lado izquierdo Lado derecho Part# 23199 Part# 23197...
- Page 5 PARTS: HARDWARE KITS PART # 21941 AA. Bolt 38mm x10 BB. Bolt 25mm x8 CC. Crescent Washer x10 Boulon 38mm Boulon 25mm Rondelle en Croissant Perno 38mm Perno 25mm Arandela de Media Luna DD. WOOD DOWEL 30mm X50 FF. 25mm SCREW x24 EE.
- Page 6 HARDWARE SYSTEM - REVIEW BEFORE ASSEMBLY AA. Bolt 38mm x10 Boulon 38mm Perno 38mm CC. Crescent Washer x10 Rondelle en Croissant Arandela de Media Luna Insert the Dowels in the Post into the holes in the Rail. Insérer les goujons dans le poteau dans les orifices dans le rail. Inserte los Pasadores del Poste en los agujeros del Riel.
- Page 7 STEP #1 ÉTAPE N°1 PASO #1 DD. WOOD DOWEL 30mm x13 Cheville en Bois 30mm Pasador de Madera 30mm To assemble this unit you may be required to place the unit on it’s side and face. It is strongly recommended that assembly is done on a soft, non-abrasive surface(such as foam wrap from package) to avoid damaging the finish.
- Page 8 STEP #2 ÉTAPE N°2 PASO #2 Attach top front rail (part E) and bottom front rail (part F) to left side (part A), ensure that the slots on the rails face the inside, using (3) 38mmbolts (part AA) and (3) crescent Washers (part CC).
- Page 9 STEP #4 ÉTAPE N°4 PASO #4 DD. WOOD DOWEL 30mm X8 Cheville en Bois 30mm Pasador de Madera 30mm Insert (8) Wood Dowels (Part DD) into Divider Frame (Part C), Drawer Rails (PartJ) and Bottom Back Panel (Part K). Insert the divider frame (PartC) onto the (2) Drawer Rails and Bottom Back Panel.
- Page 10 STEP #6 ÉTAPE N°6 DD. WOOD DOWEL 30mm X2 PASO #6 AA. Bolt 38mm x2 Cheville en Bois 30mm Boulon 38mm Pasador de Madera 30mm Perno 38mm BB. Bolt 25mm x2 CC. Crescent Washer x2 Boulon 25mm Rondelle en Croissant Perno 25mm Arandela de Media Luna Insert (2) Wood Dowels (Part DD) into Divider Frame (Part C).
- Page 11 STEP #7 ÉTAPE N°7 DD. WOOD DOWEL 30mm X6 PASO #7 Cheville en Bois 30mm Pasador de Madera 30mm Insert (6) Wood Dowels (Part DD) into divider frame (part C). Insert the Bottom Back Panel (Part K) and (2) Drawer Rails (Part J) into the Divider Frame.
- Page 12 STEP #9 ÉTAPE N°9 PASO #9 DD. WOOD DOWEL 30mm X8 BB. Bolt 25mm x4 Cheville en Bois 30mm Boulon 25mm Pasador de Madera 30mm Perno 25mm GG. Bolt 45mm x8 Boulon 45mm Perno 45mm Insert (8) Wood Dowels (Part DD) into the Sides, Front and Back Top Rails, attach the Top Panel (Part D) to the base of the case from Step 8.
- Page 13 STEP #10 ÉTAPE N°10 PASO #10 JJ. Back Panel Screw x28 Vis Pour Panneau Arrière Tornillo de Panel Trasero Attach (2) Back Panels (Part L) using (28) Screws (Part JJ). Tighten with a Phillips Screwdriver. Attachez les (2) Panneaux arrière (Partie L) en utilisant les (28) Vis (Partie JJ).
- Page 14 STEP #11A ÉTAPE N°11A FF. 25mm SCREW x24 PASO #11A Vis 25mm Tornillo 25mm Attach the Right and Left Drawer Sides (Parts N and P) to the Drawer Front (Part M) with (4) Drawer Screws (Part FF). Note: Grooves in bottom must align.
- Page 15 STEP #12 ÉTAPE N°12 PASO #12 Install the drawers as shown above. Changing the position of the drawer may improve the fit and/or appearance. Installez les tiroirs comme montrés ci-dessous. Changer la position du tiroir peut améliorer l'adaptation et/ou apparence. Instale los cajones como se muestra arriba.
- Page 16 How To Operate The Drawer Glide Utilisation de la glissière Funcionamiento de los rieles de los cajones To Insert Drawer Align Male Runner On Drawer To Female Runner On Case And Push All The Way In Pour insérer tiroir Aligner Runner Homme sur le tiroir Para insertar cajón Alinear Runner Mujer en el cajón Para de hombre Runner Case y empuje hasta el fondo 1) Lift lever on left glide up and press lever on right glide down...
Need help?
Do you have a question about the SlumberTime Melody 301030-001 and is the answer not in the manual?
Questions and answers