
Related Manuals for CARVIN OVAL DIAMOND Series


Summary of Contents for CARVIN OVAL DIAMOND Series
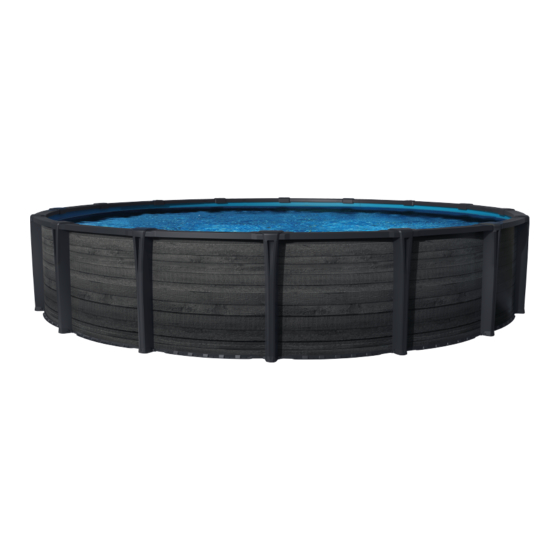
- Page 1 OVAL DIAMOND SERIES User Manual for Above-Ground Pool CARVIN POOL EQUIPMENT | 4000 boul. Casavant Ouest, Saint-Hyacinthe, Québec, Canada, J2S 9E3 ® M22905005B EN| © 2021 Le Groupe VIF Inc. All rights reserved.
-
Page 2: Table Of Contents
This manual contains information on how to do that; please read it carefully Safety recommendations before installing and using the pool. If a problem should arise, or if you have any Pool safety label questions about your product, consult an authorized CARVIN retailer or distributor. ® Pool liner label... -
Page 3: Warning
NO DIVING - NO JUMPING Le Groupe VIF Inc . SHALLOW WATER CARVIN POOL EQUIPMENT ÉQUIPEMENT DE PISCINE CARVIN 4000 boul. Casavant Ouest NE PAS PLONGER OU SAUTER • Restrict access to the pool by making sure the ladder is removed, locked or APSP- 4 Saint-Hyacinthe, Québec, Canada, J2S 9E... -
Page 4: Installation
WARNING authority having jurisdiction and may require permits If a part is missing or defective, please contact your CARVIN retailer were your ® for building, plumbing electrical, zoning etc. Check local purchase was made. -
Page 5: Preparing The Site
® CARVIN DIAMOND SERIES OVAL POOL | USER MANUAL PREPARING THE SITE GROUND LEVELING After the site is properly marked, remove the sod in the installation surface area. You will need to remove any tree stumps growing in the installation area. -
Page 6: Trench Digging
® CARVIN DIAMOND SERIES OVAL POOL | USER MANUAL TRENCH DIGGING 15x21 6′10″ (209) STEP 1 2′2″ (67) 2′5″ (74) Equal 10′ (25) You will need to dig up two trenches along the straight section of your pool in order 2′7″... -
Page 7: Unpacking The Pool Parts
® CARVIN DIAMOND SERIES OVAL POOL | USER MANUAL UNPACKING THE POOL PARTS STEP 2 Insert the sleeve (46025010) into the footbeam channel and then insert a ½ bolt Open all the boxes that were supplied with your pool. Layout on the ground all the... -
Page 8: Laying The Buttrests Inside The Trenches
® CARVIN DIAMOND SERIES OVAL POOL | USER MANUAL LAYING THE BUTTRESTS INSIDE THE TRENCHES ASSEMBLING THE TIE STRAPS Lay in the buttrest posts assemblies in the trenches. Align the upright in the middle Look into the table for part number required of tie straps confi guration and assem- of the patio block. -
Page 9: Squaring Out The Straight Section
® CARVIN DIAMOND SERIES OVAL POOL | USER MANUAL SQUARING OUT THE STRAIGHT SECTION 18’ POOL 915.46 36.042 This step is one very important. See Squaring Diagram Measurement. The Buttrests TYPICAL on each side must be aligned in respect to one to another. The posts assembly must be sitting in the middle of the patio block. -
Page 10: Assemble The Round Section Rails
® CARVIN DIAMOND SERIES OVAL POOL | USER MANUAL STEP 2 STEP 5 When assembled, screw in all foots in foot beam hole with screw. Add dust stone inside the pool before unrolling the wall. Refer to page 2 sand required. -
Page 11: Basin Assembly
® CARVIN DIAMOND SERIES OVAL POOL | USER MANUAL STEP 5 STEP 3 We suggest you install the top rails gradually as the wall is unrolled to give more When the assembly holes of the wall are aligned, you will be able to join them stability to the metal sheet. -
Page 12: The Sand Bed
® CARVIN DIAMOND SERIES OVAL POOL | USER MANUAL STEP 5 STEP 2 Once the wall is assembled, make additional checks to make sure the pool round Once the plastic sheet in place, from the sand/stone dust previously placed inside sections are perfectly round. -
Page 13: Installing The Geotextile Liner
® CARVIN DIAMOND SERIES OVAL POOL | USER MANUAL INSTALLING THE GEOTEXTILE LINER LINER INSTALLATION There are already cut to pool size geotextiles liners sold at your pool stores. Those The liner dimensions are usually a bit smaller than the pool frame. It is recom- are thick and durable. -
Page 14: Fastening The Liner On To The Pool Wall
® CARVIN DIAMOND SERIES OVAL POOL | USER MANUAL FASTENING THE LINER ON TO THE POOL WALL FOR ASSEMBLY WITH A U/J TYPE POOL LINER STEP 1 STEP 3 The top of the liner has a welded vinyl fl ange to hang the liner. It is called an overlap. -
Page 15: Installing The Top Plates - Straight Sections
® CARVIN DIAMOND SERIES OVAL POOL | USER MANUAL INSTALLING THE TOP PLATES - STRAIGHT SECTIONS STEP 2 Insert the top plate screwing detail inside the buttress post make sure that the rail is inside the rear plate channel. Before screwing make sure that the plate is sitting fl at Line up the post cover top holes with the top plate inward holes set. -
Page 16: Top Ledge Cover Installation
® CARVIN DIAMOND SERIES OVAL POOL | USER MANUAL STEP 3 STEP 2 Before screwing top ledges, pull them towards the exterior of the pool so that the Insert the rear part of the top ledge covers (hook) under top ledge and turn the top corners on the interior of the pool are pressed and fl... -
Page 17: Locking The Foots In Round Section
® CARVIN DIAMOND SERIES OVAL POOL | USER MANUAL STEP 6 STEP 2 Install the safety labels as prescribed in Section Warnings of this manual. Close skimmer opening on the outside of the pool wall with cardboard and duct tape to also prevent air from escaping. -
Page 18: Inspection
® CARVIN DIAMOND SERIES OVAL POOL | USER MANUAL STEP 5 When water reaches 4” (10 cm) deep, turn off the vacuum and remove the vacuum hose. Remove the hose Skimmer Skimmer Water return outlet Water return outlet 2’’ 4’’... -
Page 19: Water Chemistry
The hole under the skimmer must stay opened ppm = part-per-million, ppb = part per billion Keep the skimmer on the pool. Do not let water accumulate in it. Make sure the This pool series is compatible with Carvin Ollo™ Salt Chlorine Generator; consult the owner’s ®... -
Page 20: Use Of A Winter Cover
® CARVIN DIAMOND SERIES OVAL POOL | USER MANUAL USE OF A WINTER COVER STEP 1 For the use of a winter cover, we recommend you ask your local dealer for information. Since many types of winter covers are available, your dealer can advise you on the best installation for your pool. -
Page 21: Remplacement Parts
® CARVIN DIAMOND SERIES OVAL POOL | USER MANUAL REMPLACEMENT PARTS Use the original CARVIN replacement parts only. ®... - Page 22 ® CARVIN DIAMOND SERIES OVAL POOL | USER MANUAL REMPLACEMENT PARTS Use the original CARVIN replacement parts only. ®...
- Page 23 ® CARVIN DIAMOND SERIES OVAL POOL | USER MANUAL REMPLACEMENT PARTS Use the original CARVIN replacement parts only. ®...
- Page 24 ® CARVIN DIAMOND SERIES OVAL POOL | USER MANUAL REMPLACEMENT PARTS Use the original CARVIN replacement parts only. ® PART CODE DESCRIPTION QUANTITY PER SIZE(FEET) ROUND SECTION ITEM # REDWOOD / DOWNTOWN MYSTIC 12X15 12X18 12x21 12x24 15x21 15x24 15x30...
-
Page 25: Consumer Information
After following the troubleshooting section of this manual and after contacting your labour. dealer or distributor, if you have any problems with your Product, contact CARVIN ® The Warranty Period coverage starts from the original date of sale or when the unit Technical Support.
Need help?
Do you have a question about the OVAL DIAMOND Series and is the answer not in the manual?
Questions and answers