Table of Contents
Advertisement
Quick Links
Advertisement
Table of Contents

Summary of Contents for Go Electronic RCC6000
- Page 1 RCC6000 Pan/Tilt/Zoom Camera Controller User Manual...
-
Page 2: Product Features
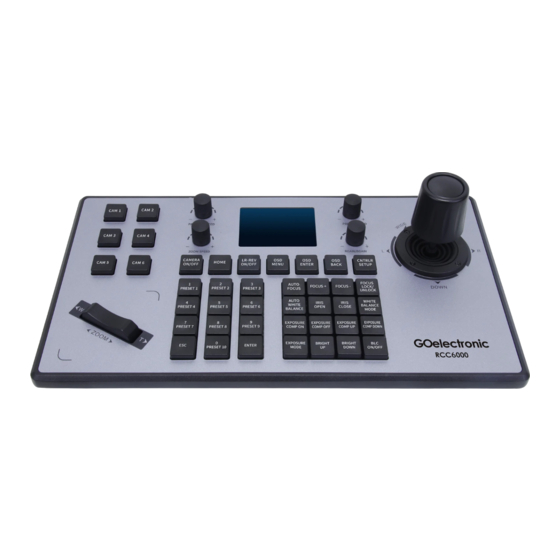
❖ Supports control of up to six cameras via shortcut keys (CAM 1, CAM 2, CAM 3, etc.) ❖ Supports standard POE power supply CONTROLLER INTERFACE 1. POWER – Power switch 2. DC12V – Power interface 3. USB – Used for updating joystick firmware 4. Ethernet – Network interface 5. RS422 6. RS232 RCC6000 user manual| 2... -
Page 3: Product Connection Diagram
IP address at this time. The controller gets its IP address dynamically. ANALOG CONNECTION Analog Mode: RS484 Connection Diagram Control Output: RS485+ of camera connects to Ta of controller and RS485- of camera connects to Tb of controller RCC6000 user manual| 3... - Page 4 GND of the camera. CONNECTION BETWEEN CAMERAS The output of camera 1 connects to the input of camera 2, the output of camera 2 connects to the input of camera 3, and so on. RCC6000 user manual| 4...
-
Page 5: Keyboard Functions
Change direction of controller; camera moves in same/opposite direction as joystick. [OSD MENU] Display camera’s on-screen display settings/functions menu. [OSD ENTER] Confirm/select within camera OSD menu [OSD BACK] Go back to previous screen within camera OSD menu RCC6000 user manual| 5... - Page 6 Select White Balance mode: Indoor, Outdoor, Manual, One-Push, Auto [EXPOSURE COMP ON] and [EXPOSURE COMP OFF] Turn on/off Exposure Compensation [EXPOSURE COMP UP] and [EXPOSURE COMP DOWN] Increase/decrease exposure compensation [EXPOSURE MODE] Select Exposure mode: Manual, Brightness Priority, Auto RCC6000 user manual| 6...
- Page 7 Increase or decrease the intensity of red and blue colors. Press the knob button to switch between Red Gain and Blue Gain. [ZOOM W/T] Use the toggle switch to zoom out (W) and zoom in (T) JOYSTICK DESCRIPTION Press the joystick button to confirm in menu mode. RCC6000 user manual| 7...
- Page 8 [ENTER] to confirm selection. 7. Reset Restore controller to default settings. Double-click [ENTER] to confirm reset. Press [ESC] to cancel. 8. Controller Check controller software version, hardware version, web version, Information gateway and subnet mask information. RCC6000 user manual| 8...
- Page 9 3. Enter Device List and select the device you want to add using the joystick (up/down). Press the joystick button or press [ENTER] to control the selected device. Device List Camera Protocol ONVIF IP Add 192.168.0.245 Port Protocol VISCA Address Baud rate 9600 RCC6000 user manual| 9...
- Page 10 ONVIF IP Add : 192.168.0.181 Port : 8999 Protocol : VISCA Address : Baud rate : 9600 3. When the screen shows the connection is successful, you can control the camera’s ptz, zoom, preset settings, etc. RCC6000 user manual| 10...
-
Page 11: Using The Web Interface
Enter this IP in a browser to access the page configuration. Enter the default login information: User Name: “admin” Password: “” (leave blank) DEVICE MANAGEMENT The Device Management interface will display as follows: Click “ ” to add or modify parameters for a specific device. RCC6000 user manual| 11... - Page 12 Input the camera number, corresponding IP address, port number and user name and click ‘Save’. SETTINGS NETWORK Use the Network function to modify the controller’s Network Type/IP acquisition method (dynamic or static) and port parameters as shown below: RCC6000 user manual| 12...
- Page 13 Use the Reset function to remove all saved data/settings from the controller and return the controller to a static IP address. Use the Reset function with caution. RESTART Periodically, the controller should be restarted for maintenance. RCC6000 user manual| 13...
- Page 14 IMPORT Use the Import function to import device information from a different controller. EXPORT Use the Export function to export device information to be imported by a different controller. RCC6000 user manual| 14...
- Page 15 VERSION Use the Version function to display the controller’s current firmware and hardware information. RCC6000 user manual| 15...
- Page 16 Go Electronic www.goelectronic.com PO Box 1864 Lake Oswego, OR 97035 customerservice@goelectronic.com RCC6000 user manual| 16...


Need help?
Do you have a question about the RCC6000 and is the answer not in the manual?
Questions and answers