Table of Contents
Advertisement
OWNER'S MANUAL
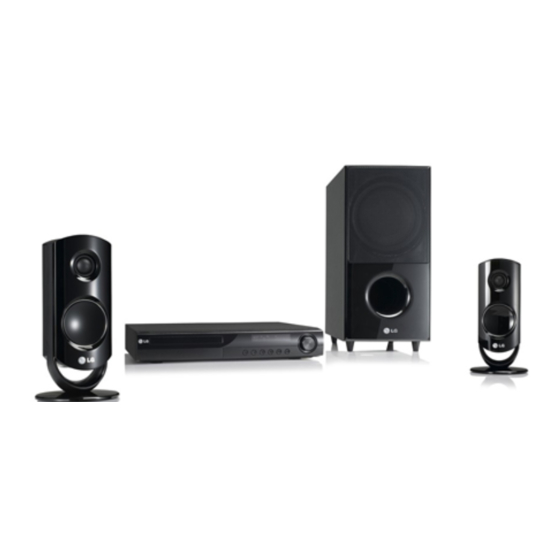
DVD Receiver System
Please read this manual carefully before operating
your set and retain it for future reference.
FOR THE WARRANTY TERMS & CONDITIONS,
PLEASE REFER TO BACK COVER OF THIS MANUAL.
MODEL
HT44S (HT44S, SH85S-F/ W)
P/NO : MFL63284290
HT805S-D0_BGBRLL_ENG_4290.indd 1
2010-03-02 ¿ÀÈÄ 3:40:57
Advertisement
Table of Contents

Subscribe to Our Youtube Channel
Related Manuals for LG HT44S


Summary of Contents for LG HT44S
- Page 1 Please read this manual carefully before operating your set and retain it for future reference. FOR THE WARRANTY TERMS & CONDITIONS, PLEASE REFER TO BACK COVER OF THIS MANUAL. MODEL HT44S (HT44S, SH85S-F/ W) P/NO : MFL63284290 HT805S-D0_BGBRLL_ENG_4290.indd 1 2010-03-02 ¿ÀÈÄ 3:40:57...
-
Page 2: Caution
Safety Information Safety Information CAUTION RISK OF ELECTRIC SHOCK DO NOT OPEN CAUTION: TO REDUCE THE RISK OF ELECTRIC SHOCK DO NOT REMOVE COVER (OR BACK) NO USER- SERVICEABLE PARTS INSIDE REFER SERVICING TO QUALIFIED SERVICE PERSONNEL. This lightning flash with arrowhead symbol within an equilateral triangle is intended to alert the user to the presence of uninsulated dangerous voltage within... -
Page 3: Safety Information
LG Electronics hereby declares that this/ these product(s) is/are in compliance with the essential requirements and other relevant provisions of Directive 2004/108/EC, 2006/95/EC, and 2009/125/EC. - Page 4 AND 625p UNIT, PLEASE CONTACT OUR CUSTOMER SERVICE CENTER. You have to set the disc format option to [Mastered] in order to make the discs compatible with the LG players when formatting rewritable discs. When setting the option to Live File System, you cannot use it on LG players.
- Page 5 Safety Information POWER: This unit operates on a mains supply of 200-240V~, 50/60Hz. WIRING: This unit is supplied with a BSI 1363 approved 13 amp mains plug, fused at 5 amp. When replacing the fuse always use a 5 amp BS 1362, BSI or ASTA approved type.
-
Page 6: Table Of Contents
Contents Contents Safety Information CAUTION Preparation Unique Features Accessories Introduction Playable Discs About the Symbol Display Symbol Used in this Manual Regional Codes Playable file Requirement Remote control Front panel Rear panel Installation Attaching the speakers to the unit Connections to Your TV Component Video Connection HDMI Out Connection... - Page 7 Changing subtitle code page Viewing a PHOTO file Options while viewing a photo Sleep Timer Setting Dimmer Turn off the sound temporarily Last Scene Memory System Select - Optional Adjust the speaker level settings Radio Operations Presetting the Radio Stations Deleting all the saved stations Deleting a saved station Improving poor FM reception...
-
Page 8: Unique Features
Preparation Preparation Unique Features Portable In Listens to music from your portable device. (MP3, Notebook, etc) USB Direct Recording Records music from CD to your USB device. Full HD up-scaling Views Full HD picture quality with simple setup. Home Theater Speaker ez Setup listens sound form TV, DVD and Digital device with vivid 2.1 or 2.0 ch mode. -
Page 9: Introduction
Introduction Playable Discs This unit plays DVD±R/RW and CD-R/RW that contains audio titles, DivX, MP3, WMA and/or JPEG files. Some DVD±RW/DVD±R or CD- RW/CD-R cannot be played on this unit due to the recording quality or physical condition of the disc, or the characteristics of the recording device and authoring software. -
Page 10: Playable File Requirement
Preparation Playable file Requirement MP3/ WMA music file requirement MP3/ WMA file compatibility with this unit is limited as follows : • Sampling frequency : within 32 to 48 kHz (MP3), within 32 to 48 kHz (WMA) • Bit rate : within 32 to 320 kbps (MP3), 40 to 192 kbps (WMA) •... -
Page 11: Remote Control
Remote control Remote control • • • • • • • • • • a • • • • • • • • • t RADIO&INPUT: Changes input sources. MARKER : Marks play list. HT805S-D0_BGBRLL_ENG_4290.indd 11 1 POWER : Switches the unit ON or OFF. Z OPEN/CLOSE : Opens and closes the disc Drawer. - Page 12 REPEAT : Selects a play mode. (Repeat/ Random) • • • • • • • • • • f • • • • • • • • • TV Control buttons : Controls the TV. (LG TV only) z REC : USB Direct Recording. : This button is not available.
-
Page 13: Front Panel
Front panel k j (POWER) Switches the unit ON or OFF. b Disc Tray c Display window Shows the current status of the unit. d VOLUME Adjusts speaker volume. e F (FUNCTION) Changes the input source or function. (SKIP) > Go to next or previous file/track/chapter. -
Page 14: Rear Panel
Preparation Rear panel a Power cord b Speakers connectors Connect the speaker cables. c Cooling Fan d Antenna Connector FM- Connects the FM wired antenna e SCART connetcor f VIDEO OUT Connects to a TV with video inputs. HT805S-D0_BGBRLL_ENG_4290.indd 14 g HDMI OUT (type A) Connects to TV with HDMI inputs. -
Page 15: Installation
Installation Attaching the speakers to the unit 1. Connect the wires to the unit. Match each wire’s colored band to the same colored connection terminal on the rear of the unit. To connect the cable to the unit, press each plastic finger pad to open the connection terminal. -
Page 16: 16 Connections To Your Tv
Installation Connections to Your Make one of the following connections, depending on the capabilities of your existing equipment. NOTE • Depending on your TV and other equipment you wish to connect, there are various ways you could connect the unit. Use only one of the connections described in this manual. -
Page 17: Hdmi Out Connection
HDMI Out Connection If you have a HDMI TV or monitor, you can connect it to this unit using a HDMI cable. Connect the HDMI OUT jack on the unit to the HDMI IN jack on a HDMI compatible TV or monitor. -
Page 18: Video Connection
Installation Video Connection Connect the VIDEO OUT jack on the unit to the video in jack on the TV using a video cable. You can hear the sound through the system’s speakers. Video Connection HT805S-D0_BGBRLL_ENG_4290.indd 18 SCART Connection Connect the SCART jack on the unit to the SCART in jack on the TV using a SCART cable. -
Page 19: Resolution Setting
Resolution Setting The unit provides several output resolutions for HDMI OUT and COMPONENT VIDEO OUT jacks. You can change the resolution using [Setup] menu. 1. Press HOME. 2. Use I / i to select the [Setup] and press ENTER. The [Setup] menu appears. 3. -
Page 20: Optional Equipment Connection
Installation Optional Equipment Connection AUX IN Connection Connect an Output of auxiliary device to the AUX (L/R) INPUT Connector. AUX IN Connection To the audio output jacks of your component (TV, VCR, etc.) NOTE If your TV has only one output for audio (mono), connect it to the left (white) audio jack on the unit. -
Page 21: Usb Connection
USB Connection Connect the USB port of USB Memory (or MP3 player, etc.) to the USB port on the front of the unit. USB Connection Removing the USB Device from the unit 1. Choose a different function mode or press STOP (x) twice in a row. 2. -
Page 22: Optical In Connection
Installation OPTICAL IN connection Connect an optical output of Unit (or Digital Device etc) to the OPTICAL IN connector. OPTICAL IN Connection To the digital optical output jack of your component Home theater speaker ez setup Listen to sound from TV, DVD and Digital Device with 2.1 or 2 ch mode. -
Page 23: Adjust The Setup Settings
Adjust the setup settings By using the Setup menu, you can make various adjustments to items such as picture and sound. You can also set a language for the subtitles and the Setup menu, among other things. For details on each Setup menu item, see pages 23 to 27. -
Page 24: Language
Installation Language Menu Language Select a language for the Setup menu and then on screen display. Disc Audio / Disc Subtitle / Disc Menu Select the language you prefer for the audio track (disc audio), subtitles, and the disc menu. [Original] Refers to the original language in which the disc was recorded. -
Page 25: Audio
[1080i] Outputs 1080 lines of interlaced video. [720p] Outputs 720 lines of progressive video. [480p (or 576p)] Outputs 480 (or 576) lines of progressive video. [480i (or 576i)] Outputs 480 (or (576) lines of interlaced video. Audio 2.1 Speaker setup Make the following settings for the built-in 2.1 channel surround decoder. -
Page 26: Lock (Parental Control)
Installation DRC (Dynamic Range Control) Make the sound clear when the volume is turned down (Dolby Digital only). Set to [On] for this effect. Vocal Select [On] to mix karaoke channels into normal stereo. This function is effective for multi-channel karaoke DVDs only. -
Page 27: Others
Password You can enter or change password. 1. Select [Password] on the [Lock] menu and then press i . 2. Press ENTER. 3. Input a password and press ENTER. To change the password, press ENTER when the [Change] option is highlighted. Input a password and press ... -
Page 28: Operation
Operation Operation Using the Home Menu 1. Press HOME. Displays the [Home] menu. 2. Select an option by using I i . 3. Press ENTER then selected option menu. [Music] – Displays [MUSIC] menu. [Movie] – Start video media’s playback or displays the [MOVIE] menu. -
Page 29: Other Operations
Stop Press x (STOP) Press B (PLAY), MONO/ Playback STEREO. Pause Press X (PAUSE/STEP). Press X (PAUSE/STEP) Frame- repeatedly to play title by-Frame Frame-by-Frame. (DVD, DivX playback only) During playback, press ./> SKIP to go to Skipping to the next chapter/ track/ the next/ file or to return to the previous... -
Page 30: To Display The Dvd Menu
Operation To display the DVD Menu When you play a DVD which contains several menu, you can select the menu you want using the Menu. 1. Press DISC MENU. The disc’s menu appears. 2. Select the menu by using U u I i . 3. -
Page 31: Marked Playback
Marked Playback The mark function enables you to store your favourite files from any disc or USB device in the unit memory. 1. Select [Music] on the [Home] menu. Music menu Returning to the upper folder. (MP3/ WMA only) File information will be displayed according to the ID3TAG information on the appropriate music file. -
Page 32: Viewing A Photo File 43 Specifications
Operation Viewing a PHOTO file This unit can play discs with photo files. 1. Select [Photo] on the [Home] menu and press ENTER. Photo menu Moving to the previous or Returning to the upper folder. 2. Press U u to select a folder, and then press ... -
Page 33: Sleep Timer Setting Warranty
Sleep Timer Setting Press SLEEP one or more times to select delay time between 10 and 180 minutes, after the unit will turn off. To check the remaining time, press SLEEP. To cancel the sleep function, press SLEEP repeatedly until “SLEEP 10” appears, and then press SLEEP once again while “SLEEP 10”... -
Page 34: Radio Operations
Operation Radio Operations Be sure that both FM aerials are connected. (Refer to the page 22) Listening to the radio 1. Press t RADIO&INPUT until FM appears in the display window. The last received station is tuned in. 2. Press and hold TUNING (-/+) for about two seconds until the frequency indication starts to change, then release. -
Page 35: Seeing Information About A Radio Station
Seeing information about a radio station The FM tuner is supplied with the RDS (Radio Data System) facility. This shows information about the radio station being listened to. Press RDS repeatedly to cycle through the various data types. : (Programme Service Name) The name of the channel will appear in the display (Programme Type Recognition) -
Page 36: Sound Adjustment
Operation Sound adjustment Setting the surround mode This system has a number of pre-set surround sound fields. You can select a desired sound mode by using SOUND EFFECT. You can change the SOUND EFFECT using I i arrow key while the sound effect information is displayed on. -
Page 37: Advanced Operations
Advanced Operations Recording to USB You can record music or sound souce to USB device by connecting in to the port on the unit. 1. Connect the USB device to the unit. 2. Select a mode in which you want to record. Play back a sound source first. -
Page 38: Maintenance
Maintenance Maintenance Notes on Discs Handling Discs Never stick paper or tape on the disc. Storing Discs After playing, store the disc in its case. Do not expose the disc to direct sunlight or sources of heat and never leave it in a parked car exposed to direct sunlight. -
Page 39: Troubleshooting
Troubleshooting PROBLEM No power The power cord is disconnected. The TV is not set to receive the DVD signal. No picture The video cables are not connected securely. Equipment connected via the audio cable is not set to receive DVD signal output. There is little or The audio cables are not connected to the no sound... -
Page 40: Appendix
Appendix Appendix Language Codes Use this list to input your desired language for the following initial settings: Disc Audio, Disc Subtitle, Disc Menu. Language Code Afar 6565 Afrikaans 6570 Albanian 8381 Ameharic 6577 Arabic 6582 Armenian 7289 Assamese 6583 Aymara 6588 Azerbaijani 6590... -
Page 41: Area Codes
Area Codes Choose a area code from this list. Area Code Afghanistan Argentina Australia Austria Belgium Bhutan Bolivia Brazil Cambodia Canada Chile China Colombia Congo Costa Rica Croatia Czech Republic Denmark Ecuador Egypt El Salvador Ethiopia Fiji Finland France Germany Great Britain Greece HT805S-D0_BGBRLL_ENG_4290.indd 41... - Page 42 Pause, Scan, Skip, Stop, Power Off, etc. • Refer to the TV owner’s manual for the details of SIMPLINK function. • LG TV with SIMPLINK function has the logo as shown above. • Use a higher version cable than 1.2 A HDMI cable.
-
Page 43: Specifications
Specifications General • Power requirements: 200 - 240 V, 50/60 Hz • Power consumption: 55 W • Dimensions (W x H x D): 360 x 62.5 x 312.3 mm without foot • Net Weight (Approx.): 2.8 kg • Operating temperature: 41 °F to 95 °F (5 °C to 35 °C) •... - Page 44 2. The dealer (or his service agent) who sold the product will be reimbursed for any labour provided in the repair of this LG equipment, for a period of 12 months from the original date of purchase. These claims must be made in accordance with the published scale of service charges and relevant claims procedure.
- Page 45 HT805S-D0_BGBRLL_ENG_4290.indd 45 2010-03-02 ¿ÀÈÄ 3:41:03...
Need help?
Do you have a question about the HT44S and is the answer not in the manual?
Questions and answers