Table of Contents
Advertisement
Advertisement
Table of Contents

Related Manuals for Tescom TC-5942B


Summary of Contents for Tescom TC-5942B
- Page 1 TC-5942B Pneumatic Shield Box Operating Manual R10530...
- Page 2 TESCOM guarantees that this product will be free from defects in materials and workmanship for a period of six months from the date of shipment. During the warranty period, TESCOM will, at its discretion, either repair or replace defective products.
- Page 3 Appendix A TC-5942B Specification, page A-1 Gives the shield box specification Appendix B TC-5942B I/O Interface Block Diagram, page B-1 Gives the shield box I/O interface information Appendix C TC-5942B Operation Flow Chart for programming, page C-1 Gives the operation flow chart for programming...
- Page 4 Safety Considerations Review the following safety precautions to avoid injury and prevent damage to this product or any product connected to it. Use Proper Power Cord To avoid fire hazard, use only the power cord specified for this product. Use Proper Power Source Do not operate this product from a power source that applies more than the voltage specified.
- Page 5 Service and Support If you have a problem with your TC-5942B, contact Tescom Technical Support specialists. Any adjustment or repair of this product must be performed by qualified personnel. Contact Information...
-
Page 6: Table Of Contents
5-1. Maintenance of TC -5942B ....................5-2 5-2. Performance Test ......................5-4 5-3 Check List for Common Problems ..................5-6 Appendix A TC-5942B Specification ..................A-2 Appendix B TC-5942B I/O Interface Block Diagram ..............B-1 Appendix C TC-5942B Operation Flow Chart ................C-1... -
Page 7: General Information
General Information This section provides a general description of the shield box and proper set-up procedures. Instruction and Key Features, page 1-2 Specifications, page 1-2 Connectors, page 1-3 Handler Component Identification, page 1-4 Initial Inspection, page 1-5 Packing Instruction, page 1-6... -
Page 8: Instruction And Key Features
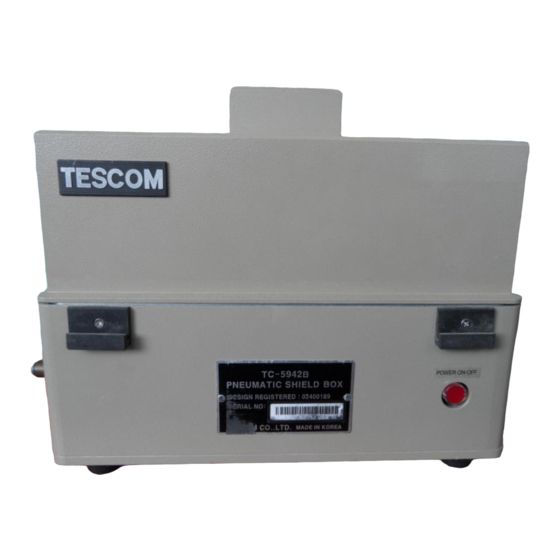
1-1 Instruction and Key Features Instructions and Key Features Instructions The TC-5942B Pneumatic Shield Box provides effective shielding for testing small RF devices such as a portable phone or a PC Assembly. The unique, compact, economical design is intended to provide medium accuracy measurements. -
Page 9: Connectors
1-3 Connectors Connectors This section contains reference information for TC-5942B’ s connectors. Table 1-1 TC-5942B Connectors Connector Specification Working Voltage: 100V RS-232C (Communication between the TC- Dielectric Withstanding Voltage: 300V 5942B and other instruments or computers). EMI Filter: 1000 pF Pi... -
Page 10: Handler Component Identification
1-4 Handler Component Identification Handler Component Identification Figure 1-1 TC-5942B Handler Component Identification ① AC Input Connector 100V ~ 240VAC ② Air Inlet ③ RS-232C Connector ④ 25-Pin Data Connector (Outside) ⑤ Air Valve for Lid Closing Speed Control ⑥ 9-Pin Data Connector (Outside) ⑦... -
Page 11: Initial Inspection
This section provides the information for verifying proper shipment of the TC -5942B Pneumatic Shield Box. Product Condition and Accessory Check 1. Upon receipt of the TC-5942B Shield Box, check for damage that could have occurred during shipment. 2. Verify you have received all the standard accessories supplied with the TC -5942B which... -
Page 12: Packing Instruction
Wrap the equipment in appropriate shock absorbing materials, then place it in a corrugated cardboard box at least 5 mm thick. (If shipping to a TESCOM Service Office, attach a tag indicating the type of service required, return address, model number and full serial number.) Wrap accessories separately in the same shock absorbing material, then place them in the corrugated cardboard box with the equipment. -
Page 13: Installation And Configuration
Installation and Configuration This section provides the information required to install the TC-5942B Pneumatic Shield Box. This includes information regarding the power requirements, environment and storage. 2-1 Power Requirement, page 2-2 2-2 Compressed Air Requirement, page 2-2 Plexiglas Safety Shield Installation, page 2-3... -
Page 14: Power Requirement
It is highly recommended that the compressed air system must be used in conjunction shown in figure 2-1. Low air quality may cause deterioration of performance. Figure 2-1 General Compressed Air Connection System Air Compressor Regulator TC-5942B Air Tank Air Filter Air Dryer Regulator... -
Page 15: Plexiglas Safety Shield Installation
2-3 Plexiglas Safety Shield Installation Plexiglas Safety Shield Installation The Plexiglas safety shield can be easily installed and removed by using four screws and the safety shield holder on the each side. The screw (2) allows you to adjust the size of the door. The 5942-0057 can be simply installed on the holder. -
Page 16: Tc-5942B Verification
TC-5942B Verification This section provides important information regarding performance verification procedure and sample operating programs for the TC-5942B. 3-1 Operation Procedure, page 3-2 3-2 Remote Operation Using RS-232C, page 3-2 3-3 PC Control Using Communication Program, page 3-3... - Page 17 Operation Procedure 1. Connect compressed air to “Air Inlet”. The lid will open as soon as compressed air is connected to TC-5942B. 2. Connect the AC power cord to a 100 to 240 VAC outlet. Turn the power on. 3. To open or close the Shield Box, press “Open - Close” switch.
-
Page 18: Remote Operation Using Rs-232C
B. Start Hyper Terminal: Click Start → Program → Accessories→ (Communications) and then click “Hyper Terminal”. C. On “Hyper Terminal” screen, double click “Hypertrm” icon. D. In “Name” block, on “New Connections” screen, enter “TC-5942B”. Select a desired icon and click “OK”. - Page 19 A. Connect 9 pin D type RS-232 cable between PC COM 1 port and TC-5942B. B. Turn TC-5942B power on. C. Type in a RS-232 command (Ex : “OPEN”) on “TC-5942B Hyper Terminal” screen and press Enter on PC keyboard. TC-5942B returns OK or Error Data signal.
- Page 20 Option 30 downward INWARD Option 15 Inward OUTWARD Option 15 outward Read the current status of STATUS? OPEN or CLOSE TC-5942B LID? OPEN or CLOSE Lid status query HANDLER? INWARD or OUTWARD Option 10 status query PROBE? UPWARD or DOWNWARD...
- Page 21 3-3 PC Control Using Communication Program Programming Example The following examples are written in Visual Basic. Example 1) OPEN the Shield Box Private Sub Form_Load() MSComm1.Rthreshold = 1 MSComm1.CommPort = 1 ' select COM1 MSComm1.Settings = "9600, N, 8, 1" ` Baud Rate(9600 bps), Parity Bit(None), Data Bit(8 bit), Stop Bit(1 bit) MSComm1.PortOpen = True ' Open Com Port.
-
Page 22: Tc-5942B Options
TC-5942B Options This section provides information on TC-5942B options, including the DUT Handler. 4-1 Optional DUT Handler (Option 10-46), page 4-2 4-2 Other Options (Option 60, 70), page 4-7 4-3 Serviceable Parts, page 4-8... -
Page 23: Optional Dut Handler (Option 10-46)
4-1 Optional DUT Handler (Option 10-46) Optional DUT Handler (Option 10 – 46) This section applies to a TC-5942B fitted with the optional DUT Handler. Typically, every device has a unique outline and connection configuration requiring unique handler and fixture customization to move DUT in and out of the cell, make data/RF connections, and to move probe pins or connectors up and down for signal probing. - Page 24 4-1 Optional DUT Handler (Option 10-46) Option 15: DUT ride platform. A white piece where DUT is placed for the test Maximum DUT size 150(D) x 60(W) x 30(H) mm Two screws hold option 15 in the 10. Use the two screws (1) and (2) to remove or reinstall option 15.
- Page 25 4-1 Optional DUT Handler (Option 10-46) Option 35: Pogo pin fixture Two screws hold the pin fixture on the moving mechanism. Use the two screws (1) and (2) to remove or reinstall the pogo pin fixture. Figure 4-6 Option 35 Pogo pin fixture Option 40: Provision for RF DUT Handler Two screws hold the provision on the moving Two screws hold the option 40 in the option 30 and...
- Page 26 The connection fixture assembly can be easily removed and re-installed by unscrewing two screws, (1) and (2), below. Two screws hold the connection fixture assembly in TC-5942B. Remove the two screws (1) and (2) to remove the fixture. Use two screws to reinstall the fixture.
- Page 27 1 second 0.5 second ② Air Valve for Option 30 Cylinder Speed Control is at the bottom-right of the TC-5942B main body. One is for down control and the other is for up control. Table 4-2 Approximate Option 30 Downward / Upward time...
-
Page 28: Other Options (Option 60,70)
Press the “DUT Handler operation switch”, while the lid is opening, to manually move the Handler inward or outward. The DUT Handler operation switch is on the right side of the TC-5942B. The switch enables the Handler to move inward and outward. The DUT Handler operation switch is on the right corner of the TC-5942B. -
Page 29: Serviceable Parts
Figure 4-13 Dual Pressure Lid Control System Configuration Serviceable Parts This section lists the parts you will need to service the shield box and Handler. All parts are supplied by TESCOM. Table 4-3 Replaceable Parts Description Part Number / Option Number... -
Page 30: Tc-5942B Maintenance
TC-5942B Maintenance This section contains information for keeping the instrument in good working order and checking its overall performance. 5-1 Maintenance of TC-5942B, page 5-2 5-2 Performance Test, page 5-4 5-3 Check List for Common Problems, page 5-6... -
Page 31: Maintenance Of Tc-5942B
5-1 Maintenance of TC-5942B Maintenance of TC-5942B TC-5942B is designed and built for long life and easy maintenance. Optimal RF shielding is obtained using a wire mesh gasket between the case and lid. It must be checked periodically for damage or excessive wear that would compromise the seal. Pressure on the gasket by the lid results in a proper RF seal. - Page 32 Periodic cleaning of the aluminum contact surface where the gasket touches is important for optimum shielding performance. Figure 5-2 TC-5942B RF gasket Maintaining the shielding effectiveness. 1. RF shielding effectiveness of TC-5942A/B/BC depends on mechanical contact and will degrade with its use. Typical degradation is shown in Table 1.
-
Page 33: Performance Test
5-2 Performance Test Performance Test TESCOM Shield Boxes are precision RF devices built very sturdy. Their electrical performance can, however, deteriorate with mechanical damages. Worn out shielding gaskets, as well as metal corrosion or oxidation at the lid contact, can significantly reduce the effectiveness of the Shield Box. - Page 34 Connect the 900MHz Dipole or Rod to the Spectrum Analyzer with RF cable. Open the lid of the TC-5942B and move the antenna around the TC -5942B to find the location where the maximum field is found. Fix the location of antenna for maximum field.
-
Page 35: Check List For Common Problems
TC -5942B. Verify the shield box performance is to specification while troubleshooting the problem. 1. Verify that the AC power cord is connected to the TC-5942B. Make sure that the power cord is firmly plugged into the power module on the left side. Also make sure that the power source for the TC-5942B is energized. -
Page 36: Appendix A Tc-5942B Specification
Appendices A. TC-5942B Specification B. TC-5942B I/O Interface Diagram C. TC-5942B Operation Flow Chart... - Page 37 Appendix A Specifications TC-5942B Specifications Shielding: > 80 dB to 2.0 GHz including connectors. Typically >70 dB to 2.5 GHz RF Connector: Type N outside, SMA inside Data Connector: One 9 pin and one 25 pin D-Type, filtered Data line capacity: 100 VDC, 3 Amps maximum Remote control: RS-232C, 3 wire, 9 pin D type Compressed air requirement: Minimum 5 bar, maximum to 7.5 bar...
-
Page 38: Appendix B Tc-5942B I/O Interface Block Diagram
Appendix B TC-5942B I/O Interface Block Diagram TC-5942B I/O Interface Block Diagram SWITCH PORT (INPUT) SENSOR PORT (INPUT) SWITCH1: Lid Open/Close Operation SW SENSOR1: Inward Sensor SWITCH2: Fixture Open/Close Operation SW SENSOR2: Downward Sensor TC-5942B RS-232C Controller Board SOLENOID PORT (OUTPUT) -
Page 39: Appendix C Tc-5942B Operation Flow Chart
Appendix C TC-5942B Operation Flow Chart for programming TC-5942B Operation Flow Chart for programming SW1: Lid Open/Close, Green switch POWER ON SW2: Fixture In/Out, Red switch inside SCI: Serial Communication cde_lid: Lid Operation IRQ System status initialize, cde_handler: Handler Operation IRQ... - Page 40 Appendix C TC-5942B Operation Flow Chart for programming Is the lid opened? Finish_status RESET Open the lid Is the handler outward? Finish_status RESET Time delay 1 sec Move the handler inward Start the timer Move the probe upward Inward sensor ON? Time delay 0.9 sec...
- Page 41 Appendix C TC-5942B Operation Flow Chart for programming Is the probe downward? Move the probe downward Start the timer Downward sensor ON? Timer = Timer + 1m sec Timer = 1.4 sec? Move the probe upward Time Delay 900mS Close the lid Move the handler outward Time Delay 1.5 sec...
- Page 42 Appendix C TC-5942B Operation Flow Chart for programming Status=0 Handler Outward, Probe Upward Status=1 Handler Inward, Probe Upward Finish_status RESET Status=2 Handler Inward, Probe Downward Status=3 Handler Inward, Probe Upward Status =0 Move the handler inward Status=3 Start the timer...
- Page 43 Appendix C TC-5942B Operation Flow Chart for programming Status =1 Move the probe downward Start the timer Downward sensor ON? Timer = Timer + 1m sec Move the probe upward Timer = 1.4 sec? Move the probe upward Time delay 800mS...
- Page 44 Appendix C TC-5942B Operation Flow Chart for programming Finish_status RESET Is the lid opened? Close the Lid Open the Lid Delay Time 1.4 sec Delay Time 1 sec Finish_status SET, Finish_status SET, Error_status RESET Error_status RESET Lid_status RESET Lid_status SET...
- Page 45 Appendix C TC-5942B Operation Flow Chart for programming Finish_status RESET Is the handler outward? Move the handler inward Start the timer Inward sensor ON? Timer = Timer + 1m sec Move the handler outward Timer = 2.2 sec? Time delay 1 sec...
- Page 46 Appendix C TC-5942B Operation Flow Chart for programming Finish_status RESET Is the probe upward? Move the probe downward Start the timer Downward sensor ON? Timer = Timer + 1m sec Move the probe upward Timer = 1.4 sec? Move the probe upward...
- Page 47 Appendix C TC-5942B Operation Flow Chart for programming Is the program message correct? Execute the program Send error message Send response message...
Need help?
Do you have a question about the TC-5942B and is the answer not in the manual?
Questions and answers