Table of Contents
Advertisement
Quick Links
Advertisement
Table of Contents

Related Manuals for Artika U7


Summary of Contents for Artika U7
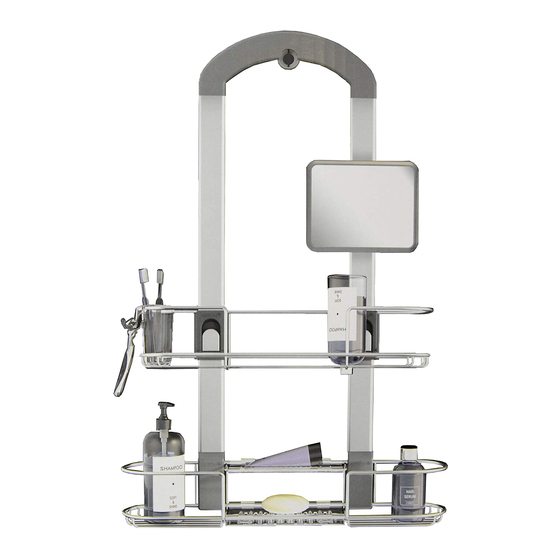
- Page 1 ITM. 1346373 Model / 모델: CADU7-C7 Shower Caddy - U7 INSTRUCTION MANUAL IMPORTANT, KEEP FOR FUTURE REFERENCE: PLEASE READ CAREFULLY. 샤워 캐디 - U7 사용설명서 중요 사항: 향후 참조할 수 있도록 잘 보관하고 주의 깊게 읽어 보시기 바랍니다. Rev. 13-12-2019 Made in China 원산지...
-
Page 2: Included Hardware
INSTRUCTION MANUAL / 사용설명서 INCLUDED HARDWARE 하드웨어 포함... -
Page 3: Included Parts
INCLUDED PARTS 부품 포함 Item Description Quantity 항목 설명 수량 Rubber ring 고무링 Shower door mounting accessory 샤워 도어 고정 액세서리 Q-Cup Shelf slider 선반 슬라이더 Suction cup (for removable installation) 흡착판(탈착식 설치용) Adhesive support (for permanently affixed installation) 부착 지지대(영구 부착 설치용) Tray 받침대... - Page 4 INSTRUCTION MANUAL / 사용설명서 WHAT YOU WILL NEED... 필요한 도구... Screwdriver 드라이버 IMPORTANT 중요 사항 The installer and/or user must read, understand and 설치자 및/또는 사용자는 제품을 설치하기 follow these instructions before installing the product. 전에 이 지침을 읽고 이해하고 따라야 This product must be properly installed before it is 합니다.
-
Page 5: Installation And Adjustments
INSTALLATION AND ADJUSTMENTS 설치 및 조절 방법 1. Open the tab on the shelf slider (fig. 1). 1. 선반 슬라이더의 탭을 엽니다(그림 1). 2. Adjust to the desired height and close tab to 2. 원하는 높이로 조절한 다음 탭을 닫아 maintain the basket in position. -
Page 6: Shower Head Installation
INSTRUCTION MANUAL / 사용설명서 OPTION A: 옵션 A : SHOWER HEAD INSTALLATION 샤워헤드 설치 방법 1. Stretch the rubber ring over the shower head (fig. 3). 1. 고무링을 샤워헤드에 밀어 넣습니다( 그림 3). 2. Tighten the retaining screw while holding the nut in place until it is secure (fig. -
Page 7: Permanent Installation
OPTION A: 옵션 A : REMOVABLE 탈착식 설치 방법 INSTALLATION 1. 2개의 흡착판을 샤워 캐디 밑면 뒤에 놓습니다(그림 8). 1. Place the two (2) suction cups behind the base of the shower caddy (fig. 8). 부드럽고 깨끗한 표면에 흡착판을 For a better grip, the suction cups must be 설치해야... -
Page 8: Replacement Parts
INSTRUCTION MANUAL / 사용설명서 REPLACEMENT PARTS 교체 부품... - Page 9 REPLACEMENT PARTS 교체 부품 Item Description Quantity 항목 설명 수량 Rubber ring CADU5 / P1 고무링 Shower door mounting accessory CADU5 / P2 샤워 도어 고정 액세서리 Q-Cup™ CADU5 / P3 Shelf slider CADU5 / P4 선반 슬라이더 Suction cup CADU5 / P5 흡착판...
-
Page 10: Cleaning / Maintenance Instructions
INSTRUCTION MANUAL / 사용설명서 CLEANING / MAINTENANCE INSTRUCTIONS 청소/유지 지침 Use a damp cloth to wipe down all surface areas. Do 젖은 천을 사용하여 모든 표면을 not use any harsh cleaning solutions, bleaches or 닦아냅니다. 샤워 캐디가 손상될 수 abrasive cleaners as this may damage the shower 있으므로... -
Page 11: Warranty
WARRANTY 보증 Artika For Living Inc. is proud to offer you a one (1) year Artika For Living Inc. 사는 1년 보증을 제공하는 것을 warranty. We guarantee our product to be free of manufacturing 자랑스럽게 생각합니다. 본 제품은 구매일로부터 defects in material and workmanship for a period of one (1) 1년... - Page 12 INSTRUCTION MANUAL / 사용설명서 Artika For Living Inc. 1756, 50 Avenue Montréal (Lachine), Québec 1-866-661-9606 Canada H8T 2V5 support@artika.com Customer Service 고객서비스 Monday to Friday 월요일~금요일 9 am - 5 pm EST 동부 표준시 오전 9시~오후 5시 Service in English and French...
Need help?
Do you have a question about the U7 and is the answer not in the manual?
Questions and answers