
Subscribe to Our Youtube Channel
Related Manuals for Artika Granite Fusion F11


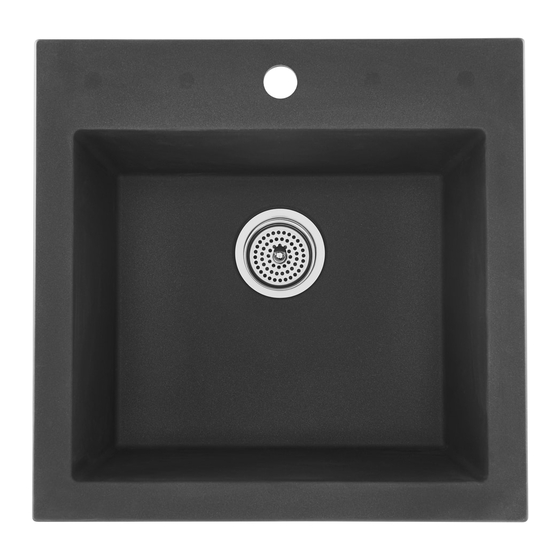
Summary of Contents for Artika Granite Fusion F11
- Page 1 Granite Fusion TM/MC Installation manual Drop-in Installation Undermount Installation Questions? 1-866-661-9606 customerservice@artikaworld.com rev. 24-12-2014...
- Page 2 Installation Manual Tools and required materials Drill Screwdriver Jigsaw with suitable blade (if cutting the counter is required) Tape measure Silicone based sealant Safety glasses (for the kitchen) Masking tape Hammer Diamond 32mm hole saw (for faucet hole trimming) Questions? 1-866-661-9606 customerservice@artikaworld.com...
-
Page 3: Hardware Included
Installation Manual Hardware (included) Kit for Kit for Drop-In Undermount Installation Installation Important The instructions may vary depending on the counter material. Read the instructions carefully and ensure that they are compatible with the sink installation before proceeding. Follow the plumber's code and builder's code e ective in your area. Shut water valves prior installation. -
Page 4: Drop-In Installation
Installation Manual Option A DROP-IN INSTALLATION 1. Trace the opening Locate the drop-in template in the box. Cut carefully along the dotted lines. Keep the inside portion of the template. It contains important information concerning the care and maintenance for your new sink. -
Page 5: Cut The Opening
Installation Manual 2. Cut the opening Using the drill, make a small starting hole of about 1/2’’ on the inside of the cutting line. Drill a second time in this same hole with a larger bit so the jigsaw can be inserted properly. - Page 6 Installation Manual 3. Add an additional faucet hole (optional) Determine the location of the desired holes. Place the sink upside down on a at and adequate surface. Using the 32 mm diamond hole saw at high power (1500tr. per min.), break through in the desired location.
- Page 7 Installation Manual 4. Sink installation Clean and dry the surface around the opening of the sink. Verify that the sink ts perfectly in the opening. The edge of the sink must sit on the counter. Turn the unit upside down to apply sealant. Apply silicone based sealant (non-includ- ed) underneath the edges of the sink.
- Page 8 Installation Manual 5. Drains installation Insert the metal strainer into the rubber seal, and then into the straining hole. Install the rubber gasket and the main drain body underneath the sink. Using the screw, tighten the main drain body and the metal strainer into place. Install the basket on top of the drain installation.
- Page 9 Installation Manual 6. Pipes installation Install the faucet following the manufacturer's instructions. Make proper water and waste pipe connections. Questions? 1-866-661-9606 customerservice@artikaworld.com...
- Page 10 Installation Manual Option B UNDERMOUNT INSTALLATION 1. Trace the opening Locate the Undermount template in the box. Cut carefully along the dotted lines. Keep the inside portion of the template. It contains important information concerning the care and maintenance for your new sink.
- Page 11 Installation Manual 2. Cut the opening Using the drill, make a small starting hole of about 1/2’’ on the inside of the cutting line. Drill a second time in this same hole with a larger bit so the jigsaw can be inserted properly.
- Page 12 Installation Manual 3. Add an additional faucet hole (optional) Determine the location of the desired holes. Place the sink upside down on a at and adequate surface. Using the 32 mm diamond hole saw at high power (1500tr. per min.), break through in the desired location.
- Page 13 Installation Manual 4. Sink installation Turn the sink upside down. Align the sink on the counter following the cutting line. Mark 8 spots around the frame, at about 1'' (25,4mm) away from the edge of the sink using a pencil. For a solid installation, it is recommended that the 8 mounting clips are used.
- Page 14 Installation Manual 1/4 po Diameter Depth stop Underneath counter 3/8’’ Counter Sealant Brass insert Sink Support Ring Wing nut Hexagon screw (Metal screws) Questions? 1-866-661-9606 customerservice@artikaworld.com...
- Page 15 Installation Manual Installation Manual 5. Drains installation Insert the metal strainer into the rubber seal, and then into the straining hole. Install the rubber gasket and the main drain body underneath the sink. Using the screw, tighten the main drain body and the metal strainer into place. Install the basket on top of the drain installation.
-
Page 16: Replacement Parts
Installation Manual 6. Pipes installation Install the faucet following the manufacturer's instructions. Make proper water and waste pipe connections. Replacement parts Item # Description Artika Part # Kit for Drop-in Installation GS150BM/P1 Kit for Undermount GS150BM/P2 Installation Strainer kit GS150BM/P3 Questions? 1-866-661-9606 customerservice@artikaworld.com... -
Page 17: Maintenance
The maximal value of the warranty cannot exceed the retail price of the product. Artika for Living inc. is not liable for indirect or consequential damages arising from improper use or installation of this sink. Questions? 1-866-661-9606... - Page 18 Granite Fusion TM/MC Guide d’installation Montage en surface Montage sous plan Questions? 1-866-661-9606 customerservice@artikaworld.com...
-
Page 19: Outils Et Matériaux Requis
Guide d’installation Outils et matériaux requis Perceuse Tournevis Scie sauteuse avec lame adéquate (si le découpage de la surface de travail est requis) Ruban à mesurer Agent d’étanchéité Lunettes de à base de silicone sécurité (pour la cuisine) Ruban à masquer Marteau Scie emporte-pièce en diamand 32mm... - Page 20 Guide d’installation Quicaillerie (incluse) Ensemble Ensemble montage montage en surface sous plan Important Les instructions peuvent varier selon le matériau du comptoir. Lisez les instructions et véri ez si elles s’appliquent avant de procéder à l’installation. La quincallerie peut varier selon le matériau du comptoir et pourrait ne pas être incluse.
- Page 21 Guide d’installation Option A MONTAGE EN SURFACE 1. Tracez l’ouverture Repérez le contour imprimé « montage en surface » dans la boîte. Découpez soigneusement en suivant le contour. Conservez la partie intérieure du gabarit. Elle contient des informations importantes concernant l'entretien et le nettoyage de votre évier. Placez le gabarit en papier sur le dessus du comptoir et positionnez-le soigneusement à...
- Page 22 Guide d’installation 2. Découpez l’ouverture À l’aide d’une perceuse, faites un petit trou de départ à 1/2’’ de l’intérieur de la ligne de découpage. Percez une seconde fois le petit trou en utilisant un foret plus grand pour que la lame de la scie sauteuse puisse bien s’insérer.
- Page 23 Guide d’installation 3. Ajoutez un trou de robinet supplémentaire (option- nel) Déterminez l'emplacement des trous désirés. Placez l’évier à l’envers sur une surface de travail adéquate, par exemple un banc de montage. Au moyen de la perceuse à haute puissance (1500tr/min) et de la scie cloche de 32mm, percez le trou désiré.
- Page 24 Guide d’installation 4. Installez l’évier Nettoyez et séchez la surface autour de l’ouverture pour l’évier. Véri ez que l’évier entre parfaitement dans l’ouverture. Le rebord de l’évier doit reposer sur le comptoir. Appliquez un agent d’étanchéité en silicone (non inclus) sous la bride de l’évier. Pour ce faire, retirez et retournez l’évier a n de pouvoir appliquer l'agent d'étanchéité...
- Page 25 Guide d’installation 5. Installez les crépines Insérez la crépine de métal dans l’anneau en caoutchouc, puis insérez-les dans le trou de drainage. Placez la cuvette en plastique et le joint en caoutchouc en dessous du trou de drainage. À l'aide de la vis, serrez la cuvette en plastique contre la crépine en métal. Placez le panier au dessus de la crépine.
- Page 26 Guide d’installation 6. Raccordez les tuyaux Installez le robinet selon les instructions du manufacturier Installer les raccordements d'alimentation et de renvoi d'eau de façon adéquate. Questions? 1-866-661-9606 customerservice@artikaworld.com...
- Page 27 Guide d’installation Option B MONTAGE SOUS PLAN 1. Tracez l’ouverture Repérez le contour imprimé « montage sous plan » dans la boîte. Découpez soigneusement en suivant le contour. Conservez la partie intérieure du gabarit. Elle contient des informations importantes concernant l'entretien et le nettoyage de votre évier. Placez le gabarit en papier sur le dessus du comptoir et positionnez-le soigneusement à...
- Page 28 Guide d’installation 2. Découpez l’ouverture À l’aide d’une perceuse, faites un petit trou de départ à 1/2’’ de l’intérieur de la ligne de découpage. Percez une seconde fois le petit trou en utilisant un foret plus grand pour que la lame de la scie sauteuse puisse bien s’insérer.
- Page 29 Guide d’installation 3. Ajoutez un trou de robinet supplémentaire (option- nel) Déterminez l'emplacement des trous désirés. Placez l’évier à l’envers sur une surface de travail adéquate, par exemple un banc de montage. Au moyen de la perceuse à haute puissance (1500tr/min) et de la scie cloche de 32mm, percez le trou désiré.
- Page 30 Guide d’installation 4. Installez l’évier Retournez le comptoir et l’évier vers le bas. Alignez l’évier selon la zone de découp- age. Localisez 8 points autour de la cuve, à environ 1’’ (25,4mm) du rebord de l‘évier. Indiquez avec un crayon les 8 points de repère. Pour une installation plus solide, l’utilisation des 8 attaches de montage est recom- mandée.
- Page 31 Guide d’installation 1/4 po Diamètre Butée de profondeur Dessous comptoir 3/8 po Comptoir Agent d’étanchéité Insert en laiton Évier Support Rondelle Écrou à oreille Vis à tête hexagonale (Vis à métaux) Questions? 1-866-661-9606 customerservice@artikaworld.com...
- Page 32 Guide d’installation 5. Installez les crépines Insérez la crépine de métal dans l’anneau en caoutchouc, puis insérez-les dans le trou de drainage. Placez la cuvette en plastique et le joint en caoutchouc en dessous du trou de drainage. À l'aide de la vis, serrez la cuvette en plastique contre la crépine en métal. Placez le panier au dessus de la crépine.
-
Page 33: Pièces De Remplacement
Installez le robinet selon les instructions du manufacturier Installer les raccordements d'alimentation et de renvoi d'eau de façon adéquate. Pièces de remplacement Item # Description Artika Part # Quicallerie - Ensemble GS150BM/P1 pour Montage en surface Quicallerie - Ensemble GS150BM/P2 pour Montage sous plan Crépine... -
Page 34: Entretien
Garantie Artika est ère de vous o rir une garantie de un (1) an. Nous garantissons que notre produit n’a aucun défaut de fabrication dans les matériaux et la production pour une période de un (1) an à partir de la date d’achat. Si vous découvrez un défaut de fabrication au cours de la période de garantie, Artika remplacera votre produit sans...
Need help?
Do you have a question about the Granite Fusion F11 and is the answer not in the manual?
Questions and answers