Table of Contents
Advertisement
Advertisement
Table of Contents

Related Manuals for Asus N73SM-DS72


Summary of Contents for Asus N73SM-DS72
-
Page 1: Notebook Pc User Manual
E5459 Notebook PC User Manual April 2010... -
Page 2: Table Of Contents
Table of Contents Chapter 1: About This User’s Manual ... 6 Notes for This Manual ... 6 Safety Precautions ... 7 Preparing your Notebook PC ... 9 Chapter 2: Top Side ...12 Bottom Side ...15 Right Side ...18 Left Side ...21 Rear Side ...22 Chapter 3: Power System ...24... - Page 3 Chapter 4: Using the Notebook PC Pointing Device ...46 Using the Touchpad ...47 Touchpad Usage Illustrations ...48 Caring for the Touchpad ...51 Automatic Touchpad Disabling ...51 Storage Devices ...53 Flash Memory Card Reader ...53 Optical Drive ...54 Hard Disk Drive ...58 Memory (RAM) ...61 Connections ...62 Network Connection ...62...
- Page 4 Wireless Operation Channel for Different Domains ... A-25 France Restricted Wireless Frequency Bands ... A-25 UL Safety Notices ... A-27 Power Safety Requirement ... A-28 TV Tuner Notices ... A-28 REACH ... A-28 Nordic Lithium Cautions (for lithium-ion batteries) ... A-29 Optical Drive Safety Information ...
-
Page 5: Chapter 1: Introducing The Notebook Pc
Chapter 1: Introducing the Notebook PC... -
Page 6: About This User's Manual
About This User’s Manual You are reading the Notebook PC User’s Manual. This User’s Manual provides information regarding the various components in the Notebook PC and how to use them. The following are major sections of this User’s Manual: 1. Introducing the Notebook PC Introduces you to the Notebook PC and this User’s Manual. -
Page 7: Safety Precautions
Safety Precautions The following safety precautions will increase the life of the Notebook PC. Follow all precautions and instructions. Except as described in this manual, refer all servicing to qualified personnel. Disconnect the AC power and remove the battery pack(s) before cleaning. - Page 8 SAFE TEMP: This Notebook PC should only be used in environments with ambient temperatures between 10°C (50°F) and 35°C (95°F). DO NOT carry or cover a Notebook PC that is powered ON with any materials that will reduce air circulation such as a carrying bag.
-
Page 9: Preparing Your Notebook Pc
Preparing your Notebook PC These are only quick instructions for using your Notebook PC. Installing the Battery Pack Connecting the Power Adapter HDMI E-SATA 2 0 V V - 2 1 1 0 Notebook PC User Manual... - Page 10 Opening the LCD display panel Carefully lift up the display panel with your thumb. Slowly tilt the display panel forward or backward to a comfortable viewing angle. Turning on the Power Push and release the power button located beneath the LCD display panel.
-
Page 11: Chapter 2: Knowing The Parts
Chapter 2: Knowing the parts... -
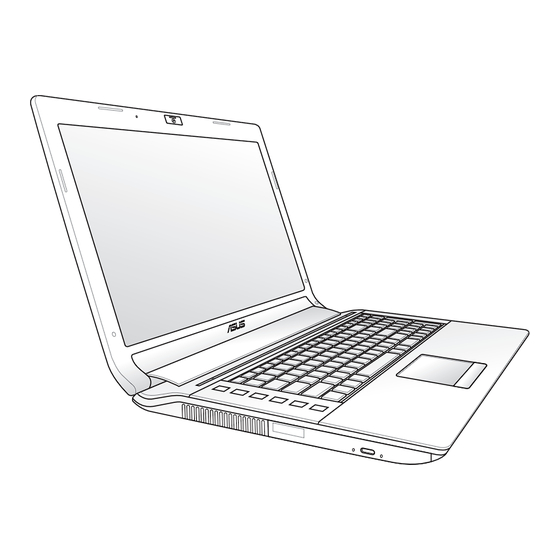
Page 12: Top Side
Top Side caps lock shift ctrl MU T E Microphone (Built-in) The built-in mono microphone can be used for video conferencing, voice narrations, or simple audio recordings. Camera Indicator The camera indicator shows when the built-in camera is in use. pause prt sc delete... - Page 13 Camera Cover Switch The camera cover switch allows you to open and close the protective camera cover. Slide the switch to the left to close the camera cover. Slide the switch to the right to open the camera cover. Camera The built-in camera allows picture taking or video recording.
- Page 14 Status Indicators (top) Status indicators represent various hardware/software conditions. See indicator details in section 3. Power Switch The power switch turns ON and OFF the Notebook PC or putting the Notebook PC into sleep or hibernation modes. Actual behavior of the power switch can be customized in Windows Control Panel “Power Options.”...
-
Page 15: Bottom Side
Bottom Side The bottom side may vary in appearance depending on model. The battery pack size varies depending on model. The bottom of the Notebook PC can get very hot. Be careful when handling the Notebook PC while it is in operation or recently been in operation. - Page 16 Battery Lock - Spring The spring battery lock is used to keep the battery pack secured. When the battery pack is inserted, it will automatically lock. To remove the battery pack, this spring lock must be held in the unlocked position. Battery Pack The battery pack is automatically charged when the Notebook PC is connected to an AC power source and...
- Page 17 Hard Disk Drive Compartment The hard disk drive is secured in a compartment. Visit an authorized service center or retailer for information on hard disk drive upgrades for your Notebook PC. Only purchase hard disk drives from authorized retailers of this Notebook PC to ensure maximum compatibility and reliability.
-
Page 18: Right Side
Right Side SPDIF Output Jack This jack provides connection to SPDIF (Sony/Philips Digital Interface) compliant devices for digital audio output. Use this feature to turn the Notebook PC into a hi-fi home entertainment system. Headphone Output Jack The stereo headphone jack (1/8 inch) is used to connect the Notebook PC’s audio out signal to amplified speakers or headphones. - Page 19 Wireless Switch Enables or disables the built-in wireless LAN and Bluetooth (selected models). When enabled, the wireless status indicator will light. Windows software settings are necessary before use. Antenna Input (on selected models) The antenna input is for TV frequency signal and for use with the provided digital TV antenna or input from subscription television services.
- Page 20 E-SATA Port & USB Combo Port E-SATA External SATA or eSATA allows external connection of Serial- ATA devices originally designed for use inside the computer. It is up to six times faster than existing USB 2.0, & 1394 for external storage solutions and is also hot pluggable using shielded cables and connectors up to two meters.
-
Page 21: Left Side
Left Side Air Vents The air vents allow cool air to enter and warm air to exit the Notebook PC. Ensure that paper, books, clothing, cables, or other objects do not block any of the air vents or else overheating may occur. -
Page 22: Rear Side
Rear Side Battery Pack The battery pack is automatically charged when the Notebook PC is connected to an AC power source and maintains power to the Notebook PC when AC power is not connected. This allows use when moving temporarily between locations. -
Page 23: Chapter 3: Getting Started
Chapter 3: Getting Started... -
Page 24: Power System
Power System Using AC Power The Notebook PC power is comprised of two parts, the power adapter and the battery power system. The power adapter converts AC power from a wall outlet to the DC power required by the Notebook PC. Your Notebook PC comes with a universal AC-DC adapter. - Page 25 IMPORTANT! Damage may occur if you use a different adapter to power the Notebook PC or use the Notebook PC’s adapter to power other electrical devices. If there is smoke, burning scent, or extreme heat coming from the AC-DC adapter, seek servicing. Seek servicing if you suspect a faulty AC-DC adapter.
-
Page 26: Using Battery Power
Using Battery Power The Notebook PC is designed to work with a removable battery pack. The battery pack consists of a set of battery cells housed together. A fully charged pack will provide several hours of battery life, which can be further extended by using power management features through the BIOS setup. -
Page 27: Battery Care
To remove the battery pack: IMPORTANT! Only use battery packs and power adapters supplied with this Notebook PC or specifically approved by the manufacturer or retailer for use with this model or else damage may occur to the Notebook PC. Battery Care The Notebook PC’s battery pack, like all rechargeable batteries, has a limit on the number times it can be recharged. -
Page 28: Powering On The Notebook Pc
Powering ON the Notebook PC The Notebook PC’s power-ON message appears on the screen when you turn it ON. If necessary, you may adjust the brightness by using the hot keys. If you need to run the BIOS Setup to set or modify the system configuration, press [F2] upon bootup to enter the BIOS Setup. - Page 29 Self Monitoring and Reporting Technology The S.M.A.R.T. (Self Monitoring and Reporting Technology) checks the hard disk drive during POST and gives a warning message if the hard disk drive requires servicing. If any critical hard disk drive warning is given during bootup, backup your data immediately and run Windows disk checking program.
-
Page 30: Checking Battery Power
Checking Battery Power The battery system implements the Smart Battery standard under the Windows environment, which allows the battery to accurately report the amount of charge left in the battery. A fully-charged battery pack provides the Notebook PC a few hours of working power. -
Page 31: Charging The Battery Pack
Charging the Battery Pack Before you use your Notebook PC on the road, you will have to charge the battery pack. The battery pack begins to charge as soon as the Notebook PC is connected to external power using the power adapter. -
Page 32: Power Options
Power Options The power switch turns ON and OFF the Notebook PC or putting the Notebook PC into sleep or hibernation modes. Actual behavior of the power switch can be customized in Windows Control Panel “Power Options.” For other options, such as “Switch User, Restart, Sleep, or Shut Down,”... -
Page 33: Emergency Shutdown
Emergency Shutdown In case your operating system cannot properly turn OFF or restart, there is an additional way to shutdown your Notebook PC: Hold the power button seconds. IMPORTANT! DO NOT use emergency shutdown while data is being written; doing so can result in loss or destruction of your data. -
Page 34: Power Management Modes
Power Management Modes The Notebook PC has a number of automatic or adjustable power saving features that you can use to maximize battery life and lower Total Cost of Ownership (TCO). You can control some of these features through the Power menu in the BIOS Setup. ACPI power management settings are made through the operating system. - Page 35 Sleep is the same as Suspend-to- RAM (STR). This function stores your current data and status in RAM while many components are turned OFF. Because RAM is volatile, it requires power to keep (refresh) the data. Click the Windows button and the arrowhead next to the lock icon to see this option.
-
Page 36: Thermal Power Control
Thermal Power Control There are three power control methods for controlling the Notebook PC’s thermal state. These power control cannot be configured by the user and should be known in case the Notebook PC should enter these states. The following temperatures represent the chassis temperature (not CPU). -
Page 37: Special Keyboard Functions
Special Keyboard Functions Colored Hot Keys The following defines the colored hot keys on the Notebook PC’s keyboard. The colored commands can only be accessed by first pressing and holding the function key while pressing a key with a colored command. The Hot Key locations on the function keys may vary depending on model but the functions should remain the same. - Page 38 Crossed-out Touchpad (F9): Toggles the built-in touchpad LOCKED (disabled) and UNLOCKED (enabled). Locking the touchpad will prevent you from accidentally moving the pointer while typing and is best used with an external pointing device such as a mouse. NOTE: Selected models have an indicator between the touchpad buttons will light when the touchpad is UNLOCKED (enabled) and not light when the touchpad is LOCKED (disabled).
-
Page 39: Microsoft Windows Keys
Fn+Enter (extended keyboard): Toggles Windows “Calculator” application. Microsoft Windows Keys There are two special Windows keys on the keyboard as described below. The key with the Windows Logo activates the Start menu located at the bottom left of the Windows desktop. The other key, that looks like a Windows menu with a small pointer, activates the properties menu and is equivalent to pressing the right mouse button on a... -
Page 40: Multimedia Control Keys (On Selected Models)
Multimedia Control Keys (on selected models) The multimedia control keys allows for convenient controlling of the multimedia application. The following defines the meaning of each multimedia control key on the Notebook PC. Some control key functions may defer depending on Notebook PC model. -
Page 41: Multimedia Control Pad
Multimedia Control Pad There are six control keys on the multimedia control pad on the left of the keyboard. The following defines the meaning of each control key on the multimedia control pad. Go to previous song / chapter (when playing) Play / Pause (when playing) Go to next song / chapter (when playing) Increase volume... -
Page 42: Switches And Status Indicators
Switches and Status Indicators Switches Express Gate Key / Power4Gear Key Press this key to launch Express Gate. Press again in the Express Gate environment to turn off the Notebook PC. Refer to the Express Gate User’s Manual for details. Under the Windows OS, this key functions as the Power4Gear Hybrid key. -
Page 43: Status Indicators
Status Indicators Front Number Lock Indicator Indicates that number lock [Num Lk] is activated when lighted. Number lock allows some of the keyboard letters to act as numbers for easier numeric data input. Capital Lock Indicator Indicates that capital lock [Caps Lock] is activated when lighted. Capital lock allows some of the keyboard letters to type using capitalized letters (e.g. -
Page 44: Drive Activity Indicator
Power Indicator The power indicator lights when the Notebook PC is turned ON and blinks slowly when the Notebook PC is in the Suspend-to- RAM (Sleep) mode. This indicator is OFF when the Notebook PC is turned OFF or in the Suspend-to-Disk (Hibernation) mode. Battery Charge Indicator (dual-color) The dual-color battery charge indicator shows the status of the battery’s power as follows:... -
Page 45: Chapter 4: Using The Notebook Pc
Chapter 4: Using the Notebook PC... -
Page 46: Pointing Device
Pointing Device The Notebook PC’s integrated touchpad pointing device is fully compatible with all two/three-button and scrolling knob PS/2 mice. The touchpad is pressure sensitive and contains no moving parts; therefore, mechanical failures can be avoided. A device driver is still required for working with some application software. -
Page 47: Using The Touchpad
Using the Touchpad The touchpad allows you to use your fingers to move the pointer around or select onscreen items instead of using a standard mouse. To use the touchpad, lightly press or tap your finger on the touchpad. Moving The Pointer Place your finger in the center of the touchpad and slide in... -
Page 48: Touchpad Usage Illustrations
Touchpad Usage Illustrations Clicking/Tapping - With the pointer over an item, press the left button or use your fingertip to touch the touchpad lightly, keeping your finger on the touchpad until the item is selected. The selected item will change color. - Page 49 Dragging - Dragging refers to moving an item to another location. Move your finger over an item, while simultaneously pressing the left button, move the item to your desired location, then release the left button. You can also double-tap and hold the item while dragging it with your finger.
- Page 50 Two-finger tapping - Use two fingers to tap the touchpad. This action simulates the click on the scroll wheel of a mouse. Three-finger tapping - Use three fingers to tap the touchpad. This action mimics the right-click function of a mouse. Notebook PC User Manual...
-
Page 51: Caring For The Touchpad
Caring for the Touchpad The touchpad is pressure sensitive. If not properly cared for, it can be easily damaged. Take note of the following precautions. • Ensure the touchpad does not come into contact with dirt, liquids or grease. • Do not touch the touchpad if your fingers are dirty or wet. • Do not rest heavy objects on the touchpad or the touchpad buttons. • Do not scratch the touchpad with your finger nails or any hard objects. The touchpad responds to movement not to force. There is no need to tap the surface too hard. - Page 52 Click ELAN on the top and click Disable when external USB mouse plug in check box. Click OK to finish the configuration. Notebook PC User Manual...
-
Page 53: Storage Devices
Storage Devices Storage devices allow the Notebook PC to read or write documents, pictures, and other files to various data storage devices. Flash Memory Card Reader Normally a memory card reader must be purchased separately in order to use memory cards from devices such as digital cameras, MP3 players, mobile phones, and PDAs. -
Page 54: Optical Drive
Optical Drive Inserting an optical disc While the Notebook PC’s power is ON, press the drive’s eject button and the tray will eject out partially. Gently pull on the drive’s front panel and slide the tray completely out. Be careful not to touch the CD drive lens and other mechanisms. - Page 55 Hold the disc by the edge and face the disc’s printed side up. Push down on both sides of the disc’s center until the disc snaps onto the hub. The hub should be higher than the disc when correctly mounted. Slowly push the drive’s tray back in.
-
Page 56: Removing An Optical Disc
Removing an optical disc Eject the tray and gently pry the edge of the disc upwards at an angle to remove the disc from the hub. Emergency eject The emergency eject is located in a hole on the optical drive and is used to eject the optical drive tray in case the electronic eject does not work. -
Page 57: Using The Optical Drive
Using the Optical Drive Optical discs and equipment must be handled with care because of the precise mechanics involved. Keep in mind the important safety instructions from your CD suppliers. Unlike desktop optical drives, the Notebook PC uses a hub to hold the CD in place regardless of the angle. -
Page 58: Hard Disk Drive
Hard Disk Drive Hard disk drives have higher capacities and operate at much faster speeds than floppy disk drives and optical drives. The Notebook PC comes with a replaceable hard disk drive. Current hard drives support S.M.A.R.T. (Self Monitoring and Reporting Technology) to detect hard disk errors or failures before they happen. - Page 59 Removing the hard disk drives Notebook PC User Manual...
- Page 60 Installing the hard disk drives Notebook PC User Manual...
-
Page 61: Memory (Ram)
Memory (RAM) Additional memory will increase application performance by decreasing hard disk access. Visit an authorized service center or retailer for information on memory upgrades for your Notebook PC. Only purchase expansion modules from authorized retailers of this Notebook PC to ensure maximum compatibility and reliability. The BIOS automatically detects the amount of memory in the system and configures CMOS accordingly during the POST (Power- On-Self-Test) process. -
Page 62: Connections
Connections The built-in network cannot be installed later as an upgrade. After purchase, network can be installed as an expansion card. Network Connection Connect a network cable, with RJ-45 connectors on each end, to the modem/network port on the Notebook PC and the other end to a hub or switch. - Page 63 Twisted-Pair Cable The cable used to connect the Ethernet card to a host (generally a Hub or Switch) is called a straight-through Twisted Pair Ethernet (TPE). The end connectors are called RJ-45 connectors, which are not compatible with RJ-11 telephone connectors. If connecting two computers together without a hub in between, a crossover LAN cable is required (Fast-Ethernet model).
-
Page 64: Wireless Lan Connection (On Selected Models)
Wireless LAN Connection (on selected models) The optional built-in wireless LAN is a compact easy-to-use wireless Ethernet adapter. Implementing the IEEE 802.11 standard for wireless LAN (WLAN), the optional built-in wireless LAN is capable of fast data transmission rates using Direct Sequence Spread Spectrum (DSSS) and Orthogonal Frequency Division Multiplexing (OFDM) technologies on 2.4GHz/5GHz frequencies. -
Page 65: Infrastructure Mode
Ad-hoc mode The Ad-hoc mode allows the Notebook PC to connect to another wireless device. No access point (AP) is required in this wireless environment. (All devices must install optional 802.11 wireless LAN adapters.) Infrastructure mode The Infrastructure mode allows the Notebook PC and other wireless devices to join a wireless network created by an Access Point (AP) (sold separately) that provides a central link for wireless clients to communicate with each other or with a wired network. -
Page 66: Antenna Connections (On Selected Models)
Antenna Connections (on selected models) This page shows multimedia connections for TV Tuner Models. TV and radio features require built-in modules only on selected models. IMPORTANT! The Notebook PC must be used indoors when using the antenna. Cable connection Connect the coaxial cable from a paid television service, roof- mounted aerial antenna, or indoor “rabbit ears”... - Page 67 DTV antenna connection Connect the provided digital TV antenna to the Notebook PC using the cable adapter. The digital TV antenna can only receive digital TV signals broadcasted in selected regions. Digital television reception is available on selected models only and will vary by location depending on distance from transmission towers and obstructions.
-
Page 68: Windows Wireless Network Connection
Windows Wireless Network Connection Connecting to a network Switch ON the Wireless function if necessary for your model (see switches in Section 3). Press [FN+F2] repeatedly until wireless LAN icon and Bluetooth icon are shown. Or double click the Wireless Console icon in Windows notification area and select the wireless LAN icon. - Page 69 When connecting, you may have to enter a password. After a connection has been established, the connection is shown on the list. You can see the wireless network icon area. The crossed wireless network icon <Fn> + <F2> to disable the WLAN function. Notebook PC User Manual in the Notification appears when you press...
-
Page 70: Bluetooth Wireless Connection(On Selected Models)
Bluetooth Wireless Connection (on selected models) Notebook PCs with Bluetooth technology eliminates the need for cables for connecting Bluetooth-enabled devices. Examples of Bluetooth-enabled devices may be Notebook PCs, Desktop PCs, mobile phones, and PDAs. If your Notebook PC did not come with built-in Bluetooth, you need to connect a USB or ExpressCard Bluetooth module in order to use Bluetooth. - Page 71 Or double click the Wireless Console icon in the Windows notification area and select the Bluetooth icon. From Control Panel, go to Network and Internet > Network and Sharing Center and then click Change adapter settings in the left blue pane. Right-click Bluetooth Network Connection and select View Bluetooth...
- Page 72 Select a Bluetooth-enabled device from the list and click Next. Enter the Bluetooth security code into your device and start pairing. The paired relationship is successfully built. Click Close to finish the setting. Notebook PC User Manual...
-
Page 73: Appendix
Appendix... -
Page 74: Optional Accessories
Optional Accessories These items, if desired, come as optional items to complement your Notebook PC. USB Hub (Optional) Attaching an optional USB hub will increase your USB ports and allow you to quickly connect or disconnect many USB peripherals through a single cable. USB Flash Memory Disk A USB flash memory disk is an optional item that can provide storage up to several hundred megabytes, higher transfer speeds,... -
Page 75: Operating System And Software
Operating System and Software This Notebook PC may offer (depending on territory) its customers the choice of a pre-installed Microsoft Windows operating system. The choices and languages will depend on the territory. The levels of hardware and software support may vary depending on the installed operating system. -
Page 76: System Bios Settings
System BIOS Settings The BIOS screens in this section are for reference only. The actual screens may differ by models and territories. Boot Device On the Boot screen, select Boot Option #1. Aptio Setup Utility - Copyright (C) 2009 American Megatrends, Inc. Main Main Advanced... -
Page 77: Security Setting
Security Setting Aptio Setup Utility - Copyright (C) 2009 American Megatrends, Inc. Main Main Advanced Advanced Boot Boot Security Password Description If ONLY the Administrator’s password is set, then this only limits access to Setup and is only asked for when entering Setup. If ONLY the user’s password is set, then this is a power on password and must be entered to boot or enter Setup. -
Page 78: Save Changes
Save Changes If you want to keep your configuration settings, you must save changes before exiting the BIOS setup utility. If you want to restore default settings, choose Restore Defaults. You must then save changes to keep the manufacture default settings. Aptio Setup Utility - Copyright (C) 2009 American Megatrends, Inc. -
Page 79: Common Problems And Solutions
If the problem still exist, contact your local service center and ask an engineer for assistance. Hardware Problem - Keyboard / Hotkey The Hotkey (FN) is disabled. A. Reinstall the “ATK0100” driver from the driver CD or download it from the ASUS website. Notebook PC User Manual... - Page 80 Diagnostics: Power On by Battery only? (Y = 2, N = 4) Able to see BIOS (ASUS Logo)? (Y = 3, N = A) Able to load the OS? (Y = B, N = A) Adapter power LED ON? (Y = 5, N = C)
- Page 81 Symptom & Solutions: A. Problem might be in the MB, HDD, or NB; visit a local service center for assistance. B. Problem caused by the operating system, try restoring your system us- ing the recovery partition or disc. IMPORTANT! You must backup all your data to another location before recovering. C. Adapter problem; check the power cord connections, otherwise visit a local service center for replacement. D. Battery problem; please check the battery contacts, otherwise visit a local service center for repair. Hardware Problem - Wireless Card How to check whether a Notebook PC is equipped with a wireless card? A.
- Page 82 When I power ON the Notebook PC, there will be an “Open policy file error” message. A. Reinstall the latest version “Power4 Gear” utility to solve your problem. It is available on the ASUS website. Unknown Reason - Blue screen with white text A blue screen with white text appears after system bootup.
- Page 83 If problem still cannot be solved, use the recovery process to reinstall your entire system. IMPORTANT! You must backup all your data to another location before recovering. CAUTION! DO NOT connect to the Internet before you have installed an anti-virus software and Internet firewall to protect yourself from viruses.
-
Page 84: Updating The Bios
Updating the BIOS. Please verify the Notebook PC’s exact model and download the latest BIOS file for your model from the ASUS website and save it in your flash disk drive. Connect your flash disk drive to the Notebook PC and power on the Notebook PC. -
Page 85: Recovering Your Notebook Pc
Press [Enter] to select Windows Setup [EMS Enabled]. Select the language you want to recover and click Next. Read the ASUS Preload Wizard messages and click Next. Select a partition option and click Next. Partition options: Recover Windows to first partition only. -
Page 86: Using Recovery Dvd (On Selected Models
This option deletes all partitions from your hard drive and creates two new partitions “C” (25%) and “D” (75%). Follow the onscreen instructions to complete the recovery process. Visit the ASUS website at www.asus.com for updated drivers and utilities. Using Recovery DVD (on selected models) Creating the Recovery DVD: Double-click the AI Recovery Burner icon on the Window desktop. -
Page 87: Using The Recovery Dvd
Ensure to connect the power adapter to your Notebook PC when performing system recovery. Unstable power supply may cause recovery failure. Visit the ASUS website at www.asus.com for updated drivers and utilities. Notebook PC User Manual DVD: :... -
Page 88: Dvd-Rom Drive Information
DVD-ROM Drive Information The Notebook PC comes with an optional DVD-ROM drive or a CD-ROM drive. In order to view DVD titles, you must install your own DVD viewer software. Optional DVD viewer software may be purchased with this Notebook PC. The DVD-ROM drive allows the use of both CD and DVD discs. -
Page 89: Region Definitions
Region Definitions Region 1 Canada, US, US Territories Region 2 Czech, Egypt, Finland, France, Germany, Gulf States, Hungary, Iceland, Iran, Iraq, Ireland, Italy, Japan, Netherlands, Norway, Poland, Portugal, Saudi Arabia, Scotland, South Africa, Spain, Sweden, Switzerland, Syria, Turkey, UK, Greece, Former Yugoslav Republics, Slovakia Region 3 Burma, Indonesia, South Korea, Malaysia, Philippines, Singapore, Taiwan, Thailand, Vietnam... -
Page 90: Internal Modem Compliancy
Internal Modem Compliancy The Notebook PC with internal modem model complies with JATE (Japan), FCC (US, Canada, Korea, Taiwan), and CTR21. The internal modem has been approved in accordance with Council Decision 98/482/EC for pan-European single terminal connection to the public switched telephone network (PSTN). However due to differences between the individual PSTNs provided in different countries, the approval does not, of itself, give an unconditional assurance of successful operation on every PSTN network... -
Page 91: Network Compatibility Declaration
Network Compatibility Declaration Statement to be made by the manufacturer to the user: “This declaration will indicate the networks with which the equipment is designed to work and any notified networks with which the equipment may have inter-working difficulties. The manufacturer shall also associate a statement to make it clear where network compatibility is dependent on physical and software switch settings. - Page 92 This table shows the countries currently under the CTR21 standard. Country Austria Belgium Czech Republic Denmark Finland France Germany Greece Hungary Iceland Ireland Italy Israel Lichtenstein Luxemburg The Netherlands Norway Poland Portugal Spain Sweden Switzerland United Kingdom A-20 Applied More Testing Not Applicable Not Applicable Still Pending...
- Page 93 This information was copied from CETECOM and is supplied without liability. For updates to this table, you may visit http://www.cetecom. de/technologies/ctr_21.html 1 National requirements will apply only if the equipment may use pulse dialling (manufacturers may state in the user guide that the equipment is only intended to support DTMF signalling, which would make any additional testing superfluous).
-
Page 94: Declarations And Safety Statements
Declarations and Safety Statements Federal Communications Commission Statement This device complies with FCC Rules Part 15. Operation is subject to the following two conditions: • This device may not cause harmful interference. • This device must accept any interference received, including interference that may cause undesired operation. -
Page 95: Fcc Radio Frequency (Rf) Exposure Caution Statement
(Reprinted from the Code of Federal Regulations #47, part 15.193, 1993. Washington DC: Office of the Federal Register, National Archives and Records Administration, U.S. Government Printing Office.) FCC Radio Frequency (RF) Exposure Caution Statement Any changes or modifications not expressly approved by the party responsible for compliance could void the user’s authority to operate this equipment. -
Page 96: Ce Marking
CE Marking CE marking for devices without wireless LAN/Bluetooth The shipped version of this device complies with the requirements of the EEC directives 2004/108/EC “Electromagnetic compatibility” and 2006/95/EC “Low voltage directive” . CE marking for devices with wireless LAN/ Bluetooth This equipment complies with the requirements of Directive 1999/5/ EC of the European Parliament and Commission from 9 March, 1999 governing Radio and Telecommunications Equipment and mutual... -
Page 97: Wireless Operation Channel For Different Domains
Wireless Operation Channel for Different Domains N. America 2.412-2.462 GHz Japan 2.412-2.484 GHz Europe ETSI 2.412-2.472 GHz France Restricted Wireless Frequency Bands Some areas of France have a restricted frequency band. The worst case maximum authorized power indoors are: • 10mW for the entire 2.4 GHz band (2400 MHz–2483.5 MHz) •... - Page 98 60 Oise 63 Puy du Dôme 66 Pyrénées Orientales 68 Haut Rhin 71 Saône et Loire 82 Tarn et Garonne 88 Vosges 90 Territoire de Belfort This requirement is likely to change over time, allowing you to use your wireless LAN card in more areas within France. Please check with ART for the latest information (www.art-telecom.fr) Your WLAN Card transmits less than 100mW, but more than 10mW.
-
Page 99: Ul Safety Notices
UL Safety Notices Required for UL 1459 covering telecommunications (telephone) equipment intended to be electrically connected to a telecommunication network that has an operating voltage to ground that does not exceed 200V peak, 300V peak-to-peak, and 105V rms, and installed or used in accordance with the National Electrical Code (NFPA 70). -
Page 100: Power Safety Requirement
REACH Complying with the REACH (Registration, Evaluation, Authorization, and Restriction of Chemicals) regulatory framework, we publish the chemical substances in our products at ASUS REACH website at http://green.asus.com/english/REACH.htm. A-28 Notebook PC User Manual... -
Page 101: Nordic Lithium Cautions (For Lithium-Ion Batteries
Nordic Lithium Cautions (for lithium-ion batteries) CAUTION! Danger of explosion if battery is incorrectly replaced. Replace only with the same or equivalent type recommended by the manufacturer. Dispose of used batteries according to the manufacturer’s instructions. (English) ATTENZIONE! Rischio di esplosione della batteria se sostituita in modo errato. -
Page 102: Optical Drive Safety Information
Optical Drive Safety Information Laser Safety Information Internal or external optical drives sold with this Notebook PC contains a CLASS 1 LASER PRODUCT. Laser classifications can be found in the glossary at the end of this user’s manual. WARNING! Making adjustments or performing procedures other than those specified in the user’s manual may result in hazardous laser exposure. -
Page 103: Macrovision Corporation Product Notice
Macrovision Corporation Product Notice This product incorporates copyright protection technology that is protected by method claims of certain U.S.A. patents and other intellectual property rights owned by Macrovision Corporation and other rights owners. Use of this copyright protection technology must be authorized by Macrovision Corporation, and is intended for home and other limited viewing uses only unless otherwise authorized by Macrovision Corporation . -
Page 104: Ctr 21 Approval(For Notebook Pc With Built-In Modem
CTR 21 Approval (for Notebook PC with built-in Modem) Danish Dutch English Finnish French German Greek Italian Portuguese A-32 Notebook PC User Manual... - Page 105 Spanish Swedish Notebook PC User Manual A-33...
-
Page 106: European Union Eco-Label
European Union Eco-label This Notebook PC has been awarded the EU Flower label, which means that this product has the following characteristics: Decreased energy consumption during use and stand-by modes. Limited use of toxic heavy metals. Limited use of substances harmful to the environment and health. -
Page 107: Global Environmental Regulation Compliance And Declaration
ASUS follows the green design concept to design and manufacture our products, and makes sure that each stage of the product life cycle of ASUS product is in line with global environmental regulations. In addition, ASUS disclose the relevant information based on regulation requirements. - Page 108 This product is protected by one or more of the following U.S. Patents: 7,416,423; 7,415,588; 7,413,402; 7,411,791; 7,408,855; 7,403,378; 7,400,721; 7,399,011; 7,394,533; 7,392,968; 7,388,754; 7,388,752; 7,388,743; 7,382,605; 7,382,314; 7,375,952; 7,374,433; 7,373,493; 7,369,402; 7,369,064; 7,362,568; 7,362,521; 7,362,276; 7,361,034; 7,359,209; 7,359,189; 7,355,372; 7,353,408; 7,352,586; 7,343,645; 7,342,777;...
-
Page 109: Copyright Information
KIND, EITHER EXPRESS OR IMPLIED, INCLUDING BUT NOT LIMITED TO THE IMPLIED WARRANTIES OR CONDITIONS OF MERCHANTABILITY OR FITNESS FOR A PARTICULAR PURPOSE. IN NO EVENT SHALL ASUS, ITS DIRECTORS, OFFICERS, EMPLOYEES OR AGENTS BE LIABLE FOR ANY INDIRECT, SPECIAL, INCIDENTAL, OR CONSEQUENTIAL DAMAGES... -
Page 110: Limitation Of Liability
ASUS will only be responsible for or indemnify you for loss, damages or claims based in contract, tort or infringement under this Warranty Statement. This limit also applies to ASUS’ suppliers and its reseller. It is the maximum for which ASUS, its suppliers, and your reseller are collectively responsible. - Page 111 Notebook PC User Manual A-39...
- Page 112 Manufacturer Address, City Country Authorized Representative in Europe Address, City Country A-40 ASUSTek COMPUTER INC. No. 150, LI-TE RD., PEITOU, TAIPEI 112, TAIWAN R.O.C TAIWAN ASUS COMPUTER GmbH HARKORT STR. 21-23, 40880 RATINGEN GERMANY Notebook PC User Manual...
Need help?
Do you have a question about the N73SM-DS72 and is the answer not in the manual?
Questions and answers