
Related Manuals for Waterite Apix CLSE-2200-HCSR


Summary of Contents for Waterite Apix CLSE-2200-HCSR
- Page 1 POINT OF USE WATER COOLER (WITH OPTIONAL FILTRATION SYSTEM) OPERATION INSTRUCTIONS MODEL CLSE-2200-HCSR VERY IMPORTANT! PLEASE READ CAREFULLY BEFORE USE Winnipeg, MB Canada ww.waterite.com...
-
Page 2: Inner Components
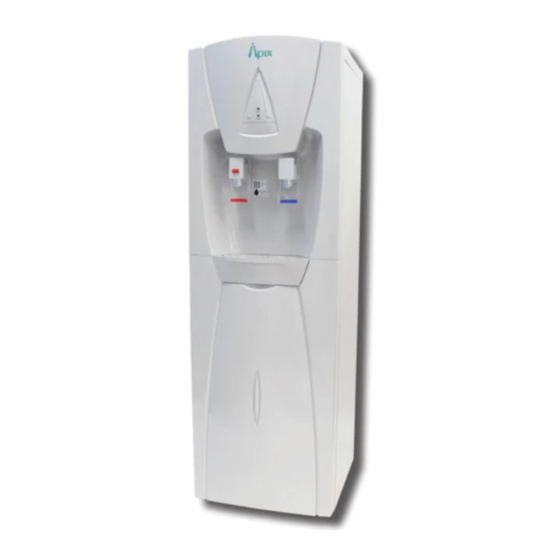
1. OUTER COMPONENTS 1. Upper front panel 2. Heating lamp (red) 3. Cooling lamp (green) 4. Cold tap (blue) 5. Hot tap (red) 6. Drip tray 7. Lower front panel 8. Adjustable feet 9. Top cover 10. Thermostat 11. Fuse 12. -
Page 3: Product Features
5. Clean outer surfaces with a soft cloth only. Do not use chemical cleaners. 6. Your cooler requires periodic sanitizing of internal components to inhibit bacterial growth. We strongly recommend sanitizing with the WATERITE Biomax Cooler Cleaning Kit (part N. ACCS- 0CK0-0001) every three months. -
Page 4: Quick-Connect Fittings
6. QUICK-CONNECT FITTINGS The Apix cooler uses 1/4” quick-connect tubing and fittings. 7. OPERATION 1. With the power still OFF, turn on the RED (hot) tap until water flows out of it (your unit is equipped with a child-safe hot tap to avoid accidental activation). DO NOT TURN COOLER ON UNTIL THIS STEP IS COMPLETE. -
Page 5: Warranty
3. Wash hands thoroughly. Remove the replacement cartridge from its box and its sani-sealed protective sleeve. Remove the protective cap. Make sure the correct cartridge is installed in its socket according to its colour. Locate the alignment tab on the top of the cartridge (there are two at 180 degrees from each other) and align with the center front of the cartridge socket. -
Page 6: Replacement Parts
11. REPLACEMENT PARTS Description Part Number Replace every Carbon Block Filter V360112CC05 3-6 months 5 Micron Sediment Filter V360112PP05 3-6 months Replacement Filter Kit (1 Carbon Block - 1 Sediment) V3602CRK 3-6 months RO Membrane V360312RO00 1-3 years UF Filter Cartridge V360312UF00 6-12 months UF Filter Replacement Kit (1 Carbon Block - 1 Sediment - 1 UF)
Need help?
Do you have a question about the Apix CLSE-2200-HCSR and is the answer not in the manual?
Questions and answers