
Subscribe to Our Youtube Channel
Related Manuals for AccuEnergy Acuvim-L Series


Summary of Contents for AccuEnergy Acuvim-L Series
- Page 1 Acuvim-L Series Quick Setup Guide • Appearance and Dimension • Installation Method • Terminals • Wiring Diagram • Settings Mode • Communication • I/O Options • Time of Use • DIN Rail Installation • Specification...
-
Page 2: Appearance And Dimension
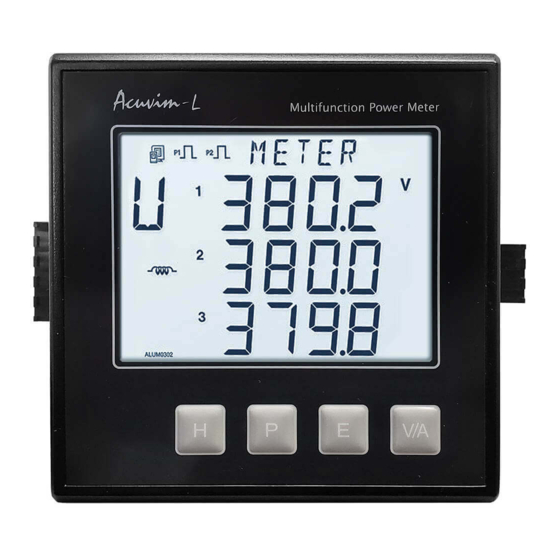
Appearance and Dimension Units: mm(inches) Acuvim-L Multifunction Power Meter Gasket 96.00 (3.800) Gasket Front View of the Display Meter and Remote Display Unit 7.60 (0.300) 35.90 35.90 35.90 (1.413) (1.413) (1.413) 10.00 50.70 (1.996) 50.70 (1.996) 14.00 (0.394) (0.551) - Page 3 Front Casing onto a panel. Key Four keys are used to select display and set. The Acuvim-L series meter enclosures is made of high Enclosure strength anti-combustible engineering plastic. DIN rail Used for Installation 35mm rail of the DIN rail Meter.
-
Page 4: Installation Method
Installation Method Environment Make sure meter is installed in a dry and dust free environment. Avoid placing meter near to heat, radiation and strong electrical interference sources. Meter's working temperature range is from -25°C to 70°C. Meter can be installed into an ANSI C39.1 (4'' round) or an IEC 92mm DIN(square) form. - Page 5 (2) Remove installation clips from the meter and insert the meter into the square or round hole from the front side. Gasket Panel Gasket Panel...
- Page 6 (3) Install the clips to the meter from backside and push the clips tightly so that the meter is fixed on the panel. Panel 2. Extend module Installation (1) The extend module could be installed from the bottom of the meter. (2) The extend module is fixed on the meter by the screw.
-
Page 7: Terminal Strips
Terminals Terminal strips Voltage Input Power Supply L / + N / – Power Supply Current Input Communication and Digital Output Comm Port Digital Output DO 1 DO 2 Note: Model Acuvim-AL has no digital output and communication terminal strips, Model Acuvim-BL/CL/DL/EL/KL share the same strips. When the Acuvim-BL is selected, the strips is used as DO. -
Page 8: Auxiliary Power
Extend module Comm Port Digital Output Digital Input DO11 DO12 DO21 DO22 DI1 The meter has 2 current input options available for different applications. 1. Standard: 5Aac 2. Optional: 1Aac Ground Terminal Connection Before setting up the meter's wiring, please connect the meter's ground terminal and the switch gear's ground terminal together. -
Page 9: Wiring Diagram
Wiring Diagram The following shows two typical wiring input configurations: 3 phase 4 wire(3LN, 3CT) 3 phase 3 wire(2LL, 3CT) Please refer to Acuvim-L user's manual section 2.3 for other wiring configuration details. Settings Mode Meter Settings Press V/A and H together to enter the meter setting screen. Press “H” to move the flashing cursor to the right, press “P”... - Page 10 In the basic parameter setting mode, by setting the correct meter address, communication baud rate and parity (Acuvim-CL/DL/EL/KL only), we can engage in normal communication. The connection mode by setting the voltage, current connection mode, the voltage transformation ratio PT1, PT2, the voltage transformation ratio CT1, CT2 in order to achieve accurate measurement of the basic amount.
-
Page 11: Din Rail Installation
Digital Output(DO) Two modes available: alarm output, energy pulse output. two modes could be used independently in one module. The alarming mode and energy pulse mode can be set from the utility software or from the meter front software. 90.00 (3.543) Unit: mm (inches) 19.50 (0.768) Time of Use (Acuvim-EL only) -
Page 12: Specification
Power Supply Power supply 100~415Vac, 50/60Hz; 100~300Vdc Power consumption 3W@230Vac Withstand 3250Vac, 50/60Hz 1min Altitude 2000m 24DC Auxiliary Power Supply Operating Range 24Vdc Nominal consumption Isolation voltage 1000V Accuenergy Corporation Los Angeles-Toronto-Beijing North America Toll Free: 1-877-721-8908 Web: www.accuenergy.com Document#1030E3301 Revision Date: Nov., 2015...
Need help?
Do you have a question about the Acuvim-L Series and is the answer not in the manual?
Questions and answers