Table of Contents
Advertisement
Quick Links
Advertisement
Table of Contents

Related Manuals for Thiele Streamfeeder Value Series


Summary of Contents for Thiele Streamfeeder Value Series
- Page 1 Value Series V-710DM Manual...
- Page 2 Part Number: 00900394 © 2010 Thiele Technologies, Inc. - Streamfeeder. All rights reserved. No part of this publication may be reproduced, photocopied, stored on a retrieval system, or transmitted without the express written consent of Thiele Technologies, Inc. - Streamfeeder.
-
Page 3: Table Of Contents
ontents Safety Information ............ii Specifications ..............iv Section 1: About the Machine ............1 Section 2: Installing the Machine ..........4 Section 3: Preparing for Operation ..........18 Section 4: How to Operate ............29 Section 5: Operational Troubleshooting ........32 Section 6: Inspection and Care ...........34 Section 7: Mechanical Components ...........40 Section 8: Electrical Components ..........54 Section 9: Technical Troubleshooting ........58 V-710DM M alue erieS anual... - Page 4 efore egin Message Conventions DANGER signifies an action or specific equipment area that can result in serious injury or death if proper precautions are not taken. WARNING signifies an action or specific equipment area that can result in personal injury if proper precautions are not taken. CAUTION signifies an action or specific equipment area that can result in equipment damage if proper precautions are not taken.
- Page 5 efore egin Message Conventions Avoid injury. Do not reach around guards. Hazardous voltage. Contact will cause electric shock or burn. Turn off and lock out power before servicing. Moving parts can crush and cut. Keep guards in place. Lock out power before servicing.
-
Page 6: Specifications
peCifiCations Maximum Product Size: ......12 W x 12 L in (305 x 305 mm)* Minimum Product Size: ......3.75 W x 3.75 L in (95 x 95 mm) Optional: ............2.5 W x 2.5 L in (63 x 63 mm) Min/Max Product Thickness: ...... - Page 7 V-710DM M alue erieS anual...
-
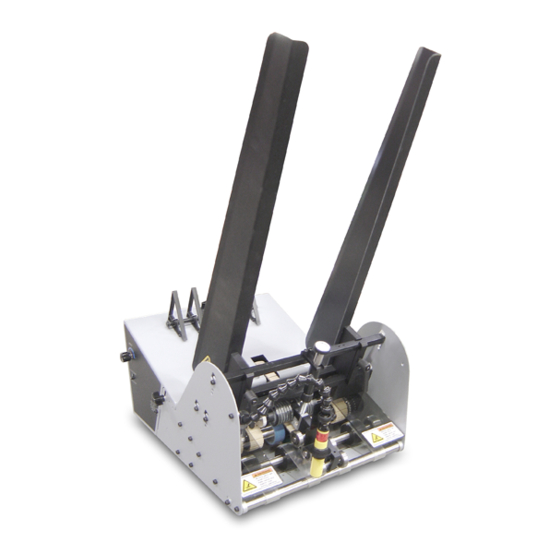
Page 8: About The Machine
About the Machine Features The V-710DM Universal Friction Feeder is designed for reliability, flexibility, and ease of use with a variety of host systems. Included are such applications as vacuum and non-vacuum bases and gripper-arm inserters. All parts required for setup, loading, feeding, sensing and easy operator control are combined into one compact unit. - Page 9 Table 1-1. Main Assemblies Feature Descriptions Feature Description Gate assembly and adjustment Mounted on a gate bracket assembly above the feed belts, this device provides a curvature to help preshingle stacked material. When properly adjusted, a clearance is created to help singulate and feed material. (Note: For multiple page material, a 1 to 1.5 maximum thickness is typical.) Table top...
- Page 10 Control Panel Components Dry Contact (Optional w/External Run) Figure 1-2. Control Panel Components (Left and Right Side Views) Table 1-2. Control Panel Feature Descriptions Feature Description AC power cordset connector Cordset plugs into this IEC320 connector to provide feeder with power from a grounded/fused outlet.
-
Page 11: Installing The Machine
Installing the Machine This section provides information on how to the install the V-710DM Universal Friction Feeder in the following application environments: • Vacuum base installation (2A) When performing initial installation, always • Inserter installation (2B) make sure you turn Off the main power switch and disconnect all equipment from the electrical power source. - Page 12 STEP 1: 1. Loosen locking knobs at both side guides (Figure 2-1). 2. Slide each side guide to the outermost position. Do not lock in Repositioning Front place. Side Guides Front side guides Locking knob Figure 2-1. Front Side Guides Being Repositioned STEP 2: 1.
- Page 13 STEP 3: 1. Locate the gate adjustment knobs (Figure 2-3) and turn com- pletely in a clockwise direction to raise hopping rollers. Raising Hopping Rollers 2. Then, locate the vertical adjustment lever on the hopping roll- ers assembly and push down all the way. This will raise the feed rollers to highest vertical position possible, thus making for maximum clearance.
- Page 14 STEP 5: 1. Position photo-eye pointing up and away from feeder and vacuum base. Initial Positioning 2. Lift the feeder onto the top plate of the vacuum base and slide of Feeder forward toward the vacuum base gate. 3. Center the feeder between the two side guides as you posi- tion the feeder fully forward.
- Page 15 STEP 7: As material leaves the feeder gate cylinder, the trailing edge must be under the hold-down as the leading edge is entering the vacuum base Checking Material transfer section. There must be a good transfer of material from the Discharge from Feeder feeder hold-down to the vacuum base transfer section.
- Page 16 STEP 8: 1. Position photo-eye pointing up and away from all objects for continuous operation. Miscellaneous 2. Set the variable speed control (Figure 2-7) to the lowest speed Feeder Adjustments (counterclockwise). Gradually increase the speed to match the speed of the vacuum base, thus bringing the gap of the mate- rial closer together.
- Page 17 Installation of the V-710DM Universal Friction Feeder onto the back deck plate of an inserter is a relatively simple procedure. Several Inserter Installation minor modifications to the selected insert station are required prior to mounting, wiring, and aligning the feeder. To install the feeder, perform the following steps: 1: Removing rear guide assembly 2: Removing T-plate...
- Page 18 STEP 2: With the rear guide assembly removed, you can now access the in- serter T-plate. Simply lift off of back deck plate (Figure 2-9). Removing T-Plate T-plate Figure 2-9. Removing T-Plate from Inserter STEP 3: 1. Locate the separator foot at the front side of the inserter sta- tion (attached to top rotating shaft).
- Page 19 STEP 4: 1. Locate the suction cup and hose from front side of insert sta- tion. Removing Suction Cup 2. Remove suction cup from vacuum assembly (Figure 2-11). and Closing Off Vacuum 3. Lower and tilt the adjustable vacuum assembly forward (by Hose turning the built-in thumbscrew).
- Page 20 STEP 5: 1. Cycle the inserter until the gripper arm jaw is approximately .5 in. (12.7 mm) from the hopper plate (leading edge of mate- Repositioning rial exiting feeder stops here). Insert Guide Tabs 2. Locate the two insert guide tabs that protrude from under the back deck plate.
- Page 21 STEP 6: 1. Using the two provided hold-down spring assemblies (with support bars), place each on the insert station rail (feeder side Installing Feeder of inserter). Hold-Down Spring 2. Position each spring support bar so they are equally spaced Assemblies from each edge of the material to be run (Figure 2-13A).
- Page 22 STEP 7: 1. Position the feeder on the rear deck plate so the two slots on the back deck plate line up with two threaded holes in the bot- Aligning Feeder with tom of the feeder (Figure 2-14A). Insert Station 2.
- Page 23 STEP 9: The length and weight of the feeder may cause the rear deck plate of the inserter to flex. A variety of alignment and feeding problems can Installing Support result from such flexing. Always use a support stand on all inserter Pedestal applications.
- Page 24 STEP 11: 1. With the machine turned Off, position the photo sensor so it first is somewhat centered between outside edges of the mate- Initial Feeder Photo rial. Sensor Positioning 2. Next, adjust the sensor so it points exactly at the leading edge of material being held by the hold-down springs (Figure 2-17).
-
Page 25: Preparing For Operation
Preparing for Operation Once the Streamfeeder V-710DM Universal Friction Feeder is in- stalled on your host system, you are then ready to prepare the machine for operation. To do so, you must perform several adjustments with the When performing initial feeder adjustments material you are going to be feeding. - Page 26 STEP 1: Procedure To adjust the gate assembly for proper gap: Gate Assembly Adjustment 1. Slide a single sheet of test product under the gate assembly. It may be necessary to pull up on the adjustment knob to allow (continued) the piece to be inserted.
- Page 27 STEP 1: To adjust the gate for effective material skew control, follow these Gate Assembly steps: Adjustment 1. Repeat drag test. (continued) 2. Test the piece for uneven side-to-side drag. Grasp with two hands and slide it front-to-back under the gate assembly. A proper adjustment allows for equal drag on the left and right sides of the piece of material.
- Page 28 Changing From Review The V-710DM is shipped to you with a high-tension spring in the Factory Set gate assembly. This works well for most materials, allows for tall High-Tension to stack height, and helps provide the best performance in prevent- ing doubles.
- Page 29 Review STEP 2: The side guides hold the stack of material being fed and they guide the Side Guides Setting material through the feeder in a straight line of movement. You can adjust the side guides to accommodate different sizes of material. Objective Adjust the side guides so the material stack maintains uniformity from top to bottom with no drifting or binding.
- Page 30 STEP 3: Review The back wedge provides proper lift to the material to help keep it off Back Wedge the table top and feed belts, and it creates the force necessary to push Adjustment material against the gate assembly. By adjusting it back and forth from the gate assembly or pivoting side to side, you can create the lift and force necessary to preshingle material against the curvature of the gate assembly.
- Page 31 STEP 3: Objective Adjust the back wedge for proper support of the material off the table Back Wedge top, without creating any pinch or stress points. Adjustment (continued) Procedure To adjust the back wedge for initial proper positioning, follow these steps: 1.
- Page 32 STEP 4: Review The photo sensor is mounted on the flexible extension arm to detect Final Photo Sensor the leading edge of a piece of material to be staged. When the grip- Adjustment (Inserter per jaw pulls the material from the feeder, the photo sensor no longer “sees”...
- Page 33 STEP 4: 4. Simulate gripper jaw action by manually grasping the leading edge of the bottom sheet and pulling completely away from Final Photo Sensor the gate assembly area. Once a piece is removed from the Adjustment (Inserter gripper jaw, the sensor sends a signal to the feeder to “stage” the next piece.
- Page 34 STEP 5: Before you move on to Section 4, How to Operate, verify the installa- tion is properly done by reading the following to prevent any opera- Verifying Proper tional problems: Installation • Review of installation • Manual test to verify Review of Installation Please notice the two applications covered in the text to follow: vacuum base and inserter.
- Page 35 STEP 5: Now that you have made all the necessary adjustments for operation, it is recommended you verify material singulation and separation at Verifying Proper the feeder for your particular application. Before you power-up and Installation run your machine with a full hopper, manually feed several sheets of material through the gate assembly area.
-
Page 36: How To Operate
How to Operate This section provides a sequence of operation for the V-710DM Uni- versal Friction Feeder. It also provides information for clearing a jam and for shutdown. Sequence of Successful power-up and operation is assured if you apply the follow- ing sequence of steps: Operation 1: Loading material in the hopper... - Page 37 Power-Up and Test Section 3 STEP 2: 1. Gradually add more material to the hopper after the initial stack is formed around the gate assembly. As stack height will Determining Stack have a preferred minimum and a maximum, you will have to Height experiment to determine effective range of height.
- Page 38 Section 4 Troubleshooting STEP 5: For vacuum base applications: 1. With the feeder already fully loaded and powered On, run the Running Test Cycles vacuum base through several cycles. 2. Notice transition of material from feeder gate assembly area to the transfer area of the vacuum base.
-
Page 39: Operational Troubleshooting
Operational Troubleshooting Table 5-1 is intended to provide you with quick solutions to the more common day-to-day problems you may encounter. For additional troubleshooting information, see the Section 9, Technical Troubleshooting. Table 5-1. Quick-Look Troubleshooting Problem Cause Solution No AC power to Move switch to "On"... - Page 40 Table 5-1. Quick-Look Troubleshooting (continued) Problem Cause Solution Review gate assembly adjustment Feed belts are 5. Gate assembly may be down too tight. procedure. operating, but ma- terial not feeding Remove material from stack. Test (continued) 6. Too much weight in hopper. again.
-
Page 41: Inspection And Care
Inspection and Care Please read this Section to learn how to: • Visually inspect your machine to detect part problems which may require adjustment or replacement. When performing initial feeder adjustments • Periodically care for your machine to prevent any operational prob- prior to operation, always make sure you turn Off the main power switch and disconnect all lems. - Page 42 Visual Inspection Ensuring Proper Timing and Drive Belt Tracking (continued) Check for visual signs of: • Misaligned timing pulleys. Checking for Gate Assembly Wear Check for visual signs of wear: • Advancing O-ring, or standard O-ring: Flat areas along the O-rings (Figures 6-1 and 6-2, respectively).
- Page 43 Visual Inspection Advancing O-Ring Gate: Adjusting Worn O-Rings (continued) To adjust worn O-rings on advancing O-ring gate (Figure 6-4): 1. Turn Off feeder and remove power cord from outlet. 2. Open discharge safety shield to access gate. 3. Make sure advance knob is in-line with the side plate and secure.
- Page 44 Preventive Care Cleaning Feed and Discharge Belts To clean feed belts: 1. Turn Off feeder and remove power cord from outlet. 2. Remove gate assembly from gate plate for easier access to Use only isopropyl alcohol (98% concentration). belts. Other solvents can cause belts to wear 3.
- Page 45 Preventive Care Cleaning Gate Assembly Use only isopropyl alcohol (98% concentration). Do not use any (continued) other types of solvents. They can cause premature wear of the belts, or even total breakdown of the material. To clean gate assemblies: 1. Turn Off feeder and remove power cord from outlet. 2.
- Page 46 Preventive Care Cleaning Photo Sensor To clean the photo sensor lens: (continued) 1. Turn Off feeder and remove power cord from outlet. 2. Using a soft, dry cloth, wipe across the face of the photo sen- sor lens. 3. Recheck the adjustments to make sure it is still in alignment to the target (for a review, refer back to Section 3, Preparing for Do not use any solvents or cleaning agents when cleaning the photo sensor lens.
-
Page 47: Mechanical Components
Mechanical Components BASE FEATURES V-710DM M alue erieS anual... - Page 48 BASE FEATURES ITEM QTY. PART NUMBER DESCRIPTION 51050102 Shell Split Front ear right 10501139 SenSor aSSembly, Sheet V710 Dual moDe 51050101 Shell Split Front ear leFt 44846058 Foot Suction cup 00003341 WaSher lock 1/4 internal Star tooth 44649034 moDule ac poWer entry W/o FuSeS 53500558 FuSe 5a 250V Slo-blo 5 x 20 mm 44841002...
- Page 49 BASE FEATURES V-710DM M alue erieS anual...
- Page 50 BASE FEATURES ITEM QTY. PART NUMBER DESCRIPTION 51050237 baSe plate 44675003 mount Front baSe plate 44846056 bracket belt tenSioner 23511290 belt tenSioner aSSembly 44846038 pulley, timing 14xl037 .500DFa 10501133 motor aSSembly 90VDc (115V moDelS only) 10502233 motor aSSembly 180VDc (230V moDelS only) 44841063 block piVot center 44841064...
- Page 51 CARRIAGE ASSEMBLY Assembly # : 10501102 V-710DM M alue erieS anual...
- Page 52 CARRIAGE ASSEMBLY Assembly # : 10501102 ITEM QTY. PART NO. DESCRIPTION ITEM QTY. PART NO. DESCRIPTION 44841020 AdjustAble RolleR shAft 15000076 belt, tAn gum 24g .75W X 9l 44841033 RolleR 44841034 belt, timing 206Xl037 23500094 beARing bAll R8 23500162 belt, tAn gum 24g 1W X 9l 00001155 Clip e 1/2 WAldes 44485005...
- Page 53 STANDARD O-RING GATE W/HORIZON ADJUST ASSEMBLY Assembly # : 13511872 V-710DM M alue erieS anual...
- Page 54 STANDARD O-RING GATE W/HORIZON ADJUST ASSEMBLY Assembly # : 13511872 ITEM QTY. PART NUMBER DESCRIPTION 23511037 aDj knob aSSembly For gate 23500019 cylinDer gate Spring 23560084 ShaFt gate liFt 23500083 Spring gate compreSSion 15000001 mount gate liFt ShaFt 00002334 bhcS 10-32 x 1/2” lg 44872005 ScreW aDjuStment 23500089...
- Page 55 HOLD DOWN ASSEMBLY Assembly # : 10501109 V-710DM M alue erieS anual...
- Page 56 HOLD DOWN ASSEMBLY Assembly # : 10501109 ITEM QTY. PART NUMBER DESCRIPTION 51277087 DiScharge roller collar 00001150 e-clip 3/8 23500095 r6 bearing 51050238 holD DoWn ShaFt 51312003 Spring pin 1/8” 51328001 holD DoWn Spring 00002234 FhSc 10-32 x 3/8” 51312001 holD DoWn mount 51050239 holD DoWn block...
- Page 57 GATE PLATE ASSEMBLY Assembly # : 84111006 V-710DM M alue erieS anual...
- Page 58 GATE PLATE ASSEMBLY Assembly # : 84111006 ITEM QTY. PART NUMBER DESCRIPTION 44841004 clamp, SiDe guiDe 44841006 Support, upper gate bar 44841005 bar, loWer gate Support 44841007 bar, pre-gate 44675006 clamp, SiDe guiDe aDjuSt 43555098 hanDle 10-32 x .75 44841011 hook, gate j 44841016 gate, pre-gate...
- Page 59 TRIANGLE WEDGE ASSEMBLY Assembly # : 63311018 V-710DM M alue erieS anual...
- Page 60 TRIANGLE WEDGE ASSEMBLY Assembly # : 63311018 ITEM QTY. PART NUMBER DESCRIPTION 44633018 WeDge guiDe ShaFt 00002320 ShcS #10-32 x 5/8 lg 44633014 WeDge block 44633016 rounD t-nut 44633033 knob, 3 lobe 00001110 ring grip 3/8 WalDeS 43560212 WeDge, material Support V-710DM M alue erieS...
-
Page 61: Electrical Components
Electrical Components V-710DM M alue erieS anual... - Page 62 V-710DM M alue erieS anual...
- Page 63 V-710DM M alue erieS anual...
- Page 64 V-710DM M alue erieS anual...
-
Page 65: Technical Troubleshooting
Technical Troubleshooting General Troubleshooting Terms Only a qualified technician should perform electrical troubleshooting activities. This unit operates on 115V or 230V electrical power. Bodily contact with these voltages can result in serious injury or death. Gaining Access to Refer to the Model V-710DM electrical wiring diagram located in Section 8, Electrical Components. - Page 66 Problem Solution Testing the power entry 1. Make sure there is power present at the AC main where the feeder is plugged in. module 2. Remove power cord from the AC input switch module (44-649-034) and disconnect the two spade connector leads located on the back of the module inside the feeder. These terminals are labeled “A”...
- Page 67 Table 9-1. Quick-Look Troubleshooting (continued) Problem Solution 3. Measure for the presence of AC power at the L1 and Neutral (L2) terminal of the Testing the sensor (contin- motor drive board. If power is not present, first verify integrity of AC power leads from ued) the power entry module, and refer to section titled “Testing the power entry module.”...
- Page 68 Table 9-1. Quick-Look Troubleshooting (continued) Problem Solution Testing the user speed 1. Remove the three pot leads from the drive board; orange, red, and white. control assembly 2. Using an ohmmeter, measure between the orange and white leads for approximate- ly 5k ohms.
- Page 69 Table 9-1. Quick-Look Troubleshooting (continued) Problem Solution DC motor drive board setup 1. Set user speed control to fully clockwise position (maximum speed). procedure 2. Set all four dials of the DC motor drive board (44-642-025) to their respective posi- tions as shown in the electrical wiring diagram;...
- Page 70 Table 9-1. Quick-Look Troubleshooting (continued) Problem Solution Testing the motor (contin- 6. Using an ohmmeter, measure between the motor body and the motor connector pin that has the green wire with a yellow stripe. This is a ground wire that bonds ued) the motor body to earth ground.
- Page 71 V-710DM M alue erieS anual...
- Page 73 315 27th Avenue NE · Minneapolis, MN 55418 · USA : (763) 502-0000 · F : (763) 502-0100 : service@streamfeeder.com Mail : www.streamfeeder.com © 2010 Thiele Technologies, Inc. - Streamfeeder Printed in the USA.
Need help?
Do you have a question about the Streamfeeder Value Series and is the answer not in the manual?
Questions and answers