Table of Contents
Advertisement
Quick Links
Advertisement
Table of Contents

Related Manuals for Tumo-Int 3000W 5Blades

Summary of Contents for Tumo-Int 3000W 5Blades
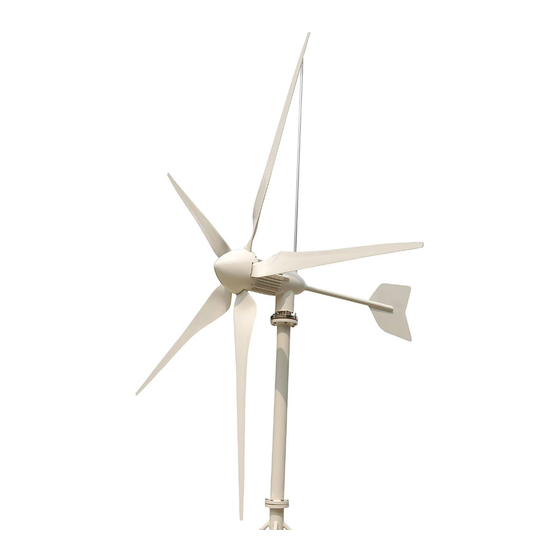
- Page 1 Tumo-Int 3000W 5Blades Small Wind Turbine User Manual...
- Page 2 Copyright Copyright © 2016 Tumo-Int Corporation Limitd. All rights reserved. Trademarks All product, font and company names mentioned in this manual may be trademarks or registered trademarks of their respective companies.
- Page 3 Preface Dear user: Thank you for your purchase of Tumo-Int wind turbine. We believe you will find it easy to install, moreover, we are confident you will experience years of dependable service from it. Please make sure you have read the manual carefully before any assembly, installation or operation of Tumo-Int wind turbine, which is helpful for better &...
-
Page 4: Safety Instructions
Safety Instructions PLEASE READ THESE INSTRUCTIONS CAREFULLY BEFORE ASSEMBLING, INSTALLATING OR OPERATING OF YOUR WIND TURBINE. 1. Before the small wind turbine installation, you must know: 1) Do not install wind turbine on a windy day or dusty day with wind speed more than 8m/s. 2) Wearing wet gloves or clothes are forbidden. - Page 5 2) Connect between system output terminal and external circuit should be fixed, or use socket for system output terminal. 3) Do not use two-way plug adapter for the connection of system’s output terminal with external circuit. 4) Apart from the installation of the permanent circuit, any cables or wires that might be damaged due to outdoor exposure should be sheathed with conduit for protection.
-
Page 6: Warranty Claim Procedures
2. Detailed description of the defects and corresponding test result has been done in accordance with the troubleshooting Tumo-Int provided. 3. Tumo-Int technician may ask for some extra testing in order to identify the defects so solutions could be provided promptly and precisely. Wind turbine users are liable to conduct these extra testing and provide referable test result. - Page 7 Customer is responsible for shipping the defect or damage part for repairing if needed, then Tumo will repair or replace with new one for free and ship to owner on Tumo-Int cost, if no defected piece ship back to us but need replacement, Tumo-Int will provide the part for free but shipping expense will be at buyer side.
-
Page 8: Exploded View And Parts List
Exploded View & Parts List... - Page 9 Item Description Tail vane Bolt M10×30 Flat washer Ø10 Spring washer Ø10 Nut M4 Decoration cover Generator Bolt M10×60 Locknut M10 Flat washer Ø10 Nut M24 Flat washer Ø24 Spring washer Ø24 Screw M5×12 Flat washer Ø5 Spring washer Ø5 Nosecone Blades Tower flange...
-
Page 10: Technical Specifications
1. Technical Specifications Model 3000W 5 Blades Rated Power 3000W Max. Power 3500W Rated Voltage 48Vdc 110Vdc 220Vdc Rated rotation speed 700rpm Start-up Wind Speed 2.0m/s Cut-in Wind Speed 2.5m/s Rated Wind Speed 12m/s Survival Wind Speed 50m/s Rotor Diameter Blades Quantity Swept area 7.3m²... -
Page 11: Wind Turbine Assembly
2. Wind Turbine Assembly Installation on site is simple, mainly including mounting blades on the hub, securing the hub to the turbine body, installing the nosecone on the blade hub and mounting wind turbine on the pole. Please install the whole turbine in accordance with the following instructions. 2.1 Mounting Blades on The Hub ①Check if all components are in good condition. - Page 12 2.2 Connecting lead wires to Wind Generator ① wind generator main body ②Unscrew cable cover. ③ Pass the wires through the cover. ④Connect the three-phase lead wires into ⑤Screw up the cable cover. ⑥Screw up the waterproof cover. the terminals (make sure three phases are not short circuited)
- Page 13 2.3 Generator and Tail Vane Assembly ①Wind generator ②Tail vane ③Insert the tail vane into the groove of the back of generator, pay attention to the flange bore position is corresponding position is corresponding to the hole of back of the generator.
- Page 14 ⑦ Snap the cover to the back of generator ⑧Tighten the cover by screws to 5N.m ⑨Assembled. 2.4 Mounting Turbines on The Pole ①Pass the cable through from the pole ②Connect the turbine to the pole by bolts. ③ Place flat washer, spring washer and nut, tighten the nut to 60N.m 2.5 Hub/Blades and Generator Assembly...
- Page 15 ① The nosecone and accessories. ②Place the hub with blades onto the rotor shaft ③ Fully tighten the nut to 500N.m and “spin” it completely onto the turbine alternator shaft, then place in sequence of flat washer, spring washer and nut. ④Snap the nosecone into position over the ⑤After installation tug on the nosecone to ⑥...
-
Page 16: Tower Installation
3 Tower Installation 3.1 Siting An ideal location for wind generator is required with stable speed and direction of prevailing wind. Small changes in wind speed and direction can have a dramatic effect on power production. In general, the higher the tower, the greater the wind speed and ultimately power production are. Therefore, the site of your wind turbine should be carefully considered. - Page 17 WARNING: Even if installing the turbine in a less windy location, the three-phase wires must be short circuited during installation to prevent the turbine from turning. 3.1 Design Requirements The tower has a direct effect on the safety of the wind turbine. We offers some tower choices for Tumo-Int wind turbine. The following section provides a summary of the available towers.
- Page 18 Chart 2 Chart 1 Dimension requirement: Dimension requirement: ODΦ114×thickness 5mm seamless pipe Pole Diameter “D“ ① ② 150 ≤Length“L“(pipe length)≤ 200 When the upper diameter of same diameter pole or taper shape pole “D“ ≤Φ120, prefer chart 2 connection way and no need of 250 ≤Distance“...
- Page 19 Special installation 2: flat roof top Explanations: 1.This installation is workable for flat roof top. 2.The wall or ground of rooftop should be concrete or solid wall. 3.The installations could be both used expansion bolt to fix the supporting structure. Dimension requirement: Distance from rotor centre to roof top ≥...
- Page 20 4. Wire Size Selection All electrical systems lose energy due to resistance in conductors: the wires. • The larger the wire is , the less resistance and the loss are • Resistance losses will also increase with increasing current; therefore, if you installation is at a high wind site, it may be worthwhile to go with a larger size wire to lower the loss and enhance the output of wind turbine.
-
Page 21: Troubleshooting
2) The tower flange is not matching with the flange on turbine, which cause the interference to adjust the wind turbine facing direction. ① check if the flange is provided by or in accordance with Tumo-Int flange drawing; ② check if the flange on turbine is loose, and if the axis of rotation fall into the tower. - Page 22 5.1.3 Rotation seed Dramatically Decreases Wind turbine rotation speed dramatically decreases under heavy wind condition, which can be mainly divided into normal deceleration and abnormal deceleration: 1) Turbine normal deceleration is due to wind turbine over-speed protection, for example, dump load, electromagnetic braking and blades aerodynamic braking.
- Page 23 5.2 System Troubleshooting 5.2.1 Off-grid wind and solar hybrid system 5.2.1.1 Solar Output Voltage Too Low or No Output 1) Check whether solar panel lead is short circuit, circuit break, open circuit or not. 2) Check whether solar panel is damaged or accumulated too much dust, etc. 5.2.1.2 Abnormal charging Wind turbine does not charge battery is mainly caused by: 1) Wind speed is too low to reach cut in point.
- Page 24 5.2.2 Grid-tied Wind Turbine System 5.2.2.1 No power feed into grid 1) Wind speed is too low, wind turbine still haven’t reach it’s cut-in wind speed, so no current generated in less than 2.5m/s wind speed. 2) Wind speed is too high, wind turbine output voltage reach the over-voltage point, controller short-circuit braking system protect the wind turbine and the whole system, the system will restore automatically when the wind speed decrease.
- Page 25 6. Maintenance Although your high reliability of Tumo wind turbine has been designed to run for 15 years without any maintenance, reliability and performance will be enhanced if you periodically inspect your system. IMPORTANT: It is suggested that putting down the pole and making wind turbine short circuit before some extremely bad weather, such as typhoon, in case of some unpredictable accidents happen.
- Page 26 Appendix I Definition of 50m/s survival wind speed of the wind turbine Tumo wind turbine is strict in accordance with following standards: GB/T 10760.1 Generator of Off-grid Wind Turbine Generator System Part 1:Technology condition GB/T 13981-2009 Design General Requirements for Small Wind Turbine Generator System GB 17646 Safety of Small Wind Turbine Generator System GB/T 19068.1 Off-grid Wind turbine Generator Systems Part 1:Technology condition JB/T 10399-2004 Rotor Blades for Off-grid Wind Turbine Generator System...
- Page 27 From above explanation, the survival wind speed of Class III wind turbine is: =1.4 -1.4 *7%=1.4*37.5-1.4*37.5*7%=52.5-3.68=48.82m/s (<50m/s) So this is why the survival wind speed of Tumo-Int wind turbine is 50m/s. Generally speaking, the safety and operation of wind turbine is closely related with matching components, correct pole installation, correct system cable...
- Page 28 Appendix II ( Source: National Weather Service Portland, http://weather.gov/portland)
Need help?
Do you have a question about the 3000W 5Blades and is the answer not in the manual?
Questions and answers