Table of Contents
Advertisement
Quick Links
Advertisement
Table of Contents

Subscribe to Our Youtube Channel
Summary of Contents for Vancare GoLift
- Page 1 Installation and Operation Instructions GoLift Service and Repair Manual...
-
Page 2: Table Of Contents
Contents Introduction Getting Access To The GoLift Engaging The Trolley Micro-switch Replacing The GoLift Strap Replacing The GoLift Battery PCB Connections Replacing the PCB 10-11 Replacing the GoLift Hand Control Replacing The Emergency Switch 13-14 Replacing the GoLift Motor(s) 15-16... -
Page 3: Introduction
Vancare strives to consistently provide exemplary service, design, and installation to all of its customers. In an ever more competitive market, it is important to standardize installation techniques, thus ensuring that the highest standards of quality and safety are met. -
Page 4: Getting Access To The Golift
Getting Access to the GoLift 1. Use a stand to support the lift while it is being serviced. 2. Turn the lift upside down to the side showing the battery compartment lids. 3. Twist the knobs to unlocked position and remove the battery lids. -
Page 5: Engaging The Trolley Microswitch
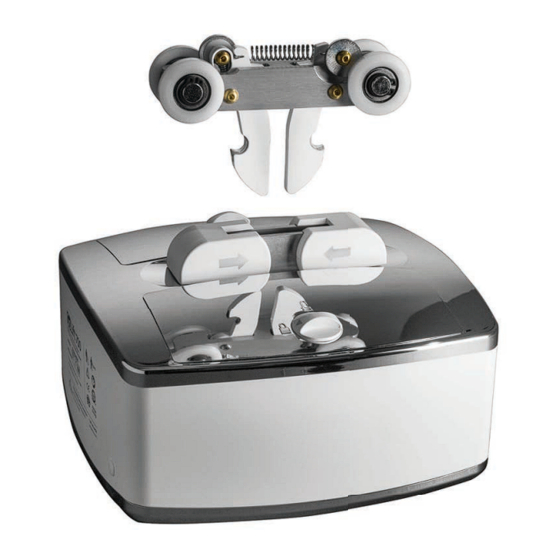
Engaging The Trolley Microswitch 1. Insert the trolley to activate the trolley micro-switches to allow for correct operation of the GoLift. www.vancare.com... -
Page 6: Replacing The Golift Strap
Engaging The Trolley Microswitch Alternatively, a jumper can be used to activate the trolley micro-switches in the GoLift. 2. Disconnect the trolley micro-switch harness and plug in the jumper in the proper circuit board port. Replacing The GoLift Strap 1. Press the down button on the hand control. - Page 7 4. Loosen the 5/32” shoulder bolt and pull out from the gear hub assembly. 5. Pull the strap out of the gearbox assembly. 6. Insert the new strap, with the correct orientation as shown through the opening in the bottom cover of the GoLift. 7. Position the strap through the limit switch rollers.
-
Page 8: Replacing The Golift Battery
Replacing The GoLift Battery 1. Remove the trolley from the lift 2. Pull the emergency red power cord to ensure all power is cut o from the battery. 3. Open the battery lids to expose the batteries. 4. Grasp the connector and pull outwards to disconnect the batteries. -
Page 9: Pcb Connections
PCB Connections Battery Connectors Emergency Motor Limit Hand Switch Charger Motors Latches Brake Switch Control www.vancare.com... -
Page 10: Replacing The Pcb
1. Make sure to use proper ESD equipment (wrist strap) prior to handling the PCB. 2. Open up the GoLift by following the steps in the section “Getting access to the GoLift”. 3. Unplug all the harnesses from the PCB. - Page 11 Replacing the PCB 5. Position the new PCB on to the top cover of the GoLift. Make sure to line up the connector with the opening in the cover. 6. Plug in all the harnesses. 7. Fasten the PCB to the top cover using a 3mm T-handle.
-
Page 12: Replacing The Golift Hand Control
Replacing the GoLift Hand Control 1. Open up the GoLift by following the steps in the section “Getting access to the GoLift”. 2. Disconnect the hand control harness. 3. Twist the hand control grommet until it is able to pass through the opening in the cover. -
Page 13: Replacing The Emergency Switch
Replacing the Emergency Switch 1. Use a Phillips screwdriver to remove the two (2) screws securing the emergency stop switch bracket. 2. Once the bracket is removed, the emergency stop sleeve can be removed. www.vancare.com... - Page 14 Replacing the Emergency Switch 3. Use an 8mm socket wrench to remove the emergency switch from the bracket. 4. Disconnect the emergency switch. 5. Use cable tie cutters to remove the cable ties. Vancare...
-
Page 15: Replacing The Golift Motor(S)
Replacing the GoLift Motor(s) 1. Use a 3mm T-Handle to remove the three (3) screws securing he motor brake. 2. Disconnect the motor harness from the motor. 3. Use a 3mm T-Handle to remove the three (3) screws securing the motor to the motor mounting plate. - Page 16 Replacing the GoLift Motor(s) 4. Slide the motor out of the motor mounting plate. 5. Install new motor and motor brake following the previous steps in reverse. Vancare...
-
Page 17: Checking The Overspeed Cam
3. Use a T-handle or a small screw driver to con rm that the overspeed cam is operating correctly and not getting stuck. 4. Reassemble the gear hub and gear by pushing the gear back into place towards the plate and reinserting the retaining ring. www.vancare.com... -
Page 18: Replacing The Limit Switch
2. Install a new limit switch harness and test it to con rm that these are operating correctly. Spare Parts LIFT QR TRLY ASSY EL BAT PACK AA 2AH EL CRC BRD MMB GL LIFT MTR ZN1203 LIFT STRAP GO LIFT HND CTRL 2 Vancare... -
Page 19: Warranty
The primary purpose of our ceiling lift system is to safely lift, transfer and reposition a patient with a little effort as possible for the caregiver, regardless of the room type. Vancare's GoLift is easy and safe to use for caregivers as well as patients. - Page 20 Vancare | www.vancare.com 1515 1st Street Aurora, NE, 68818 Toll Free Tel: 1.800.694.4525 Tel: 402.694.4525 Fax: 402.694.3994 Email: Info@vancare.com...


Need help?
Do you have a question about the GoLift and is the answer not in the manual?
Questions and answers