Table of Contents
Advertisement
Quick Links
Version 3.1
Version 3.1
2020
2020
Digital, Reliable Transmission, up to 1Km!*
Digital, Reliable Transmission, up to 1Km!*
Typical Installation
Typical Installation
NB: MINIMITS units are NOT compatible with
VideoMitter MK1, MK2 & LITE and can NOT be used together
Email:
support@videomitter.com
Operating Manual
Operating Manual
Operating Manual - VideoMitter.com
Video Transceivers!
Video Transceivers!
Video Transceivers!
Order Code:
Order Code:
MINIMITS
MINIMITS
Wireless Analogue
Wireless Analogue
Wireless Analogue
Wireless Analogue
Wireless Video Transmission
with no cables
Digital Data Transmission
for cleaner, sharper images
Privacy Pairing Function
keeps TX data private for GDPR compliance
Whisper Mode
"listens" for data in low power mode
Power Pass-through
camera & TX can share 1 PSU
Mini Size
Both RX & TX just H80 x W40mm with
no antenna
Web:
*Additional antennas
required for 1Km
www.VideoMitter.com
Advertisement
Table of Contents

Summary of Contents for Videomitter MINIMITS
- Page 1 Digital, Reliable Transmission, up to 1Km!* Digital, Reliable Transmission, up to 1Km!* Typical Installation Typical Installation NB: MINIMITS units are NOT compatible with *Additional antennas VideoMitter MK1, MK2 & LITE and can NOT be used together required for 1Km www.VideoMitter.com Email: support@videomitter.com Web:...
- Page 2 VideoMitter Instructions Things the professionals know! - different sites will affect the range. Microwave signals will not go through hills. The density of the hill and water it contains in the soil absorbs the signal. Microwave signals will through branches of trees but remember that they will be attenuated greatly by water.
- Page 3 VideoMitter Instructions Things the professionals know! - getting maximum performance when fi tting multiple pairs of VideoMitters on the same site. When you are fi tting multiple pairs of VideoMitters on the same site, it’s really important to have some knowledge of good...
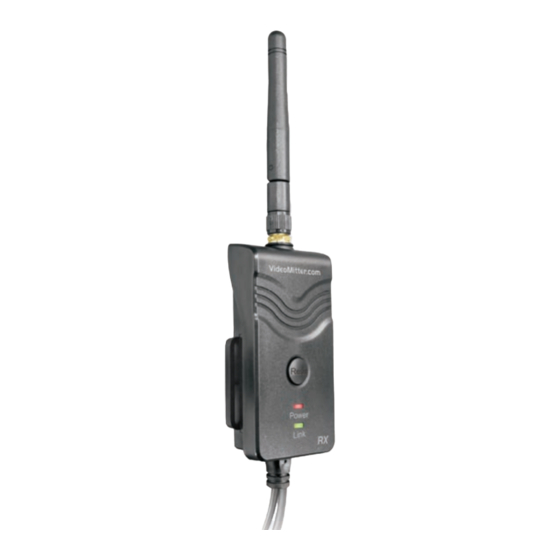
- Page 4 VideoMitter Instructions Read these instructions Receiver unit has the following connections before using the MINIMITS as they contain vital information... Connections - TX/RX Although identical in appearance each unit is clearly marked on the face as: TX - Transmitter RX - Receiver 2.1mm 12V D.C.
-
Page 5: Connecting The Video
VideoMitter Instructions Connecting the Video Powering the Units Transmitter Both the transmitter and receiver require a power supply unit (PSU). The PSU for the receiver and transmitter needs to be capable Receiver of supplying 12V D.C. @ 190mA continuously. Please keep this in mind if you are intending to share a PSU for both the TX unit and your chosen CCTV camera. - Page 6 VideoMitter Instructions Pairing Receiver with Transmitter Checking if the units are paired For security purposes and to ensure that transmissions are only shared by the receiver connected, the transmitter is paired with Set the units up at least 2 feet apart.
- Page 7 VideoMitter Instructions How to Pair Units First ensure that a event monitor connected that no signal is to the RX Receiver and displayed after the Wait Signal... a video feed to the TX pairing process, Transmitter. Press the this means that the...
-
Page 8: Installation Procedure
VideoMitter Instructions the enclosure and a good silicon seal made to Installation Procedure protect from water/moisture (fi gure 2). The transmitter and receiver will give the best results if there is line of sight between them. Obstructions will affect transmissions if the... -
Page 9: Installation Tips
Therefore it is not advisable to place the transmitter directly behind a wall. Whilst the VideoMitter may work indoors through walls and offi ce constructions, there are no easy ways of confi rming this, so use the signal strength bar and attach a pair of antenna to improve transmission quality if necessary. -
Page 10: Troubleshooting
As the density so the number may be less. VideoMitter pack will either provide good Always ensure that the transmitter and receiver video quality or nothing at all, you can either have line of sight. - Page 11 VideoMitter Instructions Troubleshooting Power Link Symptom Reason light light No power light on the Transmitter or No Video No Power Signal Receiver. No Video This could mean that there is no power Not Paired Signal to the Transmitter or Receiver. Check that the power light comes on when power is applied.
- Page 12 VideoMitter Instructions Get up to 1KM “Line of sight” range by adding extra antennas.. 1000m AER550 AER550 300m AER538 AER538 Connect these antennas 250m directly to the The AER550 unit connects with AER535 AER535 an antenna connection 200m cable overleaf...
- Page 13 VideoMitter Instructions Internal Omni-Directional Antenna - Direct Connection code:AER535 Connect antenna This antenna allows the TX & RX to be enclosed in a Specification directly to unit small external enclosure with this antenna mounted IP65 Rating - Indoor or Outdoor on top of the box for a professional look.
- Page 14 Power the Tx plus (158 x 91 x 46mm) camera with 1 PSU Fully Regulated IP65 Rating RDER RDER MINIMITS RX & TX BOX415 POW803 Ivory ABS Build draws 190mA Spare Parts for Tx and Rx VideoMitters RDER ESCRIPTION...
- Page 15 Can be used as a talkback amp with DVRs Use the VoiceOff for... Welcoming Inform in risk Warning off Visitors areas intruders Hard hats Warning! Intruder Welcome to Deterring must be worn detected, CCTV Groves Garden vandals system recording. Centre. in this area! www.VideoMitter.com Email: support@videomitter.com Web:...
- Page 16 (H) 80mm x (W) 40mm x (D) 18mm hopping modulation. All specifi cations are approximate. VideoMitter.com reserves the right to change any product specifi cations or features without notice. Whilst every effort is made to ensure that these instructions are complete and accurate, VideoMitter.

Need help?
Do you have a question about the MINIMITS and is the answer not in the manual?
Questions and answers