Advertisement
Quick Links
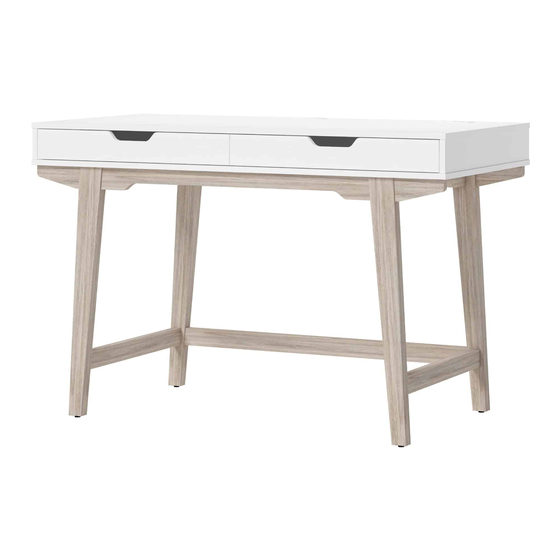
Whitney 48in Desk with Powerstrip
ADULT ASSEMBLY REQUIRED DUE TO THE PRESENCE OF SMALL PARTS, SHARP
POINTS, SHARP EDGES AS RECEIVED
If you have any questions regarding assembly or if parts are missing, DO NOT return this item to the
store where it was purchased. Please call our toll-free customer service number and have your
instructions and parts list ready to provide the model name, part name or factory number:
Pacific Standard Time: 8:30 a.m. - 4:30 p.m., Monday - Friday
Or visit our web site 24 hours a day, 7 days a week for product assistance at
THIS INSTRUCTION BOOKLET CONTAINS IMPORTANT SAFETY INFORMATION.
Thomasville™ is a trademark of HHG IPCo, LLC. ©HHG IPCo, LLC. thomasville.com
Model # SPLS-WH48D-TV
1-866-942-5362
www.whalenfurniture.com
Or e-mail your request to parts@whalenfurniture.com
PLEASE READ AND KEEP FOR FUTURE REFERENCE.
Date 2021-02-2 3
LOT NUMBER:
DATE PURCHASED: /
Rev. 0001-A
/
Advertisement

Subscribe to Our Youtube Channel
Related Manuals for HHG Thomasville Whitney 48in Desk with Powerstrip SPLS-WH48D-TV


Summary of Contents for HHG Thomasville Whitney 48in Desk with Powerstrip SPLS-WH48D-TV
- Page 1 Or visit our web site 24 hours a day, 7 days a week for product assistance at www.whalenfurniture.com Or e-mail your request to parts@whalenfurniture.com THIS INSTRUCTION BOOKLET CONTAINS IMPORTANT SAFETY INFORMATION. PLEASE READ AND KEEP FOR FUTURE REFERENCE. Date 2021-02-2 3 Rev. 0001-A Thomasville™ is a trademark of HHG IPCo, LLC. ©HHG IPCo, LLC. thomasville.com...
- Page 2 M A X I M U M R E C O M M E N D E D W E I G H T L O A D S MANUFACTURER: Whalen Furniture Manufacturing CATALOG: Whitney 48in Desk with Powerstrip MODEL # SPLS-WH48D-TV MAXIMUM LOAD 90.7 kg / 200 lb.
- Page 3 FURNITURE TIPPING RESTRAINT YOUNG CHILDREN MAY BE INJURED BY TIPPING FURNITURE AND YOU MUST USE THIS TIPPING RESTRAINT TO ATTACH THIS UNIT TO THE WALL, TO PREVENT ACCIDENTS AND/OR INJURIES. THIS HARDWARE MUST PROPERLY INSTALLED (FOLLOW DIRECTIONS IN ORDER ON THIS INSTRUCTIONS), TO PROVIDE PROTECTION AGAINST THE UNEXPECTED TIPPING OF FURNITURE DUE TO IMPROPER USE.
- Page 4 FURNITURE POWER DISTRIBUTION CENTER IMPORTANT SAFETY INSTRUCTIONS Carefully read all instructions installing and operating fixture IF YOU HAVE ANY QUESTIONS REGARDING THE PROPER INSTALLATION CONSULT A QUALIFIED ELECTRICIAN. TO REDUCE THE RISK OF FIRE, ELECTRICAL SHOCK OR INJURY TO PERSONS, PLEASE FOLLOW THE NEXT: •...
-
Page 5: Specifications
Furniture Power Distribution Unit User Guide Please read this user guide before installing and using your power distribution Center. INTRODUCTION This device complies with Part 15 of the FCC Rules. The integrated power and USB center offer 480 Mbps Operation is subject to the following two conditions: (1) high transmission rate and can connect up to three This device may not cause harmful interference, and (2) devices, such as a digital camera, MP3 player, cell... - Page 6 Parts and Hardware List Please read completely through the instructions and verify that all listed parts and hardware are present before beginning assembly. A- Desk Top (Qty. 1) (Qty. 1) (Qty. 1) Left Front Leg Right Front Leg (Qty. 1) (Qty.
- Page 7 Parts and Hardware List Please read completely through the instructions and verify that all listed parts and hardware are present before beginning assembly. (1) 5/16” x 70 mm Bolt (2) Large Lock Washer (3) Large Flat Washer (Qty. 8+1 extra) (Qty.
- Page 8 Assembly Instructions NOTE: Please do not fully tighten all bolts until you finish assembling all parts. Once assembled, go back and fully tighten all bolts. This will make the assembly easier. 1. Unpack the unit and confirm that you have all the hardware and required parts. Assemble the unit on a carpeted floor or the empty carton to avoid any scratch.
- Page 9 Assembly Instructions 6. Repeat steps 4 through 5 to attach the Back Stretcher (F) and the Right Back Leg (E). 7. Repeat the same procedure to attach the other Side Stretcher (G) and Right Front Leg (C) at the opposite end.
- Page 10 Assembly Instructions B/C/D/E 8. Fasten the Apron Decorations (H) to the bottom of Desk Top (A) with the end dowels fully inserted by using two 38 mm Bolts (8) and the Small Washers (9 and 10) in each. Route Shorten 9.
- Page 11 Assembly Instructions 11. Feed the wire of Power Center (J) through the cutout of the Desk Top (A) and push into the cutout from top of Desk Top, secure it in place with two 12 mm Screws (4). Make sure the wire are not pinched. 12.
- Page 12 Assembly Instructions Wooden stud Wall Short screw Wall Nylon strap Metal bracket Long screw Floor leveler Tools required (not provided): Phillips screwdriver, stud finder, tape measure, pencil, power drill and 1/8” drill bit. 13. Position the unit at the desired location against a wall. If necessary, adjust the Floor Levelers at the bottom of the Legs to level the unit.
-
Page 13: Quality Guarantee
Care and Maintenance ⚫ Use a soft, clean cloth that will not scratch the surface when dusting. ⚫ Gently rub the surface with a soft dry cloth, soft damp cloth, or soft damp cloth with neutral detergent, and then dry it well. ⚫...
Need help?
Do you have a question about the Thomasville Whitney 48in Desk with Powerstrip SPLS-WH48D-TV and is the answer not in the manual?
Questions and answers