
Related Manuals for GIA Giatsu GIA-RG52


Summary of Contents for GIA Giatsu GIA-RG52
- Page 1 OWNER’S MANUAL REMOTE CONTROL GIA-RG52 Thanks for choossing our product. Please, read carefully this manual before using the product...
-
Page 2: Table Of Contents
Handlin CONTENTS Handling the remote controller ............Remote controller Specifications........... Function buttons ................Indicators on LCD ................How to use the buttons ..............Auto operation................. Cooling/Heating/Fan operation............Dehumidifying operation ............... bloc Adjusting air flow direction............Prev the r Timer operation................If the sunl SLEEP function................ -
Page 3: Handling The Remote Controller
Handling the remote controller Location of the remote controller..Use the remote controller within a distance of 8 ..meters from the appliance, pointing it towards the receiver. Reception is confirmed by a beep..CAUTIONS The air conditioner will not operate if curtains, doors or other materials block the signals from the remote controller to the indoor unit. -
Page 4: Remote Controller Specifications
Function Remote Controller Specifications RG52C1/BG(C)E. Model GIA 3.0V(Dry batteries R03/LR03×2) Rated Voltage Signal Receiving 8m (when using 3.0 voltage, it gets 11m) Range 。 。 Environment -5 C 60 C Performance Feature ON/OFF 1. Operating Mode: AUTO, COOL, DRY, HEAT(Cooling only model without), MODE and FAN. -
Page 5: Function Buttons
Function buttons ON/OFF Button Operation starts when this button is pressed and stops when this button is pressed again. MODE Button Each time the button is pressed, the operation mode is selected in a sequence of following: AUTO COOL HEAT NOTE: Heat mode is for Cooling &... - Page 6 Indicato TIMER OFF Button Press this button to initiate the auto-off time sequence. Each press will increase the auto-timed setting in 30 minutes increments. When the setting time displays 10, each press will increase the auto-timed setting 60 minutes increments. To cancel the auto-timed program, simply adjust the auto-off time to 0.0 DIRECT Button Used to change the louver movement and set the desired up/down air flow direction.
-
Page 7: Indicators On Lcd
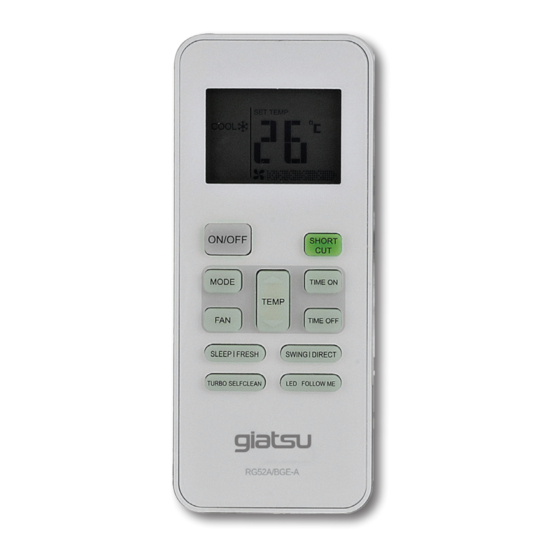
Indicators on LCD l increase e displays Mode display ents. Displays the current operation mode. Including auto( ), cool( ), dry( ), heat( ) (Not applicable to cooling only models), fan( and back to auto( flow direction. Transmission Indicator This transmission indicator lights when remote controller transmits signals to the indoor unit. -
Page 8: How To Use The Buttons
How to use the buttons Auto operation Ensure the unit is plugged in and power is available. The OPERATION indicator on the display panel of the indoor unit starts flashing. 1. Press the MODE button to select Auto. 2. Press the UP/DOWN button to set the desired temperature. -
Page 9: Dehumidifying Operation
Dehumidifying operation Ensure the unit is plugged in and power is available. The OPERATION indicator on the wer is display panel of the indoor unit starts flashing. or on the 1. Press the MODE button to select DRY mode. ts flashing. 2. -
Page 10: Timer Operation
Timer operation CAUTION Press the TIMER ON button can set the auto-on When you se time of the unit. Press the TIMER OFF button transmits the can set the auto-off time of the unit. keep the rem To set the Auto-on time. the indoor un The effective 1. - Page 11 CAUTION the auto-on When you select the timer operation, the remote controller automatically FF button transmits the timer signal to the indoor unit for the specified time. Therefore, keep the remote controller in a location where it can transmit the signal to the indoor unit properly.
- Page 12 TIMER OFF (Auto-off Operation) The TIMER OFF feature is useful when you want the unit to turn off automatically after you go to bed. The air conditioner will stop automatically at the set time. Example: Stop To stop the air conditioner in 10 hours. 1.
-
Page 13: Sleep Function
TIMER ON → TIMER OFF (Off → Start → Stop operation) This feature is useful when you want to start ou want the the air conditioner before you wake up and to bed. The stop it after you leave the house. he set time. - Page 14 C./ Industria, 13 l Polígono Industrial El Pedregar 08160 Montmeló Barcelona (Spain) Phone: (0034) 93 390 42 20 Fax: (0034) 93 390 42 05 info@giatsu.com www.giatsu.com...
Need help?
Do you have a question about the Giatsu GIA-RG52 and is the answer not in the manual?
Questions and answers