Table of Contents

Subscribe to Our Youtube Channel
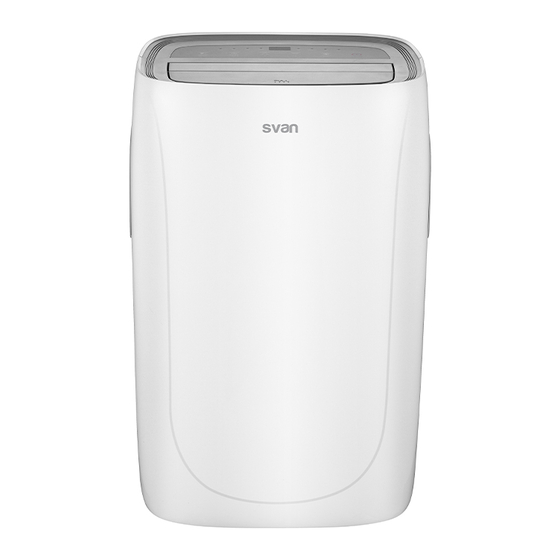
Related Manuals for Svan SVAN212PF


Summary of Contents for Svan SVAN212PF
- Page 1 Portable Air Conditioner User Manual SVAN212PF / SVAN212PBL Thank you for selecting our quality appliance. Please be sure to read this user manual carefully before using. Any question, please contact the professional service for help.
-
Page 2: Important Safeguards
This appliance is intended for domestic use only. IMPORTANT SAFEGUARDS ● Disconnect the appliance from its power source during service and when replacing parts and cleaning. ● The appliance shall not be installed in the laundry. ● Please note: Check the nameplate for the type of refrigerant gas used in your appliance. ●... - Page 3 ● If the appliance is making unusual sounds or is emitting smoke or an unusual odor, unplug it immediately. ● Do not clean the unit with water. Water can enter the unit and damage the insulation, creating a shock hazard. If water enters the unit, unplug it immediately and contact Customer Service. ●...
- Page 4 ● The appliance shall be installed in accordance with national wiring regulations. Specific information regarding appliances with R290 refrigerant gas ● Thoroughly read all of the warnings. ● When defrosting and cleaning the appliance, do not use any tools other than those recommended by the manufacturing company.
- Page 5 ● Do not pierce or burn. ● Be aware that the refrigerants may not contain an odour. ● Compliance with national gas regulations shall be observed. ● Keep ventilation openings clear of obstruction. ● The appliance shall be stored so as to prevent mechanical damage from occurring. ●...
- Page 6 WARNING: System contains refrigerant under very high pressure. The system must be serviced by qualified persons only. 1. Transport of equipment containing flammable refrigerants (Annex CC.1) Compliance with the transport regulations. 2. Marking of equipment using signs(Annex CC.2) Compliance with local regulations. 3.
- Page 7 1) Checks to the area Prior to beginning work on systems containing flammable refrigerants, safety checks are necessary to ensure that the risk of ignition is minimised. For repair to the refrigerating system, the following precautions shall be complied with prior to conducting work on the system. 2) Work procedure Work shall be undertaken under a controlled procedure so as to minimise the risk of a flammable gas or vapour being present while the work is being performed.
- Page 8 8) Checks to the refrigeration equipment Where electrical components are being changed, they shall be fit for the purpose and to the correct specification. At all times the manufacturer’s maintenance and service guidelines shall be followed. If in doubt consult the manufacturer’s technical department for assistance. The following checks shall be applied to installations using flammable refrigerants: –...
- Page 9 2) Particular attention shall be paid to the following to ensure that by working on electrical components, the casing is not altered in such a way that the level of protection is affected. This shall include damage to cables, excessive number of connections, terminals not made to original specification, damage to seals, incorrect fitting of glands, etc.
- Page 10 Electronic leak detectors shall be used to detect flammable refrigerants, but the sensitivity may not be adequate, or may need re-calibration. (Detection equipment shall be calibrated in a refrigerant-free area.) Ensure that the detector is not a potential source of ignition and is suitable for the refrigerant used. Leak detection equipment shall be set at a percentage of the LFL of the refrigerant and shall be calibrated to the refrigerant employed and the appropriate percentage of gas (25 % maximum) is confirmed.
- Page 11 13. Charging procedures(Annex DD.10) In addition to conventional charging procedures, the following requirements shall be followed. – Ensure that contamination of different refrigerants does not occur when using charging equipment. Hoses or lines shall be as short as possible to minimise the amount of refrigerant contained in them. –...
- Page 12 i) Do not exceed the maximum working pressure of the cylinder, even temporarily. j) When the cylinders have been filled correctly and the process completed, make sure that the cylinders and the equipment are removed from site promptly and all isolation valves on the equipment are closed off.
- Page 13 Competence of service personnel General Special training additional to usual refrigerating equipment repair procedures is required when equipment with flammable refrigerants is affected. In many countries, this training is carried out by national training organisations that are accredited to teach the relevant national competency standards that may be set in legislation. The achieved competence should be documented by a certificate.
- Page 14 • Connect the pipes and carry out a leak test before charging with refrigerant. • Check safety equipment before putting into service. b) Maintenance • Portable equipment shall be repaired outside or in a workshop specially equipped for servicing units with flammable refrigerants.
- Page 15 • Check safety equipment before putting into service. d) Decommissioning • If the safety is affected when the equipment is putted out of service, the refrigerant charge shall be removed before decommissioning. • Ensure sufficient ventilation at the equipment location. •...
-
Page 16: Electrical Connections
IMPORTANT - GROUNDING METHOD This product is factory equipped with a power supply cord that has a three-pronged grounded plug. It must be plugged into a mating grounding type receptacle in accordance with the National Electrical Code and applicable local codes and ordinances. If the circuit does not have a grounding type receptacle, it is the responsibility and obligation of the customer to exchange the existing receptacle in accordance with the National Electrical Code and applicable local codes and ordinances. - Page 17 SOME NOTIONS ON HUMIDITY Air always contains a certain amount of water in the form of vapour. This determines the level of humidity in an atmosphere. The capacity of the air to hold water vapour increases with temperature. This is why in our homes, as soon as the temperature decreases, the vapour contained in the air condenses, as is evident on the colder surfaces in the room, such as the windows, walls etc.
-
Page 18: Installation Instructions
ACCESSORIES PARTS PARTS NAME QUANTITY Exhaust hose Hose inlet 1 set Hose outlet Window slider kit 1 set Remote Control 1 set Batteries (Two AAA 1.5V) Drain Hose 1 set Note: All the illustrations in this manual are for explanatory purposes only. Your appliance may be slightly different. - Page 19 1 .Extend either side of the hose (Fig.1)and screw the hose inlet (Fig.2). 2 .Extend the other side of the hose and screw it to the hose outlet (Fig.3). 3 .Install the hose inlet into the unit (Fig.4). 4 .Affix the hose outlet into the window slider kit and seal.
-
Page 20: Window Slider Kit Installation
WINDOW SLIDER KIT INSTALLATION 1:Parts: A) Panel B) Panel with one hole C) Screw to lock window kit in place 2: Assembly: Slide Panel B into Panel A and size to widow width. Windows sizes vary. When sizing the window width, be sure that the window kit assembly is free from gaps from gaps and/or air pockets when taking measurements. -
Page 21: Turning The Appliance On
OPERATING FROM THE CONCTROL PANEL The control panel is on the top of the appliance, enables you to manage part functions without remote controller, but to fully exploit its potential, you must use the remote controller. TURNING THE APPLIANCE ON Plug into the mains socket, then the appliance is standby. - Page 22 The most suitable temperature for the room during the summer varies from 24℃ to 27℃(75℉ to 81℉). You are recommended, however, not to set a temperature much below the outdoor temperature. The fan speed difference is more noticeable when the appliance is under Fan mode but may not be noticeable under Cool mode.
- Page 23 NOTE: - When operating in very cold rooms, the appliance defreezes automatically, momentarily interrupting normal operation. “ ”appears on the display. During this operation, it is normal for the noise made by the appliance to change. - In this mode, you may have to wait for a few minutes before the appliance starts giving out hot air. - In this mode, the fan may operate for short periods, even though the set temperature has already been reached.
-
Page 24: Setting The Timer
Switch the unit of temperature When the appliance is running, hold on + and - button together 3 seconds by the same time, then you can change the unit of temperature. For example: Before change, in cool mode, the screen display like fig1. After change, in cool mode, the screen display like fig2. - Page 25 ● Press again the Timer button or the button, the timer will be canceled, and the “Timer” symbol will disappear from screen. Programming shut down ● When the appliance is running, press the button, the Timer indicator and the hours flash. ●...
-
Page 26: Self-Diagnosis
SELF-DIAGNOSIS The appliance has a self diagnosis system to identify a number of malfunctions. Error messages are displayed on the appliance display. IF IS DISPLAYED WHAT SHOULD I DO? The appliance is fitted with a frost protection device to avoid excessive formation of ice. - Page 27 MANUAL OF REMOTE CONTROL On/Off button Fan speed button Increase button Mode button Decrease button Swing button Timer button Sleep button Unit Switch button √ Point the remote control at the receiver on the appliance. √ The remote control must be no more than 7 meters away from the appliance (without obstacles between the remote control and the receiver).
-
Page 28: Inserting Or Replacing The Batteries
INSERTING OR REPLACING THE BATTERIES ● Remove the cover on the rear of the remote control; ● Insert two "AAA" 1.5V batteries in the correct position (see instructions inside the battery compartment); NOTE: √ If the remote control unit is replaced or disposed of, the batteries must be removed and discarded in accordance with current legislation as they are harmful to the environment. - Page 29 ● Select the required fan speed by pressing the button. Four speeds are available: High / Medium / Low / Auto. The most suitable temperature for the room during the summer varies from 24℃ to 27℃(75℉ to 81℉ ). You are recommended, however, not to set a temperature much below the outdoor temperature. The fan speed difference is more noticeable when the appliance is under FAN mode but may not be noticeable under COOL mode.
- Page 30 FAN mode When using the appliance in this mode, the air hose does not need to be attached. ● Press the button a number of times until the “Fan” symbol appears. ● Select the required fan speed by pressing the button.
- Page 31 Four speeds are available: High / Medium / Low / Auto. If the appliance is cooling only model, the unit operates in Fan mode when the room temperature is below 23℃ (73℉), and Cool mode when the room temperature is above 23℃(73℉). If the appliance is cooling and heating model, the unit operates in Heat mode when the room temperature is below 20℃(68℉), and Fan mode when the room temperature is from 20℃...
- Page 32 The SLEEP function can be canceled at any time during operation by pressing the "Sleep", "Mode" or "fan speed" button. In FAN or DRY mode, SLEEP function cannot be set. Switch the unit of temperature When the appliance is running, press the button, then you can change the unit of temperature.
-
Page 33: Tips For Correct Use
active. ● Press again the button or the button, the timer will be canceled, . TIPS FOR CORRECT USE To get the best from your appliance, follow these recommendations: ● Close the windows and doors in the room to be air conditioned (fig. -
Page 34: Water Drainage Method
WATER DRAINAGE METHOD When there is excess water condensation inside the unit, the appliance stops running and shows “ ” (FULL TANK as mentioned in SELF-DIAGNOSIS). This indicates that the water condensation needs to be drained using the following procedures: Manual Draining(fig.24) Water may need to be drained in high humidity areas 1 .Unplug the unit from power source. -
Page 35: Cleaning The Cabinet
NOTE Please be sure that the height of and section of the drain hose should not be higher than that of the drain outlet, or the water tank may not be drained. (fig.26 and fig.27) CLEANING Before cleaning or maintenance, turn the appliance off by pressing the button on the control panel or remote control, wait for a few minutes then unplug from the mains socket. -
Page 36: End Of Season Operations
Use a vacuum cleaner to remove dust accumulations from the filter. If it is very dirty, immerse in warm water and rinse a number of times. The water should never be hotter than 40℃(104℉). After washing, leave the filter to dry then attach the intake grille to the appliance. START-END OF SEASON OPERATIONS START OF SEASON CHECKS Make sure the power cable and plug are undamaged and the earth system is efficient. -
Page 37: Troubleshooting
TROUBLESHOOTING PROBLEM CAUSE SOLUTION The appliance ● There is no current ● Wait does not come on ● It is not plugged into the mains ● Plug into the mains ● The internal safety device has ● Wait 30 minutes, if the problem tripped persists, contact your service center... - Page 38 The following ● The appliance has a self ● See the SELF-DIAGNOSIS message appears on diagnosis system to identify a Chapter the display: number of malfunctions SVAN TRADING S.L. C/Ciudad de Cartagena, 20. Paterna (46988). SPAIN. info@svanelectro.com 96060034...
Need help?
Do you have a question about the SVAN212PF and is the answer not in the manual?
Questions and answers