Table of Contents
Advertisement
Advertisement
Table of Contents

Related Manuals for P&C VE-DWVFI

Summary of Contents for P&C VE-DWVFI
- Page 1 Dishwasher / User Manual VE-DWVFI...
-
Page 2: Table Of Contents
CONTENTS 1. IMPORTANT SAFETY INSTRUCTIONS ................3 2.RECYCLING........................6 3. INSTALLATION ........................8 4. TECHNICAL SPECIFICATIONS ..................9 4.1.General Appearance......................9 4.2.Technical Specifications ....................9 5.BEFORE USING THE APPLIANCE ................10 5.1. Preparing your Dishwasher for first use ..............10 5.2.Setting the Water softener ....................11 5.3.Filling the Dishwasher Salt Dispenser ................13 5.4. - Page 3 9.CLEANING AND MAINTENANCE .................35 9.1. Cleaning the Machine and Filters ................36 9.2. Spray Arms ........................36 10. TROUBLESHOOTING ....................39 11.PRACTICAL INFORMATION ..................41...
- Page 4 Thank you for choosing this product. This User Manual contains important information on safety and instructions intended to assist you in the operation and maintenance of your appliance. Please take the time to read this User Manual before using your appliance and keep this book for future reference. Icon Type Meaning...
- Page 5 INTRODUCTION Please read this user manual and particularly the safety instructions completely and carefully. They will save you time and effort and help to ensure optimum dishwasher performance. Be sure to observe all listed warnings and cautions. Look particularly for the icons with exclamation marks inside. The information icon will also provide important references.
-
Page 6: Important Safety Instructions
1. IMPORTANT SAFETY INSTRUCTIONS WARNING: When using the dishwasher, follow basic precautions. Read all instructions before using the dishwasher!Save these operating instructions and pass them on to any future user. • Use the dishwasher only for its intended purpose as described in this user manual. - Page 7 • The cup racks are designed to support cups, glasses and kitchen utensils. When the cup racks are in the dishwasher do not lean on or use the cup racks to support your body weight. • This appliance must be grounded. In the event of a malfunc- tion or breakdown, grounding will reduce the risk of electric shock by providing a path of least resistance for electric current.
- Page 8 • Do not drink and play with the water in the appliance. Harm- ful residues could be present. • To reduce the risk of injury, do not allow children to play in or on a dishwasher. • When children become old enough to operate the appliance, it is the responsibility of the parents/legal guardians to ensure the children are instructed in safe practices by qualified persons.
-
Page 9: Recycling
• Do not store or use flammable liquids or vapors in the area of the dishwasher, near or on the appliance. • Under certain conditions, hydrogen gas may be produced in a hot-water system that has not been used for two weeks or more. HYDROGEN GAS IS EXPLOSIVE. - Page 10 WARNING!: Risk of injury or suffocation! Ensure that any plastic wrappings, bags, small pieces etc. are disposed of safely and kept out of the reach of children. SAVE THESE INSTRUCTIONS USA/CAN - 7...
-
Page 11: Installation
3. INSTALLATION WARNING: When installing the dishwasher, follow basic precau- tions, including the following: Please check the standards and local codes for placement of machine. • Installation, maintenance and repair should be performed by a qualified installer. Work by unqualified persons could be danger- ous and may void the warranty. -
Page 12: Technical Specifications
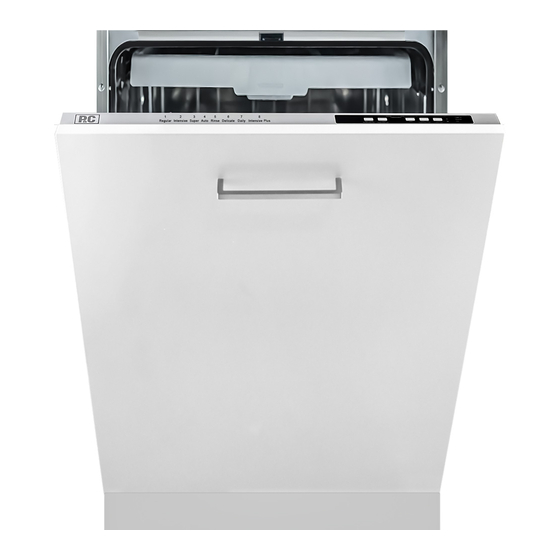
TECHNICAL SPECIFICATIONS 4.2 Technical specifications Load 14 place capacity settings Permissible 43.5-145psi water (0.3 - 10 pressure bars) 120 V (volts), 12 Electrical A (amps), connection 60Hz (hertz) Total power 1400(W) 4.1. General appearance Heater 1100 W power (watts) Upper basket with racks Upper spray arm Lower basket NOTICE: Because we continually strive to... -
Page 13: Before Using The Appliance
5.BEFORE USING THE APPLIANCE 5.1 Preparing your Dishwasher for first use • Make sure the electricity and supply water specifications match the values indicated in the installation instructions for the machine. • Open the door of the dishwasher. • Remove all packaging material inside the machine. •... -
Page 14: Setting The Water Softener
5.2. Setting the Water Softener ( Model Depending) Dishwasher needs soft water for good cleaning results. Hard water results in a build-up of calcium deposits on dishware and in the dishwasher. Your dishwasher has a special water softening system to remove the hardness of the tap water. Setting this system correctly will increase the washing effectiveness. - Page 15 Water Hardness Table French British Level German °dH Indicator °f °E L1 is shown on display. 6-11 10-20 7-14 L2 is shown on display. 12-17 21-30 15-21 L3 is shown on display. 18-22 31-40 22-28 L4 is shown on display. 23-31 41-55 29-39...
-
Page 16: Filling The Dishwasher Salt Dispenser
5.3 Filling the Dishwasher Salt Dispenser ( Model Depending) WARNING: Culinary and table salts do not dissolve in water easily, using these kind of salts will damage water softener system in your machine. NOTE: Machine can only be used by special dishwasher salt to soften the water. Do not use any small grained or powdered type of salts which can easily soluble. -
Page 17: Salt Refill Indicator
5.4. Salt Refill Indicator (Model Depending) WARNING:I f the salt indicator light comes on during a program you need to wait until the end of the program to fill the salt reservoir with dishwasher salt. After the salt reservoir has been filled, the refill indicator may still be lit up if the salt con- centration has not yet reached the correct level. -
Page 18: Using Combined Detergents
Pour/put the detergent into the dispenser. ( fig 2) Detergent pod has level lines inside. It is possible to measure the right detergent amount using these lines. Detergent pod can take totally 40 cm detergent. Open the dish- washer detergent and pour into the larger compartment 25 cm if your dishes are heavily soiled or 15 cm if they are less soiled. -
Page 19: Rinse-Aid Usage
• They produce good results for certain types of usage only. If you are using this type of detergents, you need to contact the manufacturers and find out about the suitable conditions of use. • When the conditions of use of such products and the machine settings are appro- priate, they ensure savings in salt and/or rinse aid consumption. -
Page 20: Loading Your Dishwasher
1) To fill the rinse aid compartment, open the rinse-aid compartment cap(Fig.A) 2) Fill the compartment with rinse aid to the MAX level and then close the cap.Be careful not to overfill the rinse aid compartment and wipe up any spills. 3) Close the cap until it click. - Page 21 NOTE: Dishes and cutlery should not be placed above each other. NOTE : Do not overload your dishwasher and pay attention to manufacturer instructions regarding dishes which are appropriate for use in a dishwasher. Only with suitable dishes (mentioned in section 5) will you obtain optimal washing results with a sensible use of energy High temperature water and dishwasher detergent may form a chemical synthesis that can damage certain items.
-
Page 22: Lower Rack
6.1. Lower rack ( Model Depending) You can load into the lower basket such round and deep items as pots with long handles, pot lids, plates, salad plates, cutlery sets. The lower rack should not be used for small items such as cups, wine glasses, or small plates. Bottom rack load patterns for 10 place settings. - Page 23 NOTE: Make sure that large items do not interfere with the rotation of the spray arms, and do not prevent the detergent dispenser from opening. Loading cutlery basket (Model Depending) 1: Salad Fork 2: Teaspoon 3: Dinner fork 4: Knife-solid handle Cutlery Basket load pattern for 12 place 5: Serving spoon settings .
-
Page 24: Incorrect Loads
6.2. Incorrect Loads USA/CAN - 21... - Page 25 Top Basket Rack with height adjustment These racks are designed to increase the capacity of top basket. You can place your cups and glasses on these racks. Thanks to adjustable feature of the racks, you can place glasses of different sizes under the racks.
- Page 26 Height Setting (Model Depending) 1) Height Setting - when basket is 3. Place the rack into the tracks again at the desired height C. empty (model depending) In certain models, the height setting of the upper rack may be changed using the wheels which are present at two height levels.
- Page 27 2) Height Setting - when basket is filled (model depending) The upper basket includes a mechanism which enables the height of the basket to be adjusted up (1) or down (2) without having to remove the basket. Hold the basket on both sides and pull it up or push it down, ensuring both sides of the upper basket are in the same position.
- Page 28 Lower Basket Silverware Basket ( (Model Folding Racks Depending) Silverware basket is designed to wash Folding racks consisting of four parts your dishes such as knife, fork, spoon, etc. that are located on the lower basket of your in a cleaner manner. machine are designed in order to let you Since the cutlery basket can be moved , place...
- Page 29 Upper Cutlery Basket (Model Depending) The upper cutlery basket is designed for you to place forks, spoons and knives, long dippers and small items. Because it can easily be taken out of the machine, it allows your dishes to be taken out of the machine along with the basket after washing.
-
Page 30: Program Table
PROGRAMS and OPTIONS TABLE Durations Programs Descriptions (min) DIRTY This program automatically adjusts the temperature and the Auto quantity of water, the energy consumption and the program duration. CLEAN Intensive plus Suitable for heavily soiled dishes that are kept waiting. Suitable for heavily soiled dishes Intensive Super... - Page 31 NOTE: The program duration may change according to the amount of dishes, the ater temperature, the ambient temperature and selected additional functions. NOTE: The energy-usage label is based on the "Regular" program. This program is the most efficient in terms of its combined energy and water consumption at cleaning normally soiled dishes.
-
Page 32: The Control Panel
OPERATING THE PRODUCT 4 iii Display On/Off Key + Start/Pause Key Program Selection Key + Cance Extra Function Key i. Sanitize Function ii. Extra Rinse Function iii. Extra Dry Function Delay Timer Key Options Key a. Hi-Temp Function b. Half Load Function Power On Indicator Rinse Aid Indicator End of program Indicator... -
Page 33: Keys
8.1. KEYS On/Off Key This key is used as On/Off key if the corresponding button is held down for 3 seconds. Otherwise, it can be used as Start/Pause key. It is used to turn on or turn off the machine. Machine will turn on with Regular program in On mode and the number and the dura-tion of the regular program will appear on the display. - Page 34 8.4. Auxiliary functions Washing programs of your dishwasher are designed to obtain the best cleaning effect, considering the type of the soil, soiling degree and properties of the dishes to be washed. Auxiliary functions are provided in order to enable you to save time, water and energy and to perform a more comfortable washing with conditions specific to you.
- Page 35 Hi-Temp Function When this option is selected, both the water temperature and the washing time are increased. . Programming the washing time Delay Timer If an economical electricity tariff is applied in your region, you can use the Delay Timer function to wash your dishes during appropriate hours.
- Page 36 8.6.Starting the Program First of all, open the door of your machine and in order to start your machine after selecting the program and auxiliary functions, Start/Pause + On/Off key. Once the program starts, the estimated time remained to the end of the program will appear on the display.
- Page 37 8.7. Child (key) Lock Not Available 8.8. Cancelling the program Press program Selection + Cancel key for 3 seconds to cancel the program. After 3 seconds, “1” will show on the display. For a couple of minutes the machine will fulfill the necessary operations required to cancel the program. There might be residues of detergent or rinse aid left in the machine and/or on the pieces being washed depending on the step the program you have cancelled was in.
-
Page 38: Cleaning And Maintenance
9.MAINTENANCE AND CLEANING WARNING : Before cleaning or carrying out maintenance, switch off the appliance, disconnect the mains plug and turn off the water tap. Your dishwasher can only be repaired by an authorized service agent. Do not try to repair your machine unless any recommendation by this manual WARNING : All surfaces are susceptible to scratching. -
Page 39: Cleaning The Machine And Filters
9.1. Spray arms Check whether or not the holes for the upper and lower spray arms are clogged. If there is any clogging, remove the spray arms and clean them under water. You can remove the lower spray arm by pulling it upwards, while the upper spray arm nut can be removed by turning the nut to the left. - Page 40 UPPER IMPELLER Check if the holes on the upper impeller (1 are clogged. If they are clogged, remove and clean the impeller. Turn its nut to left to re-move the upper impeller (A, B. Make sure that the nut is tightened well when installing the upper impeller. USA/CAN - 37...
- Page 41 SHOULD NOT BE WASHED IN YOUR DISHWASHER Rust-sensitive steel parts like iron and cast iron that can rust and stain other utensils and damage the interior stainless steel liner of the dishwasher and void the warranty. Do not wash copper, brass, pewter, bronze or tin. •...
-
Page 42: Troubleshooting
TROUBLESHOOTING FAULT POSSIBLE CAUSE TROUBLESHOOTING Your Dishwasher is not plugged in. Plug your Dishwasher in. Switch your Dishwasher on by pressing Your Dishwasher is not switched on. the On/Off key. Fuse blown. Check your indoor fuses. The program does not start. Water inlet tap is closed. - Page 43 FAULT POSSIBLE CAUSE TROUBLESHOOTING Use the correct amount of detergent, Not enough detergent used. as instructed in the program table. Rinse aid dosage and/or water Increase rinse aid and/or water softener softener setting set too low. level. Whitish stains remains on dishes.
-
Page 44: Practical Information
AUTOMATIC FAULT WARNINGS AND WHAT TO DO TROUBLE POSSIBLE FAULT WHAT TO DO CODE Make sure the water inlet tap is open and water is flowing Separate the inlet hose from the tap and clean the filter of Insufficient water the hose. - Page 45 Warranty products are designed and built to the highest standards. Porter&Charles We expect your appliances to provide many years of trouble free enjoyment. In the event of an appliance requiring attention, each appliance is covered by a 2 year warranty from the date of purchase. Refer to warranty policy for complete terms and conditions.
Need help?
Do you have a question about the VE-DWVFI and is the answer not in the manual?
Questions and answers