Advertisement
Quick Links
Brand Name of Product
Generic Name of Product
Product Code Number(s)
Intended Use
Range of Applications for Product
Key Specifications of Product
Shipping Conditions &
Requirements
Storage Conditions
Packaging Contents
Shelf Life
Description of Use(s)
Preparation for Use
Diagrams (drawings, pictures)
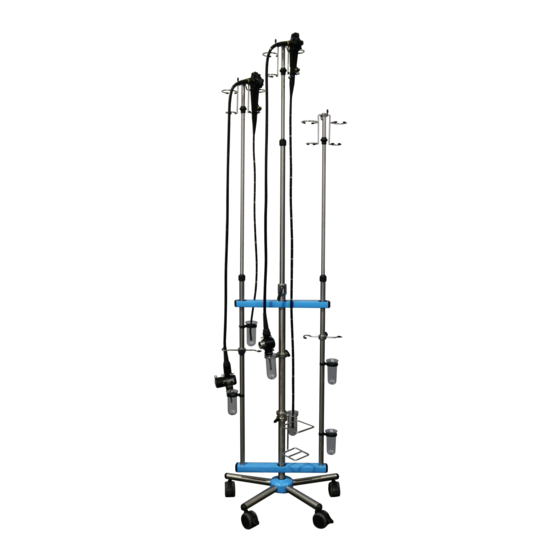
Instructions for Use: EndoDolly™
EndoDolly™
Flexible Endoscope Assistance Pole
110405-SP
To hold endoscopes and allow them to hang properly while conducting active drying,
quality assurance testing, and transportation procedures.
Hanging endoscopes to perform cleaning verification and transporting the scopes.
● Height of pole is 55 in
● 3 self-adjusting poles:
○ 2 outside poles extend an additional 8 ft
■ Adjusted maximum height of 211.58 cm
■ Lowered to a minimum height of 133.35 cm
○ Middle pole extends an additional 9.5 ft
■ Adjusted to a maximum height of 271.78 cm
■ Lowered to a minimum height of 148.59 cm
● 2 cups for each self-adjusting pole
● 2 hooks per pole to support a scope up to 15 lbs
● 5-wheel base
● Hex key (large)
Shipping & Storage
N/A
For transport and stockkeeping: temperature from -25 ℃ to 70 ℃.
N/A
N/A
Instructions for Using Product
To hold the endoscopes and transport.
Remove all parts from the packaging.
Advertisement

Subscribe to Our Youtube Channel
Related Manuals for Healthmark EndoDolly


Summary of Contents for Healthmark EndoDolly
- Page 1 Instructions for Use: EndoDolly™ EndoDolly™ Brand Name of Product Generic Name of Product Flexible Endoscope Assistance Pole Product Code Number(s) 110405-SP Intended Use To hold endoscopes and allow them to hang properly while conducting active drying, quality assurance testing, and transportation procedures.
- Page 2 Figure 1 Figure 1A Figure 1B Figure 1C Figure 2 Figure 3 Figure 3A...
- Page 3 Figure 3B Figure 3C Figure 4 Figure 5...
- Page 4 Figure 5A Figure 6 Figure 6A Figure 7 Figure 7A...
- Page 5 Figure 7B Figure 7C Figure 7D Figure 8 Figure 8A...
- Page 6 Figure 9 Figure 10 Figure 10A Figure 10B...
- Page 7 11. Place the scope brackets onto the top of each pole and tighten clockwise until secured. (Fig. 10-10B) Note: A total of six scopes can be placed on the EndoDolly™ Placing endoscope on the EndoDolly™: Place the endoscope(s) into the brackets at the top of the pole(s) and allow the endoscope to hang vertically Put the insertion tube into the “C”...
- Page 8 Extend the outer poles Middle pole: extend lower unit and wipe down. Slide lower unit back down into pole and extend the top part of the pole. Place the EndoDolly™ in the cart washer for cleaning and run on the equipment cycle EndoDolly™...
- Page 9 If the holder has not been in use for an extended period, it should be checked as described in the maintenance plan/checklist Proof of Maintenance-Conformity Integrity Function Completeness The EndoDolly™ should All screws in place and If an error is detected, only be checked at least once a tightened. original (OEM) spare parts...
Need help?
Do you have a question about the EndoDolly and is the answer not in the manual?
Questions and answers