Table of Contents
Advertisement
Available languages
Available languages
USER MANUAL
USER MANUAL
EN
EN
MANUALE D'USO
MANUALE D'USO
IT IT
286 8005373
EN 12101-10:2005 + AC:2007
Doc. n. 20-001548-PR01
CENTRALE EVACUAZIONE FUMI / METEOROLOGICA
Doc. 85588U - Rev. 22/10/2020
C-SV 4A/8A
C-SV IB 4A/8A
SMOKE EXTRACTION / WEATHER CONTROL UNIT
ULTRAFLEX CONTROL SYSTEMS s.r.l.
Via XXV Aprile 45
16012 BUSALLA (GE)
Tel. +39 010 9768232
Fax +39 010 9768233
e-mail:ucs@ultraflexgroup.it
www.ultraflexgroup.it/ucs
www.ultraflexcontrolsystems.com
Drw. / Dis. 32367/h
ITALY
Advertisement
Chapters
Table of Contents

Related Manuals for UCS C-SV 4A


Summary of Contents for UCS C-SV 4A
- Page 1 USER MANUAL USER MANUAL MANUALE D’USO MANUALE D’USO IT IT C-SV 4A/8A ULTRAFLEX CONTROL SYSTEMS s.r.l. Via XXV Aprile 45 16012 BUSALLA (GE) C-SV IB 4A/8A ITALY Tel. +39 010 9768232 Fax +39 010 9768233 286 8005373 EN 12101-10:2005 + AC:2007 Doc.
-
Page 3: Table Of Contents
USER MANUAL USER MANUAL INDEX INDEX GENERAL SAFETY RULES ..............................4 1.1 Symbols used ..................................4 1.2 Informative letter ................................5 PACKING CONTENTS ................................6 UNPACKING ....................................6 DATA PLATE ....................................6 PRODUCT DESCRIPTION ..............................7 TECHNICAL DATA .................................10 6.1 Dimensions ..................................10 INSTALLATION ..................................11 7.1 Control panel positioning ..............................11 7.2 Electrical connections ...............................13 7.3 Calibration ..................................14 USE ......................................15 8.1 Commands and signals ..............................15... -
Page 4: General Safety Rules
1. GENERAL SAFETY RULES This manual is an integral part of C-SV 4A/8A and C-SV IB 4A/8A control units and it must be carefully read before using it since it gives important indications with regards to its safe installation, use and maintenance. Keep it with care. -
Page 5: Informative Letter
The reproduction of any part of this manual, in any form, is forbidden without the prior written authorization of the manufacturer. The content of this guide can be modified without prior notice. Great care has been taken in collecting and checking the documentation contained in this manual to make it as complete and comprehensible as possible. Nothing contained in this manual can be considered as a warranty, either expressed or implied - including, not in a restrictive way, the suitability warranty for any special purpose. Nothing contained in this manual can be interpreted as a modification or confirmation of the terms of any purchase contract. The UCS products have not been conceived to work in areas at risk of explosions. In case of damage or malfunction, the control units must not be used until the Customer Care Technical Service has repaired it. Customer Care Technical Service For any information, please contact ucs@ultraflexgroup.it WARNING WARNING The original configuration of the control unit must not be changed at all, except as prescribed in this manual. -
Page 6: Packing Contents
USER MANUAL USER MANUAL 2. PACKING CONTENTS The control units are delivered in a box inside which there are the use manual and the following components: - 6 plugs (A) - 6 fixing screws (B) - 1 cabinet opening key (C) - 6 transparent gaskets (D) - 3 “earthing” adhesives (E) - 1 gasket for the upper plate (F) 3. UNPACKING Remove the control unit from the box. Remove all the components from the packaging. WARNING WARNING Check the control unit. Before installing the control unit, check to ensure that all of the items listed are present and that there are no visible signs of damage. -
Page 7: Product Description
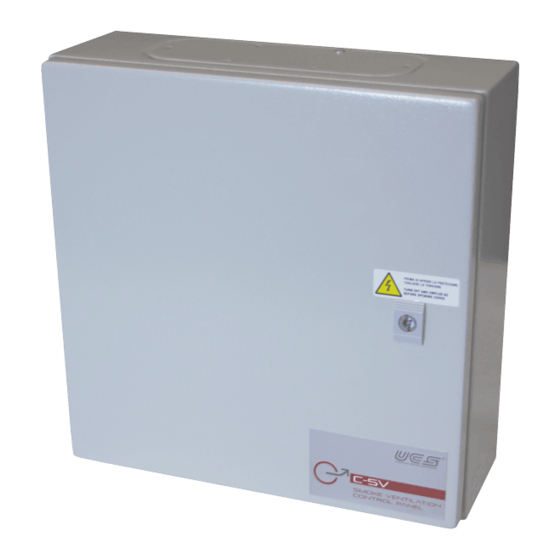
USER MANUAL USER MANUAL 5. PRODUCT DESCRIPTION C-SV 4A/8A C-SV IB 4A/8A COMPONENTS Cable inlet plate Buffer batteries Electronic board Power supply connection terminal Cabinet closing system Earthing connection Integrated emergency push button Manual opening push button panel for natural ventilation Connection of emergency push button Manual opening connection of natural ventilation Doc. 85588U - Rev. 22/10/2020 7/54 Drw. 32367/h... - Page 8 Thermostat TH 40675K 1 pc Lmax 500m Natural ventilation push buttons 41019H 3 poles, sect. 0,5-1,5 sq.mm, (2 separate areas) (or equivalent) Lmax 500m Depending on actuator Actuators 24 Vdc (2 separate motor See UCS product See par. 7.2 “Electrical absorption and control lines) catalogue connections” unit size See UCS product C-SV smoke extraction control unit catalogue For the wiring diagrams, refer to pages from 49 to 53. Doc. 85588U - Rev. 22/10/2020 8/54...
- Page 9 USER MANUAL USER MANUAL FIRE ALARM SYSTEM Doc. 85588U - Rev. 22/10/2020 9/54 Drw. 32367/h...
-
Page 10: Technical Data
ITEMS INCLUDED: • 2 lead batteries: 12 V, 4,5 Ah (*) or 2 lead batteries: 12 V, 4 Ah (*) (LxHxD: mm. 90 x 100 x 70 – Code 40911V); • Extractable input / output connectors for easy wiring. WARNING WARNING (* )If the batteries are not supplied by UCS, follow the connection diagram on page 49. Charging time: for 100% discharged batteries, maximum 10 hours. 6.1 Dimensions C-SV 4A/8A C-SV IB 4A/8A Doc. 85588U - Rev. 22/10/2020 10/54 Drw. 32367/h... -
Page 11: Installation
The control panel is to be located in a safe place, protected from the effects of fire and smoke. 7.1 Control panel positioning C-SV 4A/8A Remove earth cable “A” placed on the control unit door. C-SV IB 4A/8A Mark on the wall the position of the fixing holes. - Page 12 USER MANUAL USER MANUAL C-SV 4A/8A Reposition earth cable “A” on the control unit panel. CONNECTORS ON BOARD C-SV IB 4A/8A CONNECTORS ON COVER Reposition plate “B” inside box “C”. For C-SV IB 4A/8A version, reposition connectors “D” of the push button panel and emergency push button panel. Doc. 85588U - Rev. 22/10/2020 12/54 Drw. 32367/h...
-
Page 13: Electrical Connections
The control unit is supplied with the (RED) positive cable to the battery disconnected and isolated by means of tape, to avoid the battery discharging completely and being damaged before installation. Connect this cable to the corresponding free pole on the battery, ONLY ONCE ALL OTHER WIRING OPERATIONS HAVE BEEN COMPLETED. If the batteries are not supplied by UCS, follow the connection diagram on page 49. The control unit is fitted with quick coupling terminals, which allow quick, optimum connection of the plant’s wires. The terminals are suitable for wires with a 0,5 to 1,5 sq.mm section (20 to 16 AWG). -
Page 14: Calibration
USER MANUAL USER MANUAL All the electrical connections, including the main power supply, must reach the control unit through the dedicated cover. For that purpose, proceed as follows: Remove the fixing holes from cover “E”. Drill holes on the cover according to the Reposition cover “E” on the box equipped amount of cables to be connected. with gasket “F”. Each cable must be inserted into the control unit through a dedicated cable gland (not included). Connect the power supply cable to terminal “G”. Connect the red cable to the battery. -
Page 15: Use
USER MANUAL USER MANUAL WARNING WARNING This control unit is designed to stay switched on permanently. The control unit can only be started again in either of the following cases: • Automatic restarting following detection of a fault in execution of the software, and subsequent intervention of the watchdog circuitry. - Page 16 USER MANUAL USER MANUAL On the push button panel and on the control unit there are three LEDs - Green, Yellow, and Red - which work according to the following logic: Logic applied for the red LED: emergency (opening or closing, indifferently): ON FIXED emergency interlock (see par. 8.3.5) ON FLASHING all other cases: Logic applied for the yellow LED: fault ON FIXED power supply problems ON SINGLE FLASHING power supply problems + fault ON DOUBLE FLASHING Logic applied for the green LED: No fault, primary power supply OK and no emergency ON FIXED all other cases All the combinations are indicated below: LED STATUS CONTROL UNIT STATUS Emergency Primary power YELLOW GREEN...
-
Page 17: Initial Configuration
USER MANUAL USER MANUAL When a fault occurs, the control unit can be interrogated using a diagnostics cable (code 41853M), which can be connected to a PC and makes it possible to recover information on the control unit’s status in real-time. To use the diagnostics cable, see the specific manual. 8.2 Initial configuration The control unit configuration must be carried out by means of dip-switches and wind sensor potentiometer positioned on the board. Position dip-switches and wind threshold according to the desired configuration. The default position of all the dip-switches is OFF. OFF: actuators driving ON: solenoids/electromagnets driving OFF: repetition of emergency open com- ON: repetition of emergency open command mand inactive (deadlock inactive) -
Page 18: Commands For Smoke Extraction
USER MANUAL USER MANUAL 8.3 Commands for smoke extraction 8.3.1 Emergency The control unit can enter in emergency mode following: • Signal from a Smoke sensor • Holding the Emergency Open Button (NC contact) down for at least 0,5 seconds (filtering necessary to reduce the risk of false alarms). • Receiving of an alarm from an external source via the EXT AL terminal. The control unit can be connected, for example, to an external fire detection system. If used, the EXT AL input must be connected to one of more normally closed contacts (usually relays), put in series with one another, and with a single 10 kOhm resistor po- sitioned at the end of the line. If not used, the input must be terminated with a 10 kOhm resistor (see diagram 6 on page 51). Opening of one or more contact(s) (such as breaking of the cable) has the same effect as pushing the emergency button. The external alarm input can also be connected to the NC contact on the EM SIG output for another C-SV control unit, if you want an emergency status of the latter to be propagated to the control panel involved (see diagram 11 on page 53). When the control unit is in emergency mode, the red LED stays on and the manual, weather, thermostat and CO2 sensor functions are disabled. The control unit sends the motors an open command for 3 minutes. If the “deadlock”... -
Page 19: Emergency Interlock System
USER MANUAL USER MANUAL 8.3.5 Emergency interlock The EMERGENCY INTERLOCK status is activated by supplying 24 Vdc +/- 25% external voltage to the AUX1 input (for example, coming from the motor output of another control unit C-SV) and it is signalled by a flashing red LED. It works only if the control unit is configured in INTER- LOCK SLAVE mode (see dip-switch configuration par. 8.2) and if the control unit is not already in emergency status. The control unit enters in the EMERGENCY INTERLOCK status 2 seconds after the enabling of AUX1 input and it remains in this status until a RESET command is given; the control unit goes into standby mode. When the control unit is in EMERGENCY INTERLOCK status, it gives a closing command to the motors and it ignores any emergency command (see diagram 10 on page 53). 8.3.6 Reset The reset command can be activated using the emergency push button or (during installation / maintenance / testing) directly on the control unit’s electronic board. This control works only when the push button is released. Resetting allows the control unit to exit the emergency situation, provided the event that gave rise to the alarm has ceased.During the reset phase (about 1 second) all three LEDs (red, yellow and green) stay on, making it possible to visually check that they are actually working. In the factory settings, the double pressing of the RESET button commands the windows to close (see section 8.2). -
Page 20: Thermostat
USER MANUAL USER MANUAL 2. CLOSING A closing command sent to the actuator by manual commands, does not result in any type of signal. The close command ceases: a. When the maximum stroke time of 180 seconds is reached (impulse operation) or when the manual button is released (dead man operation). b. When the reset button is pushed (the drive command ends). c. Impulse operation: the drive stops when the open button is pushed and released within 1 second. for the occurrence of an emergency or weather event (as the case may be, the drive changes its direction or performs an emergency opening/closing) NOTE The control unit mod. C-SV IB 4A/8A is equipped with a push button panel for OPENING OF VENTILATION natural ventilation commands (see picture aside). ZONE 2 OPENING OF VENTILATION... -
Page 21: Wind Sensor
USER MANUAL USER MANUAL 8.4.4 Wind sensor The wind sensor sends impulses to the control unit to indicate the wind speed (see diagram 5 on page 50). Inside the control unit, on the circuit board, there is a 7-position selector that can be used to set the required wind alarm threshold. Higher values correspond to a higher wind speed threshold. Positions 0 to 7 correspond to the wind speed on the Beaufort scale. The selector comes in position “3”. The control unit compares the signal received from the sensor and the threshold set, and sends a close command to the actuators due to the presence of wind. As long as the signal from the wind sensor exceeds the threshold set, the close command en- joys precedence over the manual commands, the thermostat, and the CO2 sensor. -
Page 22: Maintenance
9.2 Batteries The control unit comes with a set of n° 2 lead batteries charged and with the positive (+) pole cable disconnected and isolated. If the batteries are not supplied by UCS, follow the connection diagram on page 49. These batteries guarantee emergency opening of the windows even after a prolonged blackout (up to a maximum of 72 hours). We recommend replacing the batteries every 3 years with equivalent batteries (UCS set available, code 40911V). WARNING WARNING THE BATTERIES MUST BE REMOVED FROM THE CONTROL UNIT BEFORE IT IS SCRAPPED, AND DISPOSED OF IN ACCORDANCE WITH CURRENT NORMS. -
Page 23: Anomalies And Faults
USER MANUAL USER MANUAL 10. ANOMALIES AND FAULTS FAULTS ON THE PRIMARY (MAINS) POWER SUPPLY • No power (blackout), or power supply voltage beyond tolerance, due to a fault on the feeder. The greed LED switches off and the yellow LED flashes quickly. The weather, thermostat and CO2 commands are disabled. To pro- tect itself against damage due to wind and rain, the control unit allows manual closing for 120 seconds for each of the two zones, if the battery charge level detected by the control unit is sufficient. FAULTS ON THE SECONDARY (BATTERY) POWER SUPPLY • Batteries disconnected or battery voltage insufficient (batteries discharged and/or degraded). The yellow LED flashes quickly and the green LED remains lit (if the control unit is in stand-by mode). As long as the primary power supply is available, the control unit continues to work correctly, but operation in case of a blackout is not guaranteed. If the problem is due to a low battery charge, the signal must cease within 1-2 hours, otherwise the battery must be replaced as soon as possible. The charge level on the batteries is checked automatically every 6 minutes. POSSIBLE FAULTS •... -
Page 24: Warranty
USER MANUAL USER MANUAL 13. WARRANTY The Ultraflex Control Systems S.r.l. Company guarantees that its products are made in a workmanlike manner and are free of factory and material defects. This guarantee is valid for a period of two years, from the date of manufacture of the product, and is limited to replacement or repair free of charge of the item that, within such period, is returned, delivery paid, and found by us to be defective in terms of its materials and/or manufacture. The guarantee excludes any and all other direct or indirect damages. The guarantee and any responsibility on our part (excepting that of replacing or repairing defective items, according to the terms and conditions above) expressly excludes malfunctioning of our products if their lack of or defective functioning is attributable to incorrect installation or negligent or improper use. Doc. 85588U - Rev. 22/10/2020 24/54 Drw. 32367/h... - Page 25 USER MANUAL USER MANUAL NOTES Doc. 85588U - Rev. 22/10/2020 25/54 Drw. 32367/h...
- Page 27 MANUALE D’USO MANUALE D’USO IT IT INDICE INDICE NORME GENERALI DI SICUREZZA ............................28 1.1 Simbologia impiegata ...............................28 1.2 Lettera informativa ................................29 CONTENUTO DELL’IMBALLO ..............................30 DISIMBALLAGGIO ...................................30 DATI DI TARGA ..................................30 DESCRIZIONE DEL PRODOTTO ..............................31 CARATTERISTICHE TECNICHE ..............................34 6.1 Dimensioni..................................34 INSTALLAZIONE ..................................35 7.1 Posizionamento centrale ..............................35 7.2 Collegamenti elettrici ...............................37 7.3 Calibrazione ..................................38 USO ......................................39...
-
Page 28: Norme Generali Di Sicurezza
1. NORME GENERALI DI SICUREZZA Il presente manuale d’uso è parte integrante delle centrali C-SV 4A/8A e C-SV IB 4A/8A e deve essere letto attentamente prima del loro utilizzo poiché fornisce importanti indicazioni riguardanti la sicurezza dell’installazione, dell’uso e della manutenzione. -
Page 29: Lettera Informativa
è vietata la riproduzione di qualsiasi parte di questo manuale, in qualsiasi forma, senza l’esplicito per- messo scritto del produttore. Il contenuto di questa guida può essere modificato senza preavviso. Ogni cura è stata posta nella raccolta e nella verifi- ca della documentazione contenuta in questo manuale per rendere la guida quanto più completa e comprensibile. Nulla di quanto contenuto nella presente pubblicazione può essere interpretato come garanzia o condizione espressa o implicita - inclusa non in via limitativa la garanzia di idoneità per un particolare scopo. Nulla di quanto contenuto nella presente pubblicazione può inoltre essere interpretato come modifica o asserzione dei termini di qualsivoglia contratto di acquisto. I prodotti UCS non sono progettati per funzionare in ambienti con pericolo di esplosioni. In caso di guasti o non corretto funzionamento, le centrali non devono essere utilizzate fino a quando il Servizio Assistenza Tecnica non abbia ultimato l’intervento di riparazione. Servizio Assistenza Tecnica Per informazioni rivolgersi a ucs@ultraflexgroup.it ATTENZIONE ATTENZIONE La configurazione originale della centrale non deve essere assolutamente modificata, eccetto per quanto prescritto nel presente manuale. -
Page 30: Contenuto Dell'imballo
MANUALE D’USO MANUALE D’USO IT IT 2. CONTENUTO DELL’IMBALLO La centrale viene consegnata in una scatola al cui interno sono contenuti, oltre al manuale di istruzioni, i seguenti componenti: - 6 tappi (A) - 6 viti di fissaggio (B) - 1 chiave apertura quadro (C) - 6 guarnizioni trasparenti (D) - 3 adesivi “messa a terra” (E) - 1 guarnizione per la piastra superiore (F) 3. DISIMBALLAGGIO Estrarre la centrale dalla scatola. Togliere tutte le parti dalla confezione. ATTENZIONE ATTENZIONE Controllare la centrale. Prima di procedere con l’installazione, controllare che ci siano tutte le parti elencate e che non ci siano segni visibili di danno. -
Page 31: Descrizione Del Prodotto
MANUALE D’USO MANUALE D’USO IT IT 5. DESCRIZIONE DEL PRODOTTO C-SV 4A/8A C-SV IB 4A/8A COMPONENTI Piastra ingresso cavi Batterie tampone Scheda elettronica Morsetto collegamento alimentazione Sistema di chiusura quadro Connessione messa a terra Pulsantiera di emergenza integrata Pulsantiera apertura manuale ventilazione naturale Connessione pulsantiera di emergenza Connessione apertura manuale ventilazione naturale Doc. 85588U - Rev. 22/10/2020 31/54 Dis. 32367/h... - Page 32 Lmax 500m 3 poli, sez. 0,5-1,5 mmq, Termostato TH 40675K 1 pc Lmax 500m Pulsanti per ventilazione naturale 41019H 3 poli, sez. 0,5-1,5 mmq, (2 zone indipendenti) (o equivalente) Lmax 500m Dipende da assorbi- Attuatori 24 Vcc (2 linee motori Vedere catalogo V. paragrafo 7.2 “Collegamenti mento attuatori e taglia indipendenti) prodotti UCS elettrici” centrale Vedere catalogo C-SV centrale evacuazione fumo prodotti UCS Per gli schemi di collegamento consultare le pagine da 49 a 53. Doc. 85588U - Rev. 22/10/2020 32/54 Dis. 32367/h...
- Page 33 MANUALE D’USO MANUALE D’USO IT IT FIRE ALARM SYSTEM Doc. 85588U - Rev. 22/10/2020 33/54 Dis. 32367/h...
-
Page 34: Caratteristiche Tecniche
• 2 batterie al piombo da 12 V, 4,5 Ah (*) oppure 2 batterie al piombo da 12 V, 4 Ah (*) (LxHxP: mm. 90 x 100 x 70 – Cod. 40911V); • connettori ingressi/uscite estraibili per un comodo cablaggio; ATTENZIONE ATTENZIONE (*) Nel caso in cui le batterie non vengano fornite da UCS, seguire lo schema di collegamento di pag. 49. Tempo di ricarica: a batterie scariche al 100 % massimo 10 ore. 6.1 Dimensioni C-SV 4A/8A C-SV IB 4A/8A Doc. 85588U - Rev. 22/10/2020 34/54... -
Page 35: Installazione
Prima di effettuare qualsiasi intervento sull’impianto elettrico togliere tensione attraverso l’interruttore generale. La centrale deve essere installata in un posto sicuro, protetto dagli effetti del fuoco e del fumo. 7.1 Posizionamento centrale C-SV 4A/8A Rimuovere il cavo di messa a terra “A” po- sizionato sull’anta della centrale. C-SV IB 4A/8A Segnare a parete la posizione dei fori di fissaggio. - Page 36 MANUALE D’USO MANUALE D’USO IT IT C-SV 4A/8A Riposizionare il cavo di messa a terra “A” sull’anta della centrale. C-SV IB 4A/8A CONNETTORI SU SCHEDA CONNETTORI SU COPERCHIO Riposizionare la piastra “B” all’interno della scatola “C”. Per la versione C-SV IB 4A/8A riposizionare il connettore “D” della pulsantiera e del pulsante di emergenza. Doc. 85588U - Rev. 22/10/2020 36/54 Dis. 32367/h...
-
Page 37: Collegamenti Elettrici
Collegare il suddetto cavo al corrispondente polo libero sulla batteria SOLO AL TERMINE DI TUTTI GLI ALTRI CABLAGGI. Nel caso in cui le batterie non vengano fornite da UCS, seguire lo schema di collegamento di pag. 49. La centrale è dotata di morsetti ad innesto rapido che consentono un veloce ed ottimale colle- gamento dei fili dell’impianto. I morsetti sono idonei per fili di sezione da 0,5 a 1,5 mmq (da 20 a 16 AWG). -
Page 38: Calibrazione
MANUALE D’USO MANUALE D’USO IT IT Tutte le connessioni elettriche, compresa l’alimentazione principale, devono giungere alla centrale attraverso l’apposito coperchio. A tal scopo procedere come segue: Rimuovere le viti di fissaggio dal coper- Effettuare i fori sul coperchio in base Riposizionare il coperchio “E” sulla scatola chio “E”. alla quantità di cavi da collegare. completo di guarnizione “F” in dotazione. L’ingresso di ogni singolo cavo all’interno della centrale deve avvenire attraverso un apposito pressacavo (non forniti). Collegare il cavo di alimentazione al morsetto “G”. -
Page 39: Uso
MANUALE D’USO MANUALE D’USO IT IT ATTENZIONE ATTENZIONE La centrale è progettata per restare permanentemente accesa. Un riavvio della centrale può avvenire soltanto in una delle se- guenti condizioni: • Riavvio automatico in seguito a rilevamento di anomalia nell’esecuzione del software e successivo intervento della circui- teria di watchdog;... - Page 40 MANUALE D’USO MANUALE D’USO IT IT Sulla pulsantiera e all’interno della centrale sono presenti tre led di colore Verde, Giallo e Rosso che funzionano con la seguente logica: Logica seguita per LED rosso: emergenza (apertura o chiusura, indifferentemente): ON FISSO interblocco di emergenza (v. par. 8.3.5) ON LAMPEGGIO tutti gli altri casi: Logica seguita per LED giallo: guasto ON FISSO problemi alimentazione ON LAMPEGGIO SINGOLO problemi alimentazione + guasto ON LAMPEGGIO DOPPIO Logica seguita per LED verde: Nessun guasto, alimentazione primaria OK e nessuna emergenza ON FISSO tutti gli altri casi Di seguito tutte le combinazioni: STATO LED STATO DELLA CENTRALE Emergenza Fault alimenta- ROSSO GIALLO VERDE Fault batterie Guasto...
-
Page 41: Configurazione Iniziale
MANUALE D’USO MANUALE D’USO IT IT A fronte di un’anomalia, è possibile interrogare la centrale per mezzo di un cavo diagnostico (cod.41853M) che può essere collegato ad un pc e permette di recuperare le informazioni sullo stato della centrale in tempo reale. Per l’utilizzo del cavo diagnostico, consultare il manuale specifico. 8.2 Configurazione iniziale La configurazione della centrale deve essere effettuata attraverso i dip-switch e il potenziometro sensore vento posizionati sulla scheda. Posizionare i dip-switch e la soglia vento in base alla configurazione desiderata. Nelle impostazioni di fabbrica tutti i dip-switch sono posizionati su OFF. OFF: pilotaggio attuatori ON: pilotaggio elettromagneti/solenoidi OFF: ripetizione del comando ON: ripetizione del comando di apertura di di apertura di emergenza disattiva emergenza attiva OFF: pulsanti ventilazione naturale ON: funzionamento momentaneo in modalità “presenza uomo”... -
Page 42: Comandi Per Evacuazione Fumo
MANUALE D’USO MANUALE D’USO IT IT 8.3 Comandi per evacuazione fumo 8.3.1 Emergenza La centrale può entrare nello stato di emergenza in seguito a: • segnalazione da Sensore Fumo; • pressione del Pulsante di apertura di Emergenza (contatto N.C.) per almeno 0.5 secondi (filtraggio necessario per ridurre il rischio di falsi allarmi); • per ricezione di un allarme da una sorgente esterna attraverso il morsetto EXT AL. La centrale può essere collegata, ad esem- pio, ad un sistema di rilevazione incendi esterno. Se utilizzato, l’ingresso EXT AL deve essere collegato ad uno o più contatti normalmente chiusi (tipicamente relè), posti in serie tra loro e con un singolo resistore da 10 kOhm posizionato in fondo alla linea. Se non utilizzato, l’ingresso deve essere terminato con una resistenza da 10 kOhm (ve- dere schema 6 pag. 51). L’apertura di uno o più contatti (così come la rottura del cavo) ha lo stesso effetto del pulsante di emergenza. L’ingresso allarme esterno può anche essere collegato al contatto NC dell’uscita EM SIG di un’altra centrale C-SV, se si de- sidera che lo stato di emergenza di quest’ultima venga propagato alla centrale interessata (vedere schema 11 a pag. 53). Quando la centrale si trova in modalità di emergenza, il led rosso è acceso fisso e le funzioni manuali, meteo, termostato e sen- sore CO2 sono disabilitate. La centrale impartisce ai motori un comando di apertura per 3 minuti. Se la funzione “ripetizione del comando di allarme” è abilitata (default), il comando viene ripetuto con pause di 2 minuti fra ogni ripetizione, per un tempo totale di 30 minuti. In modalità pilotaggio elettrovalvole le tempistiche cambiano: il comando dura soltanto 3 secondi e viene ripetuto con un periodo di 10 secondi per un tempo totale di due minuti. Una volta cessate le condizioni che hanno causato l’allarme, la centrale rimane comunque in stato di emergenza finché non si im- partisce un comando di reset. 8.3.2 EM SIG È un uscita a contatto pulito per la segnalazione dello stato di allarme dalla centrale a dispo- sitivi esterni. Quando la centrale entra in stato di allarme (a causa di un segnale di emergenza proveniente da sensori di fumo, da pulsante di emergenza o da una sorgente esterna), il con-... -
Page 43: Interblocco Di Emergenza
MANUALE D’USO MANUALE D’USO IT IT 8.3.5 Interblocco di emergenza Lo stato INTERBLOCCO DI EMERGENZA viene attivato fornendo all’ingresso AUX1 una tensio- ne esterna di 24 Vcc +/- 25% (proveniente, ad esempio, dall’uscita motore di un’altra centrale C-SV) ed è segnalato mediante LED rosso lampeggiante. Funziona solo se la centrale è confi- gurata in modalità INTERLOCK SLAVE (vedi configurazione dip-switch par. 8.2) e se la centrale non si trova già in uno stato di emergenza. La centrale entra nello stato INTERBLOCCO EMERGENZA a 2 secondi dall’attivazione dell’ingres- so AUX1 e vi rimane finché non viene impartito un comando di RESET che la riporta in standby. Quando si trova nello stato INTERBLOCCO DI EMERGENZA, la centrale impartisce un comando di chiusura ai motori e ignora even- tuali comandi di emergenza (vedere schema 10 a pag. 53). 8.3.6 Reset Il comando di reset può essere impartito attraverso la pulsantiera di emergenza o (in fase di installazione/manutenzione/test) direttamente sulla scheda elettronica della centrale. Il comando ha effetto quando si rilascia il pulsante. Il reset permette alla centrale di uscire dalla situazione di emergenza, purché sia cessato l’e- vento che ha generato l’allarme. In fase di reset (circa 1 secondo), tutti e tre i led (rosso, giallo e verde) restano accesi fissi, consentendo un test visivo del loro effettivo funzionamento. Nelle impostazioni di fabbrica la doppia pressione del pulsante di RESET causa la chiusura delle finestre (vedere sezione 8.2). -
Page 44: Termostato
MANUALE D’USO MANUALE D’USO IT IT 2. CHIUSURA Il comando di chiusura dell’attuatore tramite comandi manuali non comporta alcun tipo di segnalazione. Il comando di chiusura cessa: a. per raggiungimento del tempo massimo di corsa di 180 secondi (funzionamento a impulso) o per rilascio del pulsante manuale (funzionamento a uomo presente); b. per pressione del tasto di reset (il comando dell’azionamento termina); c. funzionamento a impulso: l’azionamento si ferma per pressione e rilascio entro 1 secondo del tasto di apertura; d. per il verificarsi di un evento di emergenza o meteorologico (a seconda del caso l’azionamento cambia senso di marcia o effettua una apertura/chiusura di emergenza). NOTA Sul modello C-SV IB 4A/8A è presente direttamente sulla centrale una pulsantiera APERTURA ZONA DI per i comandi di ventilazione naturale (vedi figura a lato). VENTILAZIONE 2 APERTURA ZONA DI... -
Page 45: Sensore Vento
MANUALE D’USO MANUALE D’USO IT IT 8.4.4 Sensore vento Il sensore vento, tramite impulsi, segnala alla centrale la velocità del vento (vedere schema 5 a pag. 50). All’interno della centrale, sul circuito stampato, è presente un selettore a 7 posizioni tramite il quale è possibile impostare la soglia di allarme del vento desiderata; a valore più alto corri- sponde velocità di soglia del vento maggiore. Le posizioni da 0 a 7 corrispondono alla scala Beaufort della forza del vento. Il selettore è for- nito in posizione “3”. Tramite la comparazione del segnale proveniente dal sensore con la soglia impostata la centra- le invia il comando di chiusura per presenza vento. Fino a quando il segnale proveniente dal sensore vento supera la soglia impostata, il comando di chiusura ha la prevalenza sui comandi manuali, sul termostato e sul sensore CO2. Dopo 5 minuti da quando il segnale da sensore rientra entro i limiti dettati dalla soglia, i co- mandi manuali, da termostato e da sensore CO2 vengono riabilitati. Sensore di vento WS scala m/s (metri/ knots (nodi) km/h Situazione Beaufort (miglia/ora) secondo) calma <2 bava di vento brezza leg- 6-11 gera... -
Page 46: Manutenzione
La centrale viene fornita con un set di n° 2 batterie al piombo, cariche e con il cavo del polo positivo (+) scollegato e isolato. Nel caso in cui le batterie non vengano fornite da UCS, seguire lo schema di collegamento di pag. 49. Le batterie garantiscono l’apertura di emergenza delle finestre anche dopo una prolungata assenza di tensione di rete (per un massimo di 72 ore). Si consiglia la sostituzione delle batterie ogni 3 anni con batterie equivalenti (disponibile set UCS art. 40911V). ATTENZIONE ATTENZIONE LE BATTERIE DEVONO ESSERE RIMOSSE DALL’APPARECCHIO PRIMA DEL SUO SMALTIMENTO ED ELIMINATE SECONDO LE NOR- MATIVE VIGENTI. -
Page 47: Anomalie E Guasti
MANUALE D’USO MANUALE D’USO IT IT 10. ANOMALIE E GUASTI ANOMALIE SU ALIMENTAZIONE PRIMARIA (DA RETE) • Tensione di rete assente (blackout), oppure tensione di alimentazione al di fuori della tolleranza, causa guasto su alimentatore. Il led verde si spegne e il led giallo dà un lampeggio veloce. I comandi clima, termostato e CO2 sono disabilitati. Per tutelarsi da eventuali danni da vento e pioggia, la centrale consente una chiusura manuale di 120 secondi per ciascuna delle due zone, se il livello di carica delle batterie rilevato dalla centrale è sufficiente. ANOMALIE SU ALIMENTAZIONE SECONDARIA (DA BATTERIE) • Batterie scollegate oppure tensione batterie insufficiente (batterie scariche e/o degradate). Il led giallo lampeggia veloce e il led verde rimane acceso (se la centrale è in stand-by). Finché è presente la tensione primaria, la centrale continua a funzionare correttamente, ma non è garantito il funzionamento in caso di blackout. Se il problema deriva da un basso livello di carica delle batterie, la segnalazione deve cessare entro 1-2 ore, in caso contrario si deve intervenire al più presto con una sostituzione. Il livello di carica delle batterie viene controllato automaticamente ogni 6 minuti. POSSIBILI GUASTI •... -
Page 48: Garanzia
MANUALE D’USO MANUALE D’USO IT IT 13. GARANZIA La Società Ultraflex Control Systems S.r.l. garantisce che i suoi prodotti sono costruiti a regola d’arte e che sono privi di difetti di fabbricazione e di materiali. Questa garanzia è valida per un periodo di due anni, decorrenti dalla data di fabbricazione dei prodotti ed è limitata alla sosti- tuzione o riparazione gratuita del pezzo che, entro il termine suddetto, ci sarà restituito in porto franco e che rileveremo essere effettivamente difettoso nei materiali o/e nella fabbricazione. E’ escluso dalla garanzia ogni e qualsiasi altro danno diretto o indiretto. In particolare è escluso dalla garanzia e da qualsiasi nostra responsabilità (tranne quella di sostituire o riparare, nei termini e alle condizioni suddette, i pezzi difettosi) il malfunzionamento dei nostri prodotti qualora il loro mancato o difettoso funzionamento sia attribuibile ad un’errata installazione o ad un uso negligente o improprio. Doc. 85588U - Rev. 22/10/2020 48/54 Dis. 32367/h... - Page 49 USER MANUAL / MANUALE D’USO USER MANUAL / MANUALE D’USO EN-IT EN-IT ELECTRICAL CONNECTIONS / COLLEGAMENTI ELETTRICI Fuse/Fusibile 5A (C-SV4A) 10A (C-SV8A) Fuse/Fusibile 3A (C-SV4A) 5A (C-SV8A) Fuse/Fusibile Fuse/Fusibile 5A (C-SV4A) 3A (C-SV4A) 10A (C-SV8A) 5A (C-SV8A) RED - ROSSO BLACK - NERO Install batteries correctly by matching the polarities Installare le batterie correttamente rispettando le polarità (+) RED - ROSSO (-) BLACK - NERO BATTERIES - BATTERIA...
- Page 50 USER MANUAL / MANUALE D’USO USER MANUAL / MANUALE D’USO EN-IT EN-IT ACTUATOR CONNECTION / CONNESSIONE ATTUATORI For the connector posi- tion on the board, see page 49 / Per la posizione del connettore sulla scheda consultare pag. 49 MANUAL COMMAND CONNECTION / CONNESSIONE COMANDI MANUALI MOTOR 1 + MOTOR 2 MOTOR 1 MOTOR 2...
- Page 51 USER MANUAL / MANUALE D’USO USER MANUAL / MANUALE D’USO EN-IT EN-IT EXTERNAL ALARM CONNECTION / CONNESSIONE ALLARME ESTERNO (EXT AL) R 10 k For the connector position on the board, see page 49 / N.C. Per la posizione del connettore sulla scheda consultare pag. 49 N.C. N.C. R 10 k CONTROL UNIT CONNECTED TO AN EXTER- EXTERNAL ALARM NAL ALARM SYSTEM / CENTRALE COLLEGATA...
- Page 52 USER MANUAL / MANUALE D’USO USER MANUAL / MANUALE D’USO EN-IT EN-IT SMOKE SENSOR CONNECTION - EMERGENCY PUSH BUTTON / CONNESSIONE SENSORE FUMO - PULSANTE DI EMERGENZA Output Description Descrizione Notes/Note ALARM (N.C.) ALLARME (N.C.) RESET (N..O) RESET (N.A.) 12Vdc Common (for RESET Comune (per RESET Only on last emergency push but- and ALARM) e ALLARME) ton/ solo sull’ultimo pulsante di...
- Page 53 USER MANUAL / MANUALE D’USO USER MANUAL / MANUALE D’USO EN-IT EN-IT INTERLOCK FUNCTION / FUNZIONE INTERLOCK INTERLOCK MASTER MOTOR 1 OUT DIP_SWITCH 6 ON MOTOR 2OUT OPEN INTERLOCK SLAVE 1 AUX1 DIP_SWITCH 5 ON INTERLOCK SLAVE N (max. 10 ) AUX1 DIP_SWITCH 5 ON 4.7 F...
- Page 54 USER MANUAL / MANUALE D’USO USER MANUAL / MANUALE D’USO EN-IT EN-IT Doc. 85588U - Rev. 22/10/2020 54/54 Drw. / Dis. 32367/h...
- Page 56 Via XXV Aprile 45 16012 BUSALLA (GE) ITALY Tel. +39 010 9768232 Fax +39 010 9768233 ULTRAFLEX CONTROL SYSTEMS s.r.l. e-mail:ucs@ultraflexgroup.it www.ultraflexgroup.it/ucs www.ultraflexcontrolsystems.com...
Need help?
Do you have a question about the C-SV 4A and is the answer not in the manual?
Questions and answers
Скажите пожалуйста подключил датчик дождя, но вместо того чтоб закрыть он открывает окна?