Sign In
Upload
Download
Table of Contents
Contents
Add to my manuals
Delete from my manuals
Share
URL of this page:
HTML Link:
Bookmark this page
Add
Manual will be automatically added to "My Manuals"
Print this page
×
Bookmark added
×
Added to my manuals
Manuals
Brands
GL-INET Manuals
Gateway
Brume
User manual
GL-INET Brume User Manual
Hide thumbs
1
Table Of Contents
2
3
4
5
6
7
8
9
10
11
12
13
14
15
16
17
18
19
20
21
22
23
24
25
26
27
28
29
30
31
32
33
34
35
36
37
38
39
40
41
42
43
44
45
46
47
48
49
50
51
52
53
54
55
56
57
58
59
60
61
62
63
64
65
66
67
68
69
70
71
72
73
74
75
76
77
78
79
80
81
82
83
84
85
86
87
88
89
90
91
92
93
94
95
96
97
98
99
100
101
102
103
104
105
106
107
108
109
110
111
112
113
114
115
116
117
118
119
120
121
122
123
124
125
126
127
128
129
130
131
132
133
134
135
136
137
138
139
140
141
142
143
144
145
146
147
148
149
150
151
152
153
154
155
156
157
158
159
160
161
162
163
164
165
166
167
168
page
of
168
Go
/
168
Contents
Table of Contents
Troubleshooting
Bookmarks
Table of Contents
Table of Contents
Getting Started with Gl.inet Brume
Power on
Connect
Connect Via LAN
Connect Via USB Type-C Cable
Access the Web Admin Panel
Internet
Cable
Dhcp
Static
Pppoe
Repeater
USB 3G/4G Modem
Compatible Modems
Tethering
Easytether
Wireless
G Wifi
Dongle
Clients
Upgrade
Online Upgrade
Upload Firmware
Official Openwrt/Lede Firmware
Compile Your Own Firmware
Auto Upgrade
Firewall
Port Forwards
Open Ports on Router
Dmz
Vpn
Openvpn
Openvpn Client
Openvpn Server
Wireguard
Wireguard Client
Wireguard Providers
Wireguard Server
Wireguard App Support
Visit Client's LAN Subnet
VPN Policies
Settings
Add VPN Policy
Clear DNS Cache
Applications
Plug-Ins
Internet Kill Switch
Setup
File Sharing
Router Settings
Access the Storage Device
Windows
Mac os
Linux
Chromeos or Chromiumos (Neverware Cloudready and Others)
Android
DLNA Server
Install Plug-Ins
Use the DLNA Server in Gl.inet Routers
Ddns
Cloud
Introduction
Setup
Manage Your Devices
Site to Site
Batch Setting
Template Management
Task List
Goodcloud and VPN
Disable
Tor
More Settings
Admin Password
Lan Ip
Time Zone
MAC Clone
Custom DNS Server
Button Settings
Network Mode
Revert Firmware
Advanced
Troubleshooting
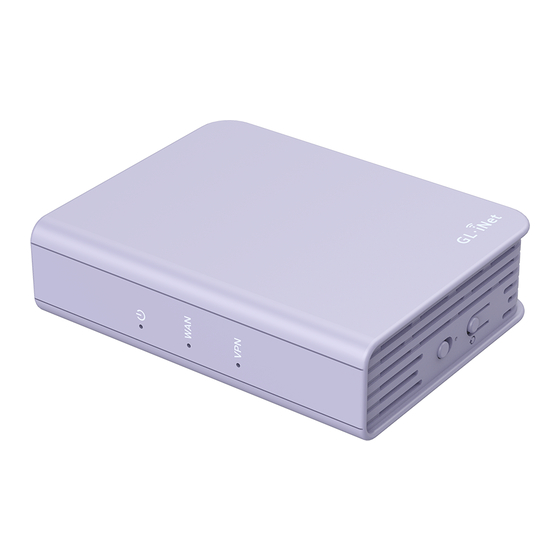
LED Indicators
LED Customization
Repair or Reset
Debrick Via Uboot
Change WAN to LAN
Captive Portal
Gl.inet App
Access Web Panel
Check Connection/Router's IP Address
Your IP Address Is Incorrect
Your IP Address Is Correct
Extensible Authentication Protocol (EAP)
Introduction
Connect Via Web Panel
Connect Via Luci
Goodcloud Issues
How to Fix if My Device Show "Deactivated
Advertisement
Quick Links
1
Connect Via Lan
2
Internet
Download this manual
Brume
(GL-MV1000&GL-MV1000W)
USER MANUAL
Table of
Contents
Previous
Page
Next
Page
1
2
3
4
5
Advertisement
Table of Contents
Need help?
Do you have a question about the Brume and is the answer not in the manual?
Ask a question
Questions and answers
Related Manuals for GL-INET Brume
Gateway GL-INET GL-MV1000 User Manual
(168 pages)
Gateway GL-INET GL-MV1000W User Manual
(168 pages)
Gateway GL-INET Collie User Manual
(48 pages)
Gateway GL-INET GL-X750V2C4 Let's Get Started
Spitz 4g lte wireless gateway (2 pages)
Gateway GL-INET Collie Let's Get Started
Industrial 4g lte gateway (2 pages)
This manual is also suitable for:
Gl-mv1000
Gl-mv1000w
Table of Contents
Save PDF
Print
Rename the bookmark
Delete bookmark?
Delete from my manuals?
Login
Sign In
OR
Sign in with Facebook
Sign in with Google
Upload manual
Upload from disk
Upload from URL


Need help?
Do you have a question about the Brume and is the answer not in the manual?
Questions and answers