Advertisement
Available languages
Available languages
Quick Links
I
NSTALLATION AND
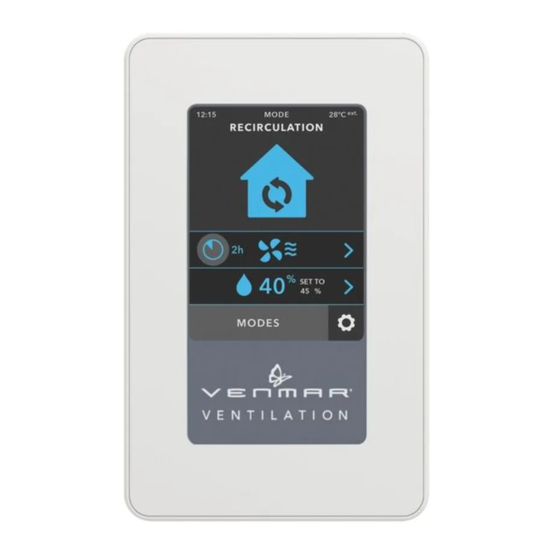
The illustrations in this document are generic; your control appearance may be slightly different from the ones shown.
Electrical wiring must be done by qualified personnel in accordance with all applicable codes and standards.
Before connecting wires, unplug the unit or switch power off at service panel and lock service disconnecting
means to prevent power from being switched on accidentally. Always wear safety glasses and gloves while
performing these instructions.
Failure to comply with the following can cause erratic operation of the control and/or unit:
• Never install more than one main wall control per ventilation unit.
• Keep control low voltage wiring at least 1 foot (305 mm) away from motors, lighting balast, light dimming circuit
and power distribution panel. Do not route control wiring alongside house power wiring.
• Ensure the wires are securely connected.
This control is compatible with all AI and N series units.
Unplug the ventilation unit.
Unscrew the screw located on the
underside of the wall control.
Separate the front module from the
mounting plate by lifting its bottom
part.
NOTE: If the control is to be installed in an electric box, do
not perform steps 3 and 4.
Using the mounting plate, mark the
hole opening and screw locations at
the desired height on the wall.
Cut the hole opening using the mark
previously drawn (1/8" outside the
mark is recommended). Drill both
screw holes (3/16" Ø) in wall and
insert the wall anchors (included).
Fix the mounting plate to the wall using the screws provided.
Set the Language and the Day and time screens following your preferences.
U
G
SER
UIDE FOR
EE
. 41303 V
VÄN
PART NO
READ AND SAVE THESE INSTRUCTIONS
VC0217
VC0219
VC0255
Ø 3/16", typ.
VC0244A
P
RELIMINARY SETTINGS
VC0245A
A
T
DVANCED
OUCHSCREEN
ENMAR PART NO
!
WARNING
CAUTION
Strip the end of the cable to access
the 4 wires (about 3"). Strip the end
of each wire (about 1/4"). Connect the
wires to the terminals, regardless of
the wire color. Note which wire color
has been chosen for each terminal.
Be careful not to pinch wires when reinstalling the
front module on the mounting plate.
Install the front module on the
mounting plate. Fix both parts by
screwing the screw on the underside
of the wall control.
Perform the electrical connection to the terminal connector of
the unit, as shown below. For more details, refer to the
installation manual of the ventilation unit.
NOTE: To avoid miswiring, refer to the notes taken at step
to match the wire color with the right terminal.
VC0232
Plug the ventilation unit in power source.
VC0246A
C
ONTROL
. 41403
CAUTION
VC0218
W
ALL CONTROL REAR VIEW
12V D- D+ Gnd
12V
D-
D+ Gnd
23840 rev. 02
Advertisement

Summary of Contents for vanEE 41303
- Page 1 NSTALLATION AND UIDE FOR DVANCED OUCHSCREEN ONTROL . 41303 V . 41403 VÄN PART NO ENMAR PART NO READ AND SAVE THESE INSTRUCTIONS The illustrations in this document are generic; your control appearance may be slightly different from the ones shown.
- Page 2 Indicates the current mode Will appear if maintenance is required or if an error triggered To access the Information screen Countdown for temporary modes To select the blower speed Will appear when RH exceeds selected set point To enable/disable humidity function and adjust set point To access the Settings screen VC0247A Select the Smart mode...
- Page 3 ’ ’ UIDE D INSTALLATION ET D UTILISATION DE LA COMMANDE AVANCÉE À ÉCRAN TACTILE 41303 V 41403 VÄN PIÈCE N ENMAR PIÈCE N VEUILLEZ LIRE ET CONSERVER CES DIRECTIVES Les illustrations de ce document sont générales; l’apparence de votre commande peut légèrement différer de celles-ci.
- Page 4 Indique le mode actuel Apparaîtra si un entretien est requis ou si une erreur est Pour accéder à l’écran Information présente Décompte pour les modes temporaires Pour sélectionner la vitesse du ventilateur Pour activer/désactiver la fonction humidité et ajuster le point Apparaîtra lorsque HR dépassera le point de de consigne consigne sélectionné...


Need help?
Do you have a question about the 41303 and is the answer not in the manual?
Questions and answers