Leantechnik lifgo 5.0 Instructions For Installation, Commissioning And Maintenance
Hide thumbs
Also See for lifgo 5.0:

Related Manuals for Leantechnik lifgo 5.0

Summary of Contents for Leantechnik lifgo 5.0
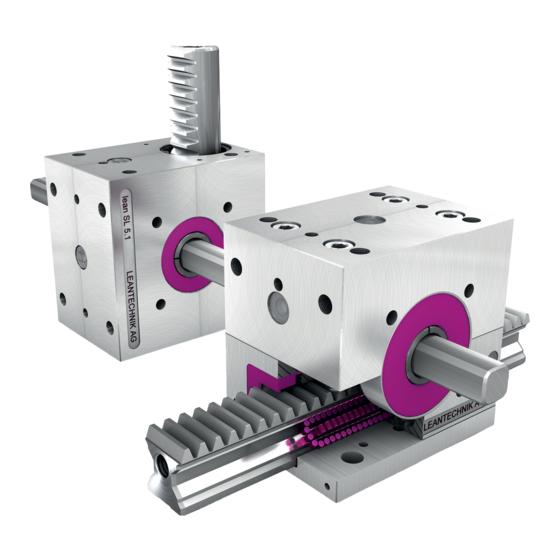
- Page 1 & lean SL 5.0 – 5.4 ® ® Instructions for Installation, Commissioning & Maintenance LEANTECHNIK AG Version 03.2016 / www.leantechnik.com...
- Page 2 Important notes on lifter installation Note! The shipping lock (assembly aid) must remain in the lifter guide block until it is slid onto the gear rack/guide rail. Otherwise the rollers can be lost. For this reason, also make sure that there is no air gap between the gear rack/guide rail and the shipping lock when the lifter/guide block is slid on or pulled out.
-
Page 3: Table Of Contents
Contents Rules Introduction Component identification Contact address Warranty Product liability EU Machine directives Technical changes/modifications Symbols used Product information Technical data Proper use Improper use Safety regulations General Hazardous points Shipping Storage Assembly Start - up Servicing End of service life, removal, disposal Resale Assembly &... -
Page 4: Rules
1.4 Warranty The manufacturer’s warranty from LEANTECHNIK AG is 1 year, according to the general terms & conditions (T&C). They are found in separate documentation. The warranty for replacement parts is 12 months after commissioning. Use only original replacement parts from LEANTECHNIK AG when replacing parts, because no liability for material quality, correct dimensions, and proper machining can be provided for replacement parts from other manufacturers. -
Page 5: Product Liability
Commissioning is not permitted until it has been determined that the machine in which this product is installed meets the requirements of the EC directive. 1.7 Technical changes/modifications LEANTECHNIK AG reserves the right to make technical changes to improve the product. Changes or modifications to lifgo & lean SL may be performed only with written permission from LEAN- ®... -
Page 6: Safety Regulations
· The use of replacement parts that are not supplied by LEANTECHNIK AG will result in the voi- ding the warranty on lifgo &... -
Page 7: Shipping
(see also Chapter 4) Before starting the installation, always make sure that all parts have been delivered and are availa- www.leantechnik.com. ble. All parts must be properly installed. Follow our assembly videos at We cannot accept responsibility for errors or damage of any kind. -
Page 8: Servicing
3.7 Servicing The following points must be observed for maintenance and repairs: · Keep unauthorized persons out of the maintenance area. · Removal and installation of components must be performed by technicians. · Use only suitable tools of the correct size in order to avoid damage to screws, bolts, and nuts. ·... -
Page 9: Assembly & Commissioning
4.1 Assembly manual for lifgo & lean SL ® ® (also follow the functional & assembly videos under www.leantechnik.com) Note: do not remove the shipping lock beforehand. Insert the gear racks into the lifters that are connected via profile shafts. For lifgo lifters, push the shipping lock out with the gear rack. -
Page 10: Commissioning
surface. The eyebolt should be oriented vertically to the side wall. Connect the eyebolt/clevis on both sides, using the retaining pin, and press the retaining clip onto the clevis. The hex rod in the middle has a left/right hand thread. Rotating in one direction increases dimension “L”, and the other direction decreases it (turnbuckle function). -
Page 11: Servicing
Housing Lubricating grease – K2K, DIN 51825 for normal loads Lubricating grease – KP2K, consistency class NLGI 2, DIN 51818 for higher loads Guide block Low-viscosity grease – DIN 51826 NLGI 00 or NLGI 000 The lifgo and lean SL lifters are provided with light lubrication at the factory. -
Page 12: Screw Connections
5.3 Screw connections After repair work or replacement of parts, no damaged screws, washers, nuts, or pins may be reused. Only standardized parts that meet at least the quality indicated in the parts list may be used. Before parts are installed, the contact surfaces must be thoroughly cleaned. Threaded and through holes must also be free of contamination. -
Page 13: Replacement Parts
The maximum period of use of the lubrication cartridges is one year. 6 Replacement parts Use only original LEANTECHNIK AG replacement parts for repairs on lifgo & lean SL . This ®... -
Page 14: Instructions For Adjusting Lifgo Eccentric 5.0
7 Instructions for adjusting lifgo eccentric 5.0 – 5.4 ® Also follow the functional & assembly videos under www.leantechnik.com. The following instruc- tions apply to the lifgo linear eccentric 5.0 – 5.4 lifter. ® 1. Remove the black, round retaining washers (2 pieces) on the sides of the pinion shaft, using a flat tool (flathead screwdriver or the like). - Page 15 4. Place the adjustment key on the eccentric disc (hole circle) and turn it in the desired direction by one hole position. by one hole position 5. Now use the adjustment key to turn the eccentric disc on the other side in the same direction.