Table of Contents
Advertisement
Advertisement
Table of Contents

Related Manuals for FoxESS E Series

Summary of Contents for FoxESS E Series
-
Page 3: Table Of Contents
PE Connection and Leakage Current ....................... 4 Surge protection devices (SPDs) for PV installation ................4 About Product ................................5 About E Series and F Series Inverter ......................5 Basic Features ..............................5 Terminals Introduction ..........................6 Dimensions ................................ 7 Technical Data ................................ -
Page 4: Important Notes
1. Important Notes 1.1 Scope This manual describes the assembly, installation, commissioning, maintenance and troubleshooting of the following model(s) of FoxESS products: E Series: E3000 E3600 E4600 E5000 E5300* E6000 F Series: F4600 F5000 F5300* F6000 Note: Please keep this manual where it will be accessible at all times. -
Page 5: Safety
2. Safety 2.1 Appropriate Usage The E Series and F Series inverter is designed and tested in accordance with international safety requirements. However, certain safety precautions must be taken when installing and operating this inverter. The installer must read and follow all instructions, cautions and warnings in this installation manual. -
Page 6: Pe Connection And Leakage Current
▪ Do not use the equipment if any operating anomalies are found. Avoid temporary repairs. ▪ All repairs should be carried out using only approved spare parts, which must be installed in accordance with their intended use and by a licensed contractor or authorized Fox-ESS service representative. ▪... -
Page 7: About Product
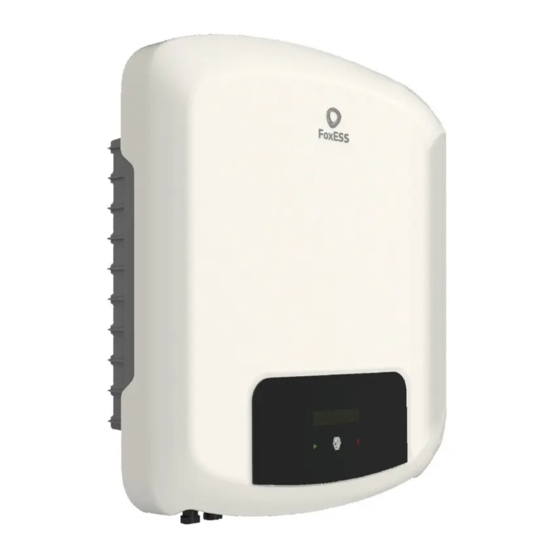
30 volts. 3. About Product 3.1 About E Series and F Series Inverter E/F series inverters cover 3kW systems up to 6kW and are integrated with 2 MPP trackers with high efficiency and reliability. -
Page 8: Terminals Introduction
▪ Power factor regulation. Friendly HMI. ▪ LED status indications. ▪ LCD display technical data, human-machine interaction through touch key. ▪ PC remote control. ▪ Upgrade through USB interface 3.3 Terminals Introduction Item Description DC Connector DC Connector DC Switch (Optional) Waterproof Lock Valve Communication Port USB Port (For Upgrade) -
Page 9: Dimensions
3.4 Dimensions For E Series: For F Series: 148mm 402mm 476.5mm 4. Technical Data 4.1 DC Input E4600 E5000 E5300* E6000 Model E3000 E3600 F4600 F5000 F5300* F6000 Max. recommended DC power [W] 3900 4680 5980 6500 6890 7800 Max. DC voltage [V]... -
Page 10: Efficiency, Safety And Protection
E6000 Model E3000 E3600 F4600 F5000 F5300* F6000 Dimension [W/H/D](mm) 360*370*128(E series) 402*476.5*148(F series) 13.5 (E series) 15.5 (F series) Net weight [kg] Wall-mounted Installation Operating temperature range -20...+60 (derating at 45) [℃] Storage temperature [℃] -40...+70 Storage/Operation relative 0%~100%, no condensation humidity 3000m (derating when >2000m) -
Page 11: Installation
5. Installation 5.1 Packing List Please un-pack the box, check and make sure you received all items as listed below before installation (excluding optional items): Object Quantity Description Object Quantity Description Inverter Communication connector Bracket Product manual DC connector (F/M) Quick installation guide AC connector CT (Optional) -
Page 12: Installation Space Required
5.3 Installation Space Required Position Min Size Left 30cm Right 30cm 30cm Bottom 30cm Front 30cm 5.4 Tools Required ▪ Manual wrench; ▪ Electric drill (drill bit set 8mm); ▪ Crimping pliers; ▪ Stripping pliers; ▪ Screwdriver. 5.5 Installation Steps Step 1: Fix the bracket on the wall ➢... -
Page 13: Wiring Steps
➢ Insert the expansion tubes into the holes and tighten them. Install the bracket with the expansion screws. Step 2: Match the inverter with wall bracket ➢ Hang the inverter over the bracket, slightly lower the inverter, and make sure the 2 mounting bars on the back are fixed with the 2 grooves from bracket properly. - Page 14 Step 2: DC Wiring ➢ Turn off the DC switch. ➢ Choose 12 AWG wire to connect the PV module. ➢ Trim 6mm of insulation from the wire end. ➢ Separate the DC connector as below. Plug Pin contact Cable nut ➢...
- Page 15 Other technical requests should comply with the requirement of the local public grid. E4600 E5000 E5300 E6000 Model E3000 E3600 F4600 F5000 F5300 F6000 Cable 4mm² 4mm² 6mm² 6mm² 6mm² 6mm² Micro-Breaker Note: A micro-breaker should be installed between inverter and grid; any load SHOULD NOT be connected with the inverter directly.
-
Page 16: Earth Connection
➢ Push the threaded sleeve into the socket, tighten up the cap on the terminal Click! ➢ Push the threaded sleeve to connection terminal until both are locked tightly on the inverter. ➢ Remove the AC connector, press the bayo-nut out of the slot with a small screwdriver or the unlock tool and pull it out, or unscrew the threaded sleeve, then pull it out. - Page 17 For WiFi device: Connect the WiFi with the local router, and complete the WiFi configuration (please refer to the WiFi product manual for more details). Set-up the site account on the FoxESS monitoring platform (please refer to the monitoring user manual for more details).
- Page 18 ➢ RS485/Meter RS 485 RS485 is a standard communication interface which can transmit the real time data from inverter to PC or other monitoring devices. RS 485 Meter (optional) The inverter has integrated export limitation functionality. To use this function, a power meter or a CT must be installed.
- Page 19 DRM0 setting Short press the touch key to switch display or make the value+1. Long press the touch key to confirm your setting. The PIN definitions of CT/RS485/DRM0/ESTOP interface are as below. Definition CT+ METER 485- METER 485+ DRM0 ESTOP ➢...
- Page 20 Wait until the LCD is off, then insert the U-disk and turn on the DC switch or re-connect the PV connector, the LCD will show picture as below. Update Master/Slave/Manager/All Short press on the button to select the type of firmware you want to upgrade, then long press on the button, the inverter will start the upgrade process automatically.
-
Page 21: Inverter Start-Up
FoxESS phone application with following steps: Login to your installer account on the phone application; Select the station that needs to be amended; Select the inverter SN that need to be amended from the Device page;... -
Page 22: Operation
Switch off the inverter AC isolation switch. Switch off the DC isolation switch and allow 5 minutes for the inverter to power down completely. 6. Operation 6.1 Control Panel Object Name Function LCD Screen Display the information of the inverter. Green: The inverter is in normal state. -
Page 23: Function Tree
6.2 Function Tree 7. Maintenance This section contains information and procedures for solving possible problems with the FoxESS inverters and provides you with troubleshooting tips to identify and solve most problems that can occur. 7.1 Alarm List Fault Code Solution... - Page 24 Fault Code Solution - Wait for one minute after the inverter reconnects to grid. - Disconnect PV (+), PV (-) with DC. DCI Fault - After the LCD switches off, reconnect and check again. - Please seek for help from us if it does not go back to normal state. - Disconnect PV (+), PV (-) with DC.
-
Page 25: Troubleshooting
Are the configurations settings correct for your particular installation? Are the display panel and the communications cable properly connected and undamaged? Contact FoxESS Customer Service for further assistance. Please be prepared to describe details of your system installation and provide the model and serial number of the unit. -
Page 26: Decommissioning
to section 2 of this manual. ➢ Maintenance checking list During the process of using the inverter, the responsible person shall examine and maintain the machine regularly. The required actions are as follows. ✓ Check that if the cooling fins at the rear of the inverters are collecting dust/dirt, and the machine should be cleaned when necessary. - Page 28 Ma i t i a n E n e r g y Co . , L t d Wu x i B r a n c h A d d : N o . 1 1 , L i J i a n g R o a d , X i n wu D i s t r i c t , Wu x i Ci t y , J i a n g s u P r o v i n c e , Ch i n a T e l : 0 5 1 0 - 6 8 0 9 2 9 9 8 WWW.
Need help?
Do you have a question about the E Series and is the answer not in the manual?
Questions and answers