GSS compact classic STC 4-16 CT ME Assembly Instruction Manual
Hide thumbs
Also See for compact classic STC 4-16 CT ME:
- Assembly instruction manual (33 pages) ,
- Assembly instructions manual (56 pages)
Table of Contents
Advertisement
Quick Links
Advertisement
Table of Contents

Subscribe to Our Youtube Channel
Related Manuals for GSS compact classic STC 4-16 CT ME


Summary of Contents for GSS compact classic STC 4-16 CT ME
- Page 1 STC 4-16 CT ME Default access data: 192.168.0.120 User: admin Password: geheim...
-
Page 2: Table Of Contents
o n t e n t s 1 Safety regulations and notes ................ 4 2 General information ..................6 Packing contents ................6 Meaning of the symbols used ............6 Technical data ................6 Description ...................8 Block diagram ................8 General ..................8 User .....................9 Administrator access ..............9 Guest access ................9 3 Assembly .................... - Page 3 - Administrator access .............37 - Guest access ................37 Firmware ................38 - Output Modulation of Head-end Station: ........38 - System settings: ..............39 - Firmware update: ..............39 - Backup: ................40 - Manager: ................40 - Reset to factory defaults: ............40 - System restart: ..............41 - Ping (Network Diagnostic Tool): ..........41 User ..................41 5 Multiple satellite reception ............
-
Page 4: Safety Regulations And Notes
a f e t y r e g u l a t i o n s a n d n o t e s • The devices meet the EU directives 2011/65/EU, 2014/30/EU and 2014/35/EU. • This device is subject to the provisions of protection class I. Operate the device only to mains sockets with protective conductor connection! •... - Page 5 • Do not place any vessels containing liquids on the head-end station. • Do not place anything on the head-end station which could initiate fires (e.g. candles). • Due to the risk of fires caused by lightning strikes, we recommend that all mechanical parts (e.g.
-
Page 6: General Information
e n e r a l i n f o r m a t i o n 2.1 P aC k i n g C o n t e n t s 1 STC 4-16 CT ME 1 LAN cable 1 Brief assembly instructions 1 Mains cable 2.2 m... -
Page 7: General
RF output QAM Frequency range: ..........42.0 MHz … 868.0 MHz Channels: ................S21 … C69 Types of modulation: ........QAM 16, 32, 64, 128, 256 Dynamic phase error: ..............< 0.2° MER: ....................45 dB Symbol rate ..............1000…7500 kBd Output level: ..............80…96 dBμV Output impedance: ................. -
Page 8: Description
2.4 d es C r i P t i o n The head-end station converts 16 transponders modulated acc. to DVB-S/ DVB-S2 standard (up to 32 APSK) into 16 DVB-C or DVB-T modulated trans- ponders. In conjunction with specially programmed multiswitches up to four satellites can be received (multiple satellite reception –... -
Page 9: User
s e r d m i n i s t r ato r aCC es s The user admin has access to all menus and may make changes. —> The default password for the user admin is geheim. u es t aCC es s The user gast has access to (almost) all menus, but may not make any changes. -
Page 10: Assembly
s s e m b l y 3.1 i n s ta l l i n g t h e d e v i C e – The device must not be operated lying down, since the function of the heat sink will be severely restricted. -
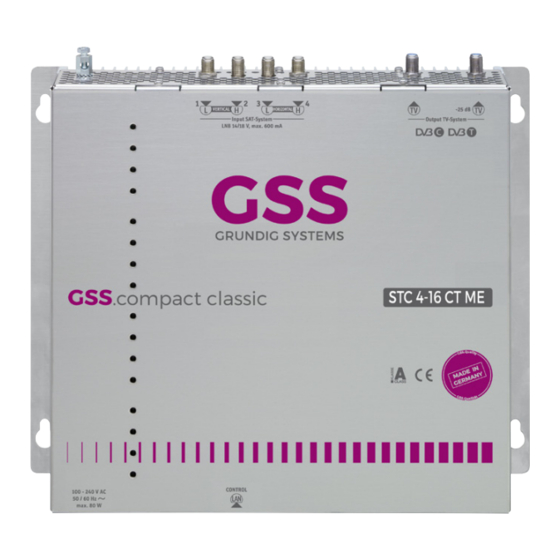
Page 11: Device Overview
QAM output Test output –25dB IEC connector C14; connector for mains cable Reset IP address /host name / password (hold depressed for more than 5 seconds) to 192.168.0.120 / gss / geheim Without function LAN socket** for configuration Mounting support... -
Page 12: Potential Equalisation (Pe)
3.3 P (Pe) ot e n t i a l e q ua l i sat i o n Equalise the potential (PE) in accordance with IEC/EN/DIN EN 60728. • Connect the PE connection terminal to a PE rail (supplied by customer) using the PE wire (Cu 4 mm - 9 mm 3.4 C... -
Page 13: Configuration / Updates
/ u o n f i g u r a t i o n P d a t e s The configuration of the station is to be done via an HTML user interface via a PC and a standard HTML browser. 4.1 i n i t i a l C o n f i g u r at i o n... - Page 14 > Internet Protocol Version 4 (TCP/IPv4) > Properties • Activate point "Use the following IP address". • Enter e.g. 192.168.0.2 for the IP address. • Enter for the Subnet mask 255.255.255.0. • Confirm the setting with "OK". - 14 - STC 4-16 CT ME...
- Page 15 • Start the browser, enter the IP address of the device (factory default is 192.168.0.120) and start the establishment of the connection. • Enter user "admin" and your Password and click on button "Login". The default password is "geheim". —> We recommend that you replace the default password to a pass- word of your choice in order to prevent unauthorized access to the head-end station (menu System >...
-
Page 16: Configuration
4.2 C o n f i g u r at i o n v e rv i e w w i n d ow 53 60 Via the selection System you have access to the menus of the System settings: Logbook (page 33); Notification (page 34); Network (page 36); Se- curity (page 37);... -
Page 17: Perform Changes
Herein the current system temperature as well as date and time of the last login is displayed. —> If a system temperature of 85°C will be reached, the system will be shut down. Via button Logout you can leave the graphical user interface. Via the Help menu you can call up the assembling instructions (PDF) as well as a ZIP file containing a list and all licences of the used Open- Source software. -
Page 18: Number Format
u m b e r f o r m at For entering/indication of the different IDs the number format can be set to hexadecimal or decimal in menu System > Firmware. o n f i g u r at i o n m e n u s n P u t 105 106 107 108 109... - Page 19 In column Name, enter a personal input name. —> If dCSS/Unicable II is activated you can assign the four levels of a satellite to each input. With button LNB Power switch on or off the LNB power supply (max. 500 mA). If necessary switch the 14V/18V power supply to 14V "only" using button 14V fixed.
-
Page 20: Output
u t P u t By default QAM modulation is set for the output. If you would like to use COFDM at the output, first you have to select COFDM for the output setting in menu System > Firmware and confirm with button . - Page 21 In column Chan. / Freq. [MHz], enter the desired output channel/fre- quency of the individual lines. —> Double assignments are indicated by a warning icon —> A output signal is normally transmitted with a bandwidth of 8 MHz. This means that you can only use the channel centre frequency of the existing channel grid in the range of channels C21…C69 (frequency grid 8 MHz).
- Page 22 For exceptional cases and "older" digital cable receivers, in column Spectrum the spectral position of the user signal can be inverted (invers). Factory default is "normal". In column Level [dB], balance the output levels of the different lines (0…-10dB). Therefore measure and note down the output level of each modulator.
- Page 23 Before leaving the menu, changes must be transferred to the head-end station! • Therefore click on button —> After that is displayed for a short time in the upper right corner. - 23 - STC 4-16 CT ME...
-
Page 24: Filter
i lt e r In the Filter menu, in the selection PASS Services you can remove programs/ services with table adjustment from the data streams of the transponders as well as modify the TS/ON IDs. In the selection Drop PIDs, PIDs can be removed (dropped) from the data streams of the transponders or have a new address assigned (remapped) - Page 25 In column Pass Service you select the stations (services) which you would like to play out. —> Only if the filter is enabled, services in which the hook has been removed ( , are suppressed (filtered out)! —> If the filter is enabled, new services added to the transponder are suppressed until a hook is set.
- Page 26 —> After that an additional field appears to enter an additional PID. —> Therefore also observe the functions Via button Reset filter, only for the displayed filters (dependent on the selections for Typ and Overview ) columns Pass Service 200 206 Filter are reset to factory defaults ( With button Reset hold value reset the previously achieved peak values...
-
Page 27: Nit
—> Modulators switched off are indicated: Herein you can set three different modes: User: The displayed table is output as NIT. original: The NIT present at the inputs is output. deactivate: No NIT is output. Herein you can change the Network ID. —>... - Page 28 Herein you get an overview of the transponders, which are included in the NIT in Mode User. If changes are done in menu output after prepar- ing the NIT, an error and in column Line a "–" will be indicated. In column Options the buttons for Edit and Delete are displayed,...
- Page 29 Herein you can delete the NIT as well as the LCNs. Herein you can manually add QAM transponders of other stations. —> Double assignments are indicated by a warning icon —> Added transponders of a second station are marked in column Line by a "–".
- Page 30 • In the selection window click on button "Open". The data is added. —> Double assignments of frequencies are display. In this case, the data is not imported. First eliminate the double assignments, and then import the corrected data. —> Double assignments of LCNs are marked in red in the LCN list. •...
-
Page 31: Lcn - Logical Channel Numbering
lCn – l o g i C a l h a n n e l u m b e r i n g —> Before you can assign LCNs, a NIT must be created or imported. —> Due to the differentiation of SD LCN and HD LCN it is possible to assign the same channel number for a channel transmitted in "SD"... - Page 32 Since there are different international requirements and the function is ultimately dependent upon the devices used, we can propose only common values here: United Kingdom 0x0000233A, Nordig 0x00000029, France and the European Association of Consumer Electronics Manufacturers 0x00000028. Bits for LCN data structure —>...
-
Page 33: System Menus
ys t e m m e n u s o g b o o k In the logbook different alerts or events are displayed. This helps 300 301 302 at a possible troubleshooting. Herein you can select whether only one line is displayed or all lines are displayed. -
Page 34: Notification
ot i f i C at i o n In this menu you use the reaction time to set when entries for input signal or data overflow errors are entered in the logbook (page 33). Enter the access data for the outgoing mail server of your e-mail account here if you want to be informed about error entries in the logbook by e-mail. - Page 35 Herein enter the mail address of the recipient. Via button send alarm mail you can send a test mail. —> Before you can send a test mail, changes must be transferred to the head-end station! Therefore click on button —> Example: —>...
-
Page 36: Network
IP address. To do this, enter the host name followed by ".local" in the browser (e.g. gss.local). If you operate several head stations in the network, you must enter different names here. —> Write down the IP address and the Host name! Further access to the device is only possible via the IP address or the host name. -
Page 37: Security
e C u r i t y —> The user gast has no access to this menu. d m i n i s t r ato r aCC es s Herein replace for the user admin the default password geheim by a password of your choice. - Page 38 i r mwa r e Herein select the output modulation QAM or COFDM, time zone, automatic daylight saving time and the number format (hexadecimal/decimal). In ad- dition a firmware update, backup, factory reset as well as a system restart (warm start) can be done. The manager allows you to store different configura- tions in the head-end station.
- Page 39 ys t e m s e t t i n gs Herein select the time zone setting dependent on the location of the head- end station. The head-end station receives the Coordinated Universal Time – UTC from the satellite. Enter the corresponding UTC offset. —>...
- Page 40 —> After a successful update, the following message is displayed: The head-end station then restarts. aC k u P Via button Save settings to PC you can download the settings from the head-end station as "*.tar" file for backup. —> Settings including password but without network settings. Via button Load settings from PC you can restore the settings from a prior downloaded backup.
- Page 41 ys t e m r es ta r t Via button Reboot you can restart the head-end station (warm start). i n g e t wo r k i ag n os t i C o o l You can use the Ping button to check whether a device is accessible on the network (also in the network to which you are connected via OpenVPN).
- Page 42 HIGH LNB INPUTS 12V DC OUT 1 16 UB SDUC 516 OUT 2 2 x 16 USER BANDS 16 UB GSS Grundig Systems GmbH 90471 Nuernberg - Germany LNB OUTPUTS HIGH HIGH 12V DC LNB INPUTS OUT 1 16 UB...
- Page 43 > i e n u o n f i g u r at i o n n P u t In order that a head-end station with upstream SDUCs 516 works, the "dCSS/ Unicable II" switch in the input settings must be set to "ON". As a result the preprogrammed frequencies of the SDUCs are set at the inputs of the head station.
- Page 44 OUT 1 16 UB SDUC 516 OUT 2 2 x 16 USER BANDS 16 UB GSS Grundig Systems GmbH 90471 Nuernberg - Germany LNB OUTPUTS HIGH (Pe) ot e n t i a l e q ua l i sat i o n Make a potential equalisation (PE) according to IEC/EN/DIN EN 50083 resp.
- Page 45 OUT 1 16 UB SDUC 516 OUT 2 2 x 16 USER BANDS 16 UB GSS Grundig Systems GmbH 90471 Nuernberg - Germany LNB OUTPUTS HIGH • Connect the SAT IF inputs … to the corresponding outputs of a quat- tro LNB.
- Page 46 h a n n e l a n d f r e q u e n C y t a b l e s Advice for a frequency grid (8 MHz) in the band I/III 42.00 82.00 146.00 186.00 226.00 266.00 50.00 114.00...
- Page 47 Declaration of CE conformity GSS Grundig Systems GmbH • Beuthener Straße 43 • D-90471 Nuremberg Phone: +49 (0) 911 / 633 240 0 • Fax: +49 (0) 911 / 633 240 98 www.gss.de/en • info@gss.de CLASS CLASS Service: Phone: +49 (0) 911/ 633 240 90 • service@gss.de Alterations reserved.
Need help?
Do you have a question about the compact classic STC 4-16 CT ME and is the answer not in the manual?
Questions and answers