Table of Contents
Advertisement
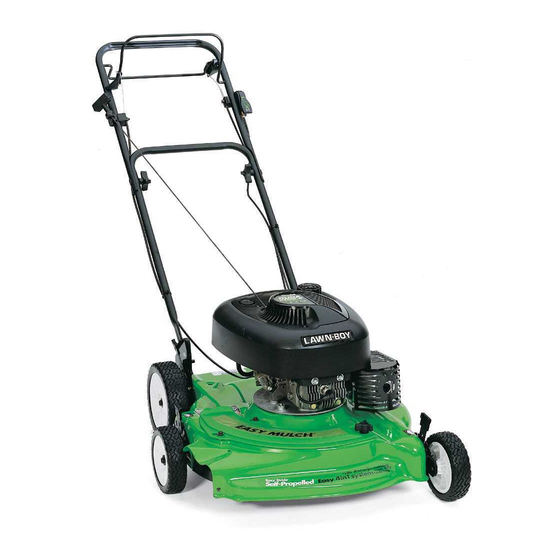
GoldPro Series
Walk Power Lawn Mower
10424—210000001 and Up
10550—210000001 and Up
10552—210000001 and Up
Operator's Manual
Para obtener una versión gratis de este manual en español, escriba a la dirección
indicada más abajo. Asegúrese de indicar el modelo y el número de serie de su producto.
Pour obtenir gratuitement une version en français de ce manuel, écrivez à l'adresse
ci–dessous. N'oubliez pas d'indiquer les numéros de modèle et de série de votre produit.
Lawn-Boy Inc., Attn: Parts Dept., 8111 Lyndale Ave S, Bloomington, MN 55420-1196.
Form No. 3325-494 Rev A
Domestic English (EN)
Advertisement
Table of Contents

Related Manuals for Lawn-Boy GoldPro Series


Summary of Contents for Lawn-Boy GoldPro Series
- Page 1 Pour obtenir gratuitement une version en français de ce manuel, écrivez à l’adresse ci–dessous. N’oubliez pas d’indiquer les numéros de modèle et de série de votre produit. Lawn-Boy Inc., Attn: Parts Dept., 8111 Lyndale Ave S, Bloomington, MN 55420-1196. Domestic English (EN)
-
Page 2: Table Of Contents
........Whenever you need service, genuine Lawn-Boy parts, or Controls . -
Page 3: Safety
Be alert and turn the lawn mower off if children enter Lawn-Boy designed and tested this lawn mower for to the area. offer reasonably safe service; however, failure to comply... - Page 4 Keep in mind that the operator or user is responsible Walk; never run. for accidents or hazards occurring to other people or Keep a firm hold on the handle. their property. For wheeled rotary lawn mowers, mow across the face See the manufacturer’s instructions for proper of slopes, never up and down.
-
Page 5: Safety And Instruction Decals
To ensure the best performance and safety, purchase only genuine Lawn-Boy replacement parts and Never store the lawn mower with gasoline in the tank accessories. -
Page 6: Assembly
Assembly 4. Insert a lock washer and wing nut in either the high setting hole or low setting hole as shown in Figure 2. To set the handle height, see Adjusting the Handle Note: Determine the left and right sides of the machine Height on page 6. -
Page 7: Installing The Cover Plate
Installing the Cover Plate Your lawn mower comes with a cover plate. For side discharge operation, install the cover plate into the deck opening. Warning An uncovered discharge opening could allow the Figure 6 lawn mower to throw objects in the operator’s or 1. -
Page 8: Before Starting
Use only Lawn-Boy Generation II 2-Cycle Oil (Fig. 10) or an equivalent premium grade, NMMA TCW III-certified two-cycle ashless oil. - Page 9 Note: Failing to use the proper oil or the 32:1 gasoline-to-oil mixture ratio can result in serious engine damage. m–3833 Add Lawn-Boy Generation II 2-Cycle Oil (Fig. 10) or an equivalent oil to fresh, unleaded gasoline according to the chart below: Figure 12 1.
-
Page 10: Operation
Operation Note: Determine the left and right sides of the machine from the normal operating position. Controls 1051 Figure 15 The starter handle, the blade control bail, and the throttle control are on the upper handle as shown in Figure 13. 1. -
Page 11: Using The Self-Propel Drive
Using the Self-propel Drive drive and should give the clutches the free wheeling they need. If you cannot disengage the self-propel drive using these methods, contact an Authorized Service Dealer. Self-propel Models only To operate the self-propel drive, simply walk forward with Adjusting the Cutting Height your hands on the upper handle. - Page 12 Overlap the cutting swaths instead of cutting a full swath with each pass. Replace the blade when necessary with an original Lawn-Boy replacement blade. Set the cutting height on the front wheels one notch lower than the rear wheels. Mow only dry grass or leaves. Wet grass and leaves tend to clump on the yard and may cause the lawn mower to plug or the engine to stall.
-
Page 13: Maintenance
Maintenance Note: Determine the left and right sides of the machine from the normal operating position. Recommended Maintenance Schedule Maintenance Service Maintenance Procedure Interval Check the stopping time of the blade brake. The blade must stop within three seconds of releasing the bail; if it does not, contact an Authorized Service Dealer Each Use for repair. -
Page 14: Cleaning The Lawn Mower Housing
Cleaning the Lawn Mower Warning Housing Tipping the lawn mower may cause the fuel to A clean lawn mower housing provides the best cutting leak from the carburetor or the fuel tank. performance. Check for grass buildup and clean it after Gasoline is extremely flammable, highly explosive each use. -
Page 15: Cleaning Under The Belt Cover
Cleaning under the Belt Cover Self-propel Models only Under certain conditions, the clippings can collect under the belt drive cover and in the pulley groove. This can cause the belt to slip, the self-propel drive to lose power, or the self-propel drive not to disengage. m–4472 Clean the grass clippings and debris from under the belt Figure 22... -
Page 16: Adjusting The Self-Propel Drive Cable
Adjusting the Self-propel Drive 1. Snap the air filter cover latch open and swing it to the side (Fig. 27). Cable Self-propel Models only If the top speed begins to decrease on the lawn mower, adjust the self-propel drive cable. Ó... -
Page 17: Maintaining The Spark Plug
Maintaining the Spark Plug away the metal that connects the flat and curved parts of the blade, check the blade before using the lawn mower. If you notice a slot or wear (Figs. 31B and 31C), replace the A spark plug that is dirty, pitted, carbon-covered, or has blade;... -
Page 18: Cleaning The Exhaust Port
Removing the Blade 1. Remove the blade nut and the mulching fan (Fig. 32). 2. Remove the blade from the blade driver (Fig. 32). 3. Examine the mulch fan for worn or bent blades. 1007 Replace it if necessary. Figure 35 4. -
Page 19: Changing The Fuse
7. Remove the transfer pipe (Fig. 37). Warning 8. Rotate the crankshaft slowly until the piston covers the exhaust port (Fig. 37). Tipping the lawn mower may cause the fuel to 9. Using a wooden dowel, loosen the carbon deposits by leak from the carburetor or the fuel tank. -
Page 20: Disposing Of The Battery
7. Unplug the battery charger. Gasoline can vaporize if you store it over long Important Use only the Lawn-Boy charger; other periods of time and explode if it comes into chargers could damage the battery. Always use the contact with an open flame. -
Page 21: Folding The Handle
3. Slowly rotate the engine several times, using the 3. Remove the spark plug (Fig. 40) and spin the engine starter rope, to distribute the oil. rapidly using the starter to blow out the excess oil from the cylinder. Clean the spark plug or replace it if 4. - Page 22 8. Hold the hanger clamp on the inside of the handle sections. Insert the handle bolt from the inside of the handle sections through the holes in the hanger clamp. 9. Position the bag hanger leg into the hanger clamp groove and secure it with a knob.
-
Page 23: Installing The Mulch Plate
Note: Under normal use, the bag will wear and deteriorate. Check the grass bag often and replace it when necessary with a genuine Lawn-Boy replacement bag. A weakened or inferior bag may let objects pass through, 1123 causing an injury. -
Page 24: Troubleshooting
Troubleshooting Lawn-Boy designed and built your lawn mower for trouble-free operation. Check the following components and items carefully, and refer to Maintenance on page 13 for more information. If a problem continues, contact an Authorized Service Dealer. - Page 25 Problem Possible Causes Corrective Action Engine runs rough 1. The wire is not connected to 1. Connect the wire to the spark the spark plug. plug. 2. The spark plug is pitted, fouled, 2. Check the spark plug and or the gap is incorrect. adjust the gap if necessary.
-
Page 26: Federal Emission Control Warranty Statement
If you have any questions regarding your warranty rights and – EGR valve body and piping system connecting to the responsibilities, or if you need a referral to a Lawn-Boy Service intake side of the engine Dealer, please feel free to contact us at: –... - Page 27 Service Dealer or Master Service Dealer. The Yellow Pages of the use of the Lawn-Boy Products covered by this warranty, except your telephone directory is a good reference source. The dealer for damages to other engine components caused by the failure of a will either arrange service at his/her dealership or recommend warranted part still under warranty.
-
Page 28: The Lawn-Boy No-Worry Warranty
Distributor (Dealer) to obtain guarantee policies for your country, province, or state. If for any reason you are dissatisfied with your Distributor’s service or have difficulty obtaining guarantee information, contact the Lawn-Boy importer. If all other remedies fail, you may contact us at Lawn-Boy Warranty Company.
Need help?
Do you have a question about the GoldPro Series and is the answer not in the manual?
Questions and answers