Table of Contents
Advertisement
Quick Links
Table of Contents
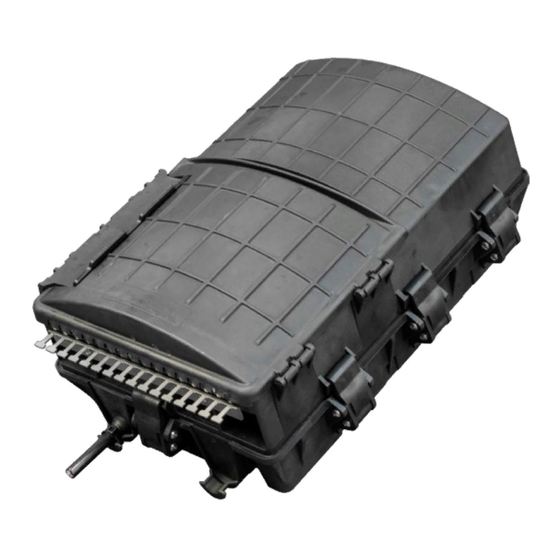
1.2 Optima 16
Dimensional Drawing
North America
Tel: +1 440 366 6966
Contact Us |
Fax: +1 440 366 6802
Email:
engsupport@gomultilink.com
Page 1
Optima™ 16 Enclosure
Europe, Middle East & Africa
Tel: +1 440 366 6966
Fax: +1 440 366 6802
Email:
engsupport@gomultilink.com
Visit
gomultilink.com
Table of Contents Continues on Page 2
Latin & South America
Tel: +1 505 885 02379
Mobile: +1 505 885 02379
Email:
bcastro@gomultilink.com
for new product releases!
3
3
4
5
6
6
Advertisement
Table of Contents

Related Manuals for Multilink Optima 16


Summary of Contents for Multilink Optima 16
-
Page 1: Table Of Contents
1. Introduction 1.1 Product Description 1.2 Optima 16 Dimensional Drawing 2. Preparations 2.1 Installation Outline 2.2 Optima 16 Checklist 2.3 Recommended Tools and Equipment 3. General Warnings 3.1 Laser Light Warning 3.2 Laser Light Magnification Warning 3.3 Loose Fiber Warning 3.4 Sharp Edge Warning... - Page 2 4.19 Splice Tray Routing 4.20 Attach Splice Tray 4.21 Attach Splice Tray Cover 4.22 Pigtail & Branch Buffer Tube Routing Optima 16 Hinged Shell Installation 4.23 Fiber Management & Tie-Wraps 4.24 Pigtail Fiber Routing 4.25 Fiber Management 4.26 Bulkhead Adapter(s) & Connector(s) 4.27 Sealing the Gap...
-
Page 3: General
1. Introduction 1.1 Product Description Multilink’s Optima 16 closure allows a FTTX provider to access the fiber optic trunk line (that is deployed from the central office, headend, or remote hub) and branch connections off to individual subscribers (such as home, apartment, or individual business). Connections can also be branched off to low count drop cables to feed another terminal point. -
Page 4: Preparations
• Removal of cable jacketing and excess CSM (Central Strength Member) • Ring cut, fiber separation, CSM tie down, and routing fiber • Securing fiber in place to the Optima 16 closure • Configuring grommets for cable entry and exit drop •... -
Page 5: General Warnings
3. General Warnings 3.1 Laser Light Warning Never look directly into the end of a fiber that may be carrying laser light. Laser light can be invisible and may be harmful to your eyes. Viewing it directly may not cause pain; therefore it will not cause blinking or the iris of the eye to close involuntarily as it does when viewing bright light. -
Page 6: Installation Entry Cable Preparations
THIS DOCUMENT AND THE INFORMATION ultilink DIMENSIONS ARE IN INCHES CONTAINED THEREIN ARE CONFIDENTIAL CENTRAL STRENGTH and buffer tubes exposed across the length of the & PROPRIETARY TO MULTILINK AND MAY NOT BUFFER TUBES TOLERANCES ARE: BE COPIED OR DISCLOSED TO OTHERS VIEW FRACTIONS... -
Page 7: Armored Cable
Repeat on opposite side of ring cut. 4.7 Drill Ground Lug Hole Drill a 0.25” hole into the Optima 16 base indicated by the cutout on the bottom as shown. Visit gomultilink.com... -
Page 8: Insert Ground Lug
CSM under the clamp. 4.11 Fiber Management Clips Insert the included fiber management clips into the slots of the Optima 16 base in the orientation shown. Ensure each clip is fully pushed in to prevent it from falling out in later steps. Insert... -
Page 9: Proper Grommet Seal
4.15 Fiber Routing & Attach Tie-Wraps Route the ring cut exposed buffer tubes around the inside perimeter of the Optima 16 base. Place the slack under the fiber management clips to hold in place temporary. Then using the supplied tie-wraps insert into each fiber... -
Page 10: Buffer Tube Branching
4.19 Splice Tray Routing Place the completed splice tray within the Optima 16 base. Route the branched off buffer tube(s) accordingly along with how the pigtail slack will be routed. Visit gomultilink.com... -
Page 11: Attach Splice Tray
4.23 Fiber Management & Tie-Wraps Insert the included fiber management clips into the slots of the Optima 16 hinged shell in the orientation shown. Ensure each clip is fully pushed in to prevent it from falling out in later steps. Then... -
Page 12: Pigtail Fiber Routing
Remove the adapter cover and plug-in the pigtail connectors following the universal fiber color chart. DO NOT remove all the adapter covers at once. (Multilink is not responsible for any fiber loss that may occur if this is performed improperly.) 4.27 Sealing the Gap... -
Page 13: Closing The Fiber Closure
4.28 Closing the Fiber Closure Once everything has been completed on the splice side of the Optima 16 then you are ready close the closure firmly. Ensure the fiber pigtail is held in place so that the buffer tubes do not get pinched in closing. -
Page 14: Optima 16 Distribution Installation
4.33 Latch Cover to Optima Shell Once the sealant has been applied to the gel then close the Optima 16 cover using the plastic latch located on the side of the closure. When closing the door ensure that the Optidrops... -
Page 15: Accessory List
5. Accessory List Multilink’s Optima 16 supports various options of grommets accommodating vast cable diameters, additional accessories some of which are included with the Optima-S, and patch & splice options including installable kits and pigtails. Mounting Kits Products Description Stock ID... - Page 16 Accessory List (Cont.) Splice Tray Products Description Stock ID 1124-SSTP 072-059-20 Ground Lug Products Description Stock ID Grounding Lug 072-121-10 Connectivity Products Description Stock ID SC/APC Duplex Adapter 10-5378 LC Quad UPC Adapter 065-239-10 Drop Cable Products Description Stock ID OptiDrop™...
- Page 17 Tool Kit w/ Pocket Cleaver 072-656-20 Tool Kit w/ Precision Cleaver 072-656-21 OptiDrop™ Field Installable 072-560-10 Multilink Inc. 580 Ternes Ln Elyria, OH 44035 Tel: (440) 366-6966 Fax: (440) 366-6802 youtube.com/GoMultilink facebook.com/GoMultilink1 twitter.com/GoMultilink © Multilink Inc. 2019 All Rights Reserved • www.gomultilink.com Page 17...
Need help?
Do you have a question about the Optima 16 and is the answer not in the manual?
Questions and answers