Table of Contents
Advertisement
Quick Links
M-16-13
REV. D
MARCH 2020
To fi nd maintenance & parts information for your BMR-CS Liftgate,
go to www.maxonlift.com. Click the PRODUCTS, COLUMNLIFT &
BMR-CS buttons. Open the Maintenance Manual in the PRODUCT
DOCUMENTATION window. For parts, click on the PARTS PORTAL,
COLUMNLIFT & BMR-CS buttons.
Installation Manual Contains:
• Warnings & Safety Instructions
• Requirements - Body Strength & Installed Liftgate
• Liftgate Installation Components
• Liftgate Component Installation Instructions
• Hydraulic Fluid Filling Instructions
• Decals
• Hydraulic & Electrical System Diagrams
• Pre-delivery Inspection Form
© MAXON Lift Corp. 2020
Advertisement
Table of Contents

Related Manuals for Maxon BMR-CS

Summary of Contents for Maxon BMR-CS
- Page 1 • Decals • Hydraulic & Electrical System Diagrams • Pre-delivery Inspection Form To fi nd maintenance & parts information for your BMR-CS Liftgate, go to www.maxonlift.com. Click the PRODUCTS, COLUMNLIFT & BMR-CS buttons. Open the Maintenance Manual in the PRODUCT DOCUMENTATION window.
-
Page 2: Table Of Contents
TABLE OF CONTENTS SUMMARY OF CHANGES: M-16-13, REVISION D ............. 5 WARNINGS ........................... 6 SAFETY INSTRUCTIONS ....................7 VEHICLE REQUIREMENTS ....................8 BODY STRENGTH ........................ 8 INSTALLED LIFTGATE ....................... 12 LIFTGATE INSTALLATION COMPONENTS ..............13 COMPONENTS ........................14 STEP 1 - PREPARE VEHICLE IF REQUIRED ..............19 STEP 2 - CHOOSE METHOD OF INSTALLATION ............. - Page 3 TABLE OF CONTENTS - Continued STEP 10 - RUN CHARGE LINES ..................59 RECOMMENDED POWER CONFIGURATIONS ..........59 RUNNING CABLE FROM VEHICLE BATTERY ..........61 STEP 11 - CONNECT CHARGE LINES & BATTERIES ............62 STEP 12 - PRESSURIZE HYDRAULIC SYSTEM .............. 66 STEP 13 - OPTIMIZE HYDRAULIC FLUID LEVEL .............
- Page 4 GRAVITY DOWN SINGLE & DUAL PUMP ELECTRICAL SCHEMATIC ......98 INTERCONNECTING ELECTRICAL SCHEMATIC - POWER DOWN ....... 99 POWER DOWN SINGLE & DUAL PUMP ELECTRICAL SCHEMATIC ......100 BMR-CS ELECTRICAL & HYDRAULIC VALVES TORQUE VALUES ......101 PRE-DELIVERY INSPECTION FORM ................102...
-
Page 5: Summary Of Changes: M-16-13, Revision D
SUMMARY OF CHANGES: M-16-13, REVISION D PAGE DESCRIPTION OF CHANGE COVER Updated REV. and date of release. Added California Proposition 65 WARNING. Updated mounting dimensions for pre-installation of mounting plates for 96” and 102” applications. Updated FIG. 26-1 extension plate and mounting plate weld dimensions. Updated fi... -
Page 6: Warnings
Comply with the following WARNINGS and SAFETY INSTRUCTIONS while installing Liftgates. See Operation Manual for operating safety requirements. WARNING Installing and maintaining a liftgate can expose you to chemicals, including lead, which are known to the State of California to cause cancer and birth defects or other reproductive harm. To mini- mize exposure, install and maintain liftgate in a well-ventilated area and wear proper Personal protective equipment (PPE). -
Page 7: Safety Instructions
• Comply with all WARNING and instruction decals attached to the Liftgate. • Keep decals clean and legible. If decals are illegible or missing, replace them. Free replacement decals are available from Maxon Customer Service. • Consider the safety and location of bystanders and location of nearby objects when operating the Liftgate. -
Page 8: Vehicle Requirements
5” (Loaded). Do not install this Liftgate on ve- hicle bodies equipped with swing open doors. The BMR-CS is a body-mounted Liftgate X= Tension on each sidewall that puts forces on the side walls of truck Y= Compression on each sidewall and trailer bodies (FIG. - Page 9 VEHICLE REQUIREMENTS - Continued BODY STRENGTH - Continued (X)(Y) MODEL CAPACITY P/F SIZE LBS. LBS. BMR-CS35 3500 LBS. 36” & 42” 1043 3786 (GALVANIZED PLATFORM) BMR-CS44 4400 LBS. 36” & 42” 1262 4461 (GLAVANIZED PLATFORM) TABLE 9-1 (X)(Y) MODEL CAPACITY P/F SIZE LBS.
- Page 10 VEHICLE REQUIREMENTS - Continued CLEARANCE DIMENSIONS NOTE: Maximum bed height is 56” (unloaded). Minimum bed height (loaded) varies with type and size of platform. Refer to FIGS. 10-1 & 10-2. 13-1/4” (INCLUDES 3/4” BUMPER) 13-3/4” (INCLUDES 3/4” BUMPER) 56” (MAX. BED HT.) 56”...
- Page 11 VEHICLE REQUIREMENTS - Continued CLEARANCE DIMENSIONS - Continued 87-1/8” (96” WIDE VEHICLE) 92-1/8” (102” WIDE VEHICLE) 95-5/8” 18-1/8” 87-1/8” (96” WIDE VEHICLE) 92-1/8” (102” WIDE VEHICLE) 97-1/8” (96” WIDE VEHICLE) 102-1/8” (102” WIDE VEHICLE) CLEARANCE DIMENSIONS FIG. 11-1...
-
Page 12: Installed Liftgate
BODY STRENGTH requirements shown on the previous pages. With the vehicle parked on level ground, the columns of the BMR-CS must be perpendicu- lar to the ground (vertical) for the Liftgate to operate correctly (FIGS. 12-1 and 12-2). -
Page 13: Liftgate Installation Components
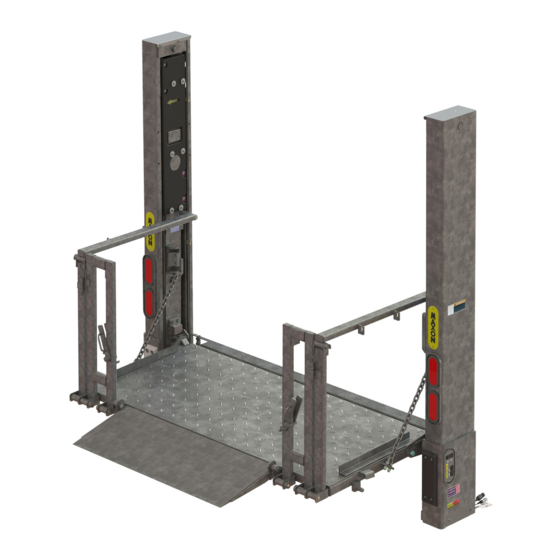
LIFTGATE INSTALLATION COMPONENTS Each BMR-CS Liftgate includes items shown in FIG. 13-1. FIG. 13-1 DESCRIPTION BMR-CS Liftgate. Hardware parts bag, mounting bracket parts bag, hydraulic lines & fi ttings, wiring harness, power cable, molded switch control box. Pump box assembly. -
Page 14: Components
Make sure you have components and parts before you start installing Liftgate. NOTE: Compare parts in the part box and each kit box with packing list enclosed in each box. If parts and components are missing or incorrect, call: Maxon Customer Service Call (800) 227-4116 or Send e-mail to cservice@maxonlift.com BOLT-ON... - Page 15 COMPONENTS - Continued OPTIONS BMR-CS HYDRAULIC FRAME, HEADER SINGLE SECOND HEADER KIT MODEL PUMP OR PUMP PUMP (ADJUST- UNIVIS HVI- BATTERY (RECESSED ASSY ABLE) BOXES DOME LAMP) 288180-11G BMR-CS35 SINGLE FRAME 296190-12 (GALVANIZED) BMR-CS44 289188-11 (GALVANIZED, 287980-11G 96” WIDE VE-...
- Page 16 COMPONENTS - Continued OPTIONS BMR-CS CONSPICUITY PUMP CAB CUTOFF MODEL POWER & STREET SIDE (REFLECTIVE) PRESSURE SWITCH GROUND CABLES CONTROL KIT TAPE GAUGE (TRUCK ONLY) BMR-CS35 GD 295263-01 BMR-CS44 GD 297080-01 BASIC INSTALLATION 295261-01 295895-01 297077-01 295263-11 EXTENDED BMR-CS35 PD...
- Page 17 COMPONENTS - Continued BATTERY BOX & CHARGING OPTIONS TRAILER TRACTOR BMR-CS 2/0 AWG CABLE CHARGE LINE CHARGE LINE MODEL TRUCK FOR USE WITHOUT FOR USE WITH OR CHARGE LINE TRAIL WITHOUT TRAIL CHARGER CHARGER 280275-01 SINGLE POLE 280275-02 280275-03 DUAL POLE...
- Page 18 COMPONENTS - Continued MISCELLANEOUS OPTIONS BMR-CS 200 AMP CIRCUIT 150 AMP CIRCUIT BATTERY BOX BATTERY BOX MODEL BREAKER BREAKER LOCK KIT LOCK KIT (SINGLE FRAME) (DUAL FRAME) 295245-02G 295245-01G 296504-200 296504-150 (BATTERY BOX IN- (BATTERY BOX IN- BMR-CS35 (WITHOUT BATTERY...
-
Page 19: Step 1 - Prepare Vehicle If Required
STEP 1 - PREPARE VEHICLE IF REQUIRED NOTE: Perform the following step for fl atbed vehicle body only. If vehicle body is not a fl atbed, skip this step. NOTE: LH and RH supports must be perpendicular to level ground. See VEHICLE REQUIREMENTS, INSTALLED LIFTGATE. - Page 20 STEP 1 - PREPARE VEHICLE IF REQUIRED - Continued 2. Weld Liftgate supports, as shown in FIGS. 20-1A, -1B, -1C & -1D. TYP. AT LH & RH 1/8” SUPPORTS VEHICLE BODY RIGHT HAND SIDE RAIL (RH) SUPPORT WELDING THE SUPPORTS FIG.
-
Page 21: Step 2 - Choose Method Of Installation
STEP 2 - CHOOSE METHOD OF INSTALLATION NOTE: MAXON recommends pre-installing the extension plate and mounting plates on the vehicle body before installing the Liftgate. NOTE: In METHOD 1, the extension plate and mounting plates come separate as part of the bolt-on installation kit. -
Page 22: Step 3 - Position Liftgate
STEP 3 - POSITION LIFTGATE METHOD 1 - PRE-INSTALL MOUNTING PLATES AND EXTENSION PLATE ON VEHICLE WARNING Recommended practices for welding on steel parts are contained in the current AWS (American Welding Society) D1.1 Structural Welding Code - Steel. Damage to Liftgate and/or vehicle, and personal injury can result from welds that are done incorrectly. -
Page 23: Method 1 - Pre-Install Mounting Plates And Extension Plate
STEP 3 - POSITION LIFTGATE - Continued METHOD 1 - PRE-INSTALL MOUNTING PLATES AND EXTENSION PLATE ON VEHICLE - Continued NOTE: Distance between extension plate and RH mounting plate is measured from the inside edge of mounting plate as shown in illustration. 2. - Page 24 STEP 3 - POSITION LIFTGATE - Continued METHOD 1 - PRE-INSTALL MOUNTING PLATES AND EXTENSION PLATE ON VEHICLE - Continued NOTE: Installer can use either set of dimensions shown in FIG. 24-1 to install RH mounting plate. The fi rst set of dimensions is taken from the center of each hanger, and the second set of dimensions is taken from the inner edge of the mounting plates.
- Page 25 STEP 3 - POSITION LIFTGATE - Continued METHOD 1 - PRE-INSTALL MOUNTING PLATES AND EXTENSION PLATE ON VEHICLE - Continued NOTE: Before welding mounting plates to vertical posts on vehicle body, check to make sure LH and RH mounting plates are positioned within dimensions shown in FIGS.
- Page 26 STEP 3 - POSITION LIFTGATE - Continued METHOD 1 - PRE-INSTALL MOUNTING PLATES AND EXTENSION PLATE ON VEHICLE - Continued NOTE: Before welding mounting plates to vehicle frame, check squareness to make sure mounting plates are perpendicular to extension plate. 5.
-
Page 27: Method 2 - Weld Bolt-On Liftgate To Body
STEP 3 - POSITION LIFTGATE - Continued METHOD 2 - WELD BOLT-ON LIFTGATE TO BODY WARNING Recommended practices for welding on steel parts are contained in the current AWS (American Welding Society) D1.1 Structural Welding Code - Steel. Damage to Liftgate and/or vehicle, and personal injury, can result from welds that are done incorrectly. - Page 28 STEP 3 - POSITION LIFTGATE - Continued METHOD 2 - WELD BOLT-ON LIFTGATE TO BODY - Continued NOTE: Before welding Liftgate to vehicle frame, check squareness to make sure columns are perpendicular to extension plate. 2. Check to make sure RH and LH columns are square and perpendicular to the extension plate by measuring dimensions at the top and bottom of the columns, and dimensions A and...
- Page 29 STEP 3 - POSITION LIFTGATE - Continued METHOD 2 - WELD BOLT-ON LIFTGATE TO BODY - Continued TYPICAL 3. Use overhead hoist or fork CLAMPS lift to center Liftgate against the vehicle (FIG. 29-1). Let angle stock, welded to extension plate, rest on the top surface of the vehicle bed.
-
Page 30: Method 3 - Weld Liftgate To Body
STEP 3 - POSITION LIFTGATE - Continued METHOD 3 - WELD LIFTGATE TO BODY WARNING Recommended practices for welding on steel parts are contained in the current AWS (American Welding Society) D1.1 Structural Welding Code - Steel. Damage to Liftgate and/or vehicle, and personal injury, can result from welds that are done incorrectly. - Page 31 STEP 3 - POSITION LIFTGATE - Continued METHOD 3 - WELD LIFTGATE TO BODY - Continued NOTE: Before welding Liftgate to vehicle frame, check squareness to make sure columns are perpendicular to extension plate. 2. Check to make sure RH and LH columns are square and perpendicular to the extension plate by measuring dimensions at the top and bottom of the columns, and dimensions A and...
- Page 32 STEP 3 - POSITION LIFTGATE - Continued METHOD 3 - WELD LIFTGATE TO BODY - Continued 3. Use overhead hoist or TYPICAL forklift to center Lift- CLAMPS gate against the vehicle (FIG. 32-1). Let angle stock, welded to extension plate, rest on the top surface of the vehicle bed.
-
Page 33: Step 4 - Bolt Liftgate To Vehicle
STEP 4 - BOLT LIFTGATE TO VEHICLE METHOD 1 - PRE-INSTALLED MOUNTING PLATES & EXTENSION PLATE ON VEHICLE NOTE: Save all hardware to re- attach column cover and LH COLUMN COVER extension plate. LH COLUMN 1. Remove screws, lock washers, FLAT WASHER fl... - Page 34 STEP 4 - BOLT LIFTGATE TO VEHICLE - Continued METHOD 1 - PRE-INSTALLED MOUNTING PLATES & EXTENSION PLATE ON VEHICLE - Continued NOTE: If the rear of the vehicle & Liftgate mounting plates are galvanized, make sure: • Bolts are removed from top hanger •...
- Page 35 STEP 4 - BOLT LIFTGATE TO VEHICLE - Continued METHOD 1 - PRE-INSTALL MOUNTING PLATES AND EXTENSION PLATE ON VEHICLE - Continued HANGER WARNING HANGER (4 PLACES) (4 PLACES) Tighten top hanger bolts on the columns while the Liftgate is sup- MOUNTING ported by forklift.
- Page 36 STEP 4 - BOLT LIFTGATE TO VEHICLE - Continued METHOD 1 - PRE-INSTALL MOUNTING PLATES AND EXTENSION PLATE ON VEHICLE - Continued TOP HANGER 5. Slightly loosen support channel cap screws on the LH column (FIGS. 36-1 and 36-1A) to allow column slots to sit on top hangers and mounting pins (FIG.
- Page 37 STEP 4 - BOLT LIFTGATE TO VEHICLE - Continued METHOD 1 - PRE-INSTALL MOUNTING PLATES AND EXTENSION PLATE ON VEHICLE - Continued 6. Get (2) hanger bolts from parts bag. LH COLUMN Then look down into the top of LH MOUNTING column (FIGS.
-
Page 38: Step 5 - Remove Lower Support Fixtures
STEP 5 - REMOVE LOWER SUPPORT FIXTURES NOTE: Use short wrenches for unbolting lower support fi xtures. 1. Unbolt and remove lower sup- port fi xture from LH column (FIG. 38-1). Repeat for lower support fi xture on RH column (FIG. -
Page 39: Step 6 - Position Pump Box Frame
STEP 6 - POSITION PUMP BOX FRAME NOTE: Make sure pump box is closer to Liftgate than battery box (if installed) and pump box cover opens toward curb-side of vehicle. Also, make sure hydraulic hoses are installed without straining hoses. Distance from pump box to Liftgate is limited by lengths of hydraulic hoses and wiring harness supplied with Liftgate. - Page 40 STEP 6 - POSITION PUMP BOX FRAME - Continued 20’ 12” (Viewed from under truck.) PUMP BOX TYPICAL 20 FT. INSTALLATION FIG. 40-1 20’ 12” (Viewed from under trailer.) PUMP BOX TYPICAL 20 FT. INSTALLATION FIG. 40-2 28’ 12” (Viewed from under trailer.) PUMP BOX TYPICAL 28 FT.
-
Page 41: Step 7 - Attach Pump & Battery Box Frame To Vehicle
STEP 7 - ATTACH PUMP & BATTERY BOX FRAME TO VEHICLE NOTE: There are 2 methods to mount pump and battery box frame to vehicle frame. • Bolt pump and battery box frame to hanger brackets welded to vehicle frame. •... - Page 42 STEP 7 - ATTACH PUMP & BATTERY BOX FRAME TO VEHICLE - Continued LOCK NUT NOTE: Do instructions 3 through 5 if hanger WASHER brackets are being used to mount pump and battery box frame on vehicle. CROSS MEMBER 2. Select holes on top of battery box frame to align mounting brackets fl...
- Page 43 STEP 7 - ATTACH PUMP & BATTERY BOX FRAME TO VEHICLE - Continued NOTE: If welding mounting brackets to cross members, skip instruction 3. CROSS 3. Using mounting brackets as a tem- MEMBER plate mark and drill holes through cross members (FIG. 43-1). Bolt mounting brackets to cross mem- bers as shown in FIGS.
- Page 44 STEP 7 - ATTACH PUMP & BATTERY BOX FRAME TO VEHICLE - Continued WARNING Recommended practices for welding on steel parts are contained in the current AWS (American Welding Society) D1.1 Structural Welding Code - Steel. Damage to Liftgate and/or vehicle, and personal injury can result from welds that are done incorrectly.
- Page 45 STEP 7 - ATTACH PUMP & BATTERY BOX FRAME TO VEHICLE - Continued WARNING Explosive hydrogen gas from charging batteries can accumulate in battery box if not vented from the box. To prevent hydrogen gas from accumulating, ensure the 3 ventilation holes in battery box are not plugged or covered. NOTE: Any methods not shown in this section, for welding mounting brackets to cross members, must be approved by body or trailer manufacturer.
- Page 46 STEP 7 - ATTACH PUMP & BATTERY BOX FRAME TO VEHICLE - Continued VENTILATION HOLES BATTERY BOX ASSEMBLY (REAR VIEW SHOWN) FIG. 46-1...
-
Page 47: Step 8 - Run Hydraulic Lines & Electric Cables
NOTE: The fold and unfold hydraulic hoses are identical hoses. To avoid confu- sion when running hoses through the channel, MAXON recommends tap- ing both ends of one of the hoses for easy identifi cation. -
Page 48: Run Gravity Down Hydraulic Lines
STEP 8 - RUN HYDRAULIC LINES & ELECTRIC CABLES - Continued RUN GRAVITY DOWN HYDRAULIC LINES NOTE: See TABLES 49-1 & 49-2 for CAUTION information on the numbered Before connecting hoses, ensure face hoses in this illustration. seal o-rings are in place. VEHICLE CHANNEL (BOTTOM VIEW) - Page 49 STEP 8 - RUN HYDRAULIC LINES & ELECTRIC CABLES - Continued RUN GRAVITY DOWN HYDRAULIC LINES NOTE: Each pump extension kit contains 2 hoses of the same length (item 3). One hose is for the Platform Fold Line and the second hose is for the Platform Unfold Line.
-
Page 50: Torque Values For Hydraulic Connectors
STEP 8 - RUN HYDRAULIC LINES & ELECTRIC CABLES - Continued TORQUE VALUES FOR HYDRAULIC CONNECTORS SAE O-RING CONNECTORS SIZE TORQUE (LB-FT) TORQUE (NEWTON-METER) 13-15 17.6-20.3 22-24 29.8-32.5 40-43 54.2-58.3 TABLE 50-1 SAE 37 DEGREE FLARE CONNECTORS SIZE TORQUE (LB-FT) TORQUE (NEWTON-METER) 11-12 14.9-16.3... -
Page 51: Run Power Down Hydraulic Lines
STEP 8 - RUN HYDRAULIC LINES & ELECTRIC CABLES - Continued RUN POWER DOWN HYDRAULIC LINES CAUTION NOTE: See TABLES 52-1 & 52-2 for CAUTION information on the numbered Before connecting hoses, ensure face hoses in this illustration. seal o-rings are in place. VEHICLE CHANNEL (BOTTOM VIEW) - Page 52 STEP 8 - RUN HYDRAULIC LINES & ELECTRIC CABLES - Continued RUN HYDRAULIC LINES NOTE: Each pump extension kit contains 2 hoses of the same length (item 1). One hose is for the Platform Fold Line and the second hose is for the Platform Unfold Line.
-
Page 53: Run Electric Cables
STEP 8 - RUN HYDRAULIC LINES & ELECTRIC CABLES - Continued RUN ELECTRIC CABLES NOTE: Liftgates with auxiliary or street-side controls have a tee assembly with three green connectors. Use the following procedure on all green connectors. 1. Locate GREEN connector at the base of RH column, that connects runner switch to interconnect harness (FIG. - Page 54 STEP 8 - RUN HYDRAULIC LINES & ELECTRIC CABLES - Continued RUN ELECTRIC CABLES 2. Check that O-ring is in position and there is no dirt or debris on the O-ring or in the connector with sockets (FIG. 54-1). GREEN CONNECTOR O-RING CHECKING CONNECTOR O-RING...
- Page 55 STEP 8 - RUN HYDRAULIC LINES & ELECTRIC CABLES - Continued RUN ELECTRIC CABLES 5. Align the keyed connectors and push together. Tighten blue rings until fully seated with no gap between the connectors. Grip both ends of connector fi rmly by hand and tighten (FIG.
- Page 56 STEP 8 - RUN HYDRAULIC LINES & ELECTRIC CABLES - Continued RUN ELECTRIC CABLES CAUTION Before connecting, ensure connectors are clean inside. Ensure there is a thin coating of dielectric grease on face of receptacle, and there is no dielectric grease on connector contacts.
- Page 57 STEP 8 - RUN HYDRAULIC LINES & ELECTRIC CABLES - Continued RUN ELECTRIC CABLES 10. Connect taillight harness to LH taillight connectors at bottom of LH column (FIG. 57-1). 11. Repeat for RH column. LH COLUMN LH TAILLIGHT CONNECTORS (TO VEHICLE WIRING HARNESS) 3 = GREEN (TURN SIGNAL) 2 = BROWN (TAILLIGHT) 1 = PLUGGED (GROUND)
-
Page 58: Step 9 - Ground Pump To Vehicle Frame
NOTE: • Before connecting ground cable to frame, clean connection point on the frame down to bare metal. • After connecting ground cable, MAXON recommends sealing the ground connection with galvanized coating for galvanized surfaces, or black paint for painted surfaces. -
Page 59: Step 10 - Run Charge Lines
STEP 10 - RUN CHARGE LINES RECOMMENDED POWER CONFIGURATIONS CAUTION Never route an energized wire. Make sure battery is disconnected. Always route electrical wires clear of moving parts, brake lines, sharp edges and exhaust systems. Avoid making sharp bends in wiring. Attach securely. If drilling is nec- essary, fi... - Page 60 STEP 10 - RUN CHARGE LINES - Continued 2. Liftgate, pump box, and optional battery box are typically installed on trucks as shown in FIG. 60-1 and FIG. 60-2. See the following page for battery and cable connections. 150 AMP CIRCUIT BREAKER TRUCK BATTERIES, 200 AMP...
-
Page 61: Running Cable From Vehicle Battery
STEP 10 - RUN CHARGE LINES - Continued RUNNING CABLE FROM VEHICLE BATTERY NOTE: Make sure cable is long enough to reach master disconnect switch on Lift- gate pump box, or circuit breaker in optional battery box (if equipped), without putting strain on the cable. -
Page 62: Step 11 - Connect Charge Lines & Batteries
STEP 11 - CONNECT CHARGE LINES & BATTERIES WARNING Prevent injury and equipment damage. Before connecting charge lines or power cables, ensure negative (-) battery cable is disconnected at vehicle bat- tery or battery box (if equipped). Ensure master disconnect switch is turned OFF on the pump box. - Page 63 STEP 11 - CONNECT CHARGE LINES & BATTERIES - Continued NOTE: Skip instruction 4 below if vehicle battery is connected to master discon- nect switch on the pump box. 4. If optional battery box is installed for the Liftgate, the battery box is mounted in one of 2 ways. RED (+) CABLE •...
- Page 64 STEP 11 - CONNECT BATTERIES TO LIFTGATE - Cont’d NOTE: The following instructions are only required if Liftgate is equipped with optional battery box, and the pump box and battery box are mounted in separate single frames. In the dual frame shown below, the power cable is connected between pump box and battery box at the factory.
- Page 65 STEP 11 - CONNECT BATTERIES TO LIFTGATE - Cont’d 7. Remove nut and washer NEGATIVE (-) from unused terminal on TERMINAL 200 amp circuit breaker (FIG. 65-1). Then, connect BLACK (-) BATTERY CABLE red (+) cable to the termi- nal. Reinstall and tighten nut.
-
Page 66: Step 12 - Pressurize Hydraulic System
STEP 12 - PRESSURIZE HYDRAULIC SYSTEM WARNING To prevent injury and equipment damage, pressurize hydraulic system before removing lower support fi xtures and operating Liftgate. NOTE: Before operating liftgate, read and understand the operating instructions in the Operation Manual. 1. To pressurize lifting cylinders, set control box toggle switch to UP for 10-15 seconds as shown in FIG. -
Page 67: Step 13 - Optimize Hydraulic Fluid Level
STEP 13 - OPTIMIZE HYDRAULIC FLUID LEVEL NOTE: If equipped, select power down on demand for optimizing hydraulic fl uid level (FIG. 67-1). 1. Lower (DOWN) the platform 9” to 12” using POWER DOWN toggle switch settings shown in FIG. 67-1. ON DEMAND DOWN LOWERING PLATFORM... - Page 68 STEP 13 - OPTIMIZE HYDRAULIC FLUID LEVEL - Continued 3. Close (FOLD) the platform by setting toggle switches as shown in FIG. 68-1. Then, open (UNFOLD) the platform by setting toggle switches as shown in FIG. 68-2. FOLD FOLDING PLATFORM FIG.
- Page 69 STEP 13 - OPTIMIZE HYDRAULIC FLUID LEVEL - Continued 4. Lower (DOWN) the platform to 10” above ground level using the toggle switch settings shown in FIG. 69-1. DOWN GROUND 10” LOWERING PLATFORM FIG. 69-1 5. Raise (UP) the platform to about 6”...
- Page 70 STEP 13 - OPTIMIZE HYDRAULIC FLUID LEVEL - Continued 6. Close (FOLD) the platform by setting toggle switches as shown in FIG. 70-1. FOLD FOLDING PLATFORM FIG. 70-1 7. Raise (UP) the runners to stow platform by setting toggle switches as shown in FIG.
- Page 71 STEP 13 - OPTIMIZE HYDRAULIC FLUID LEVEL - Continued NOTE: Information for checking hy- draulic fl uid level is shown on a decal on the pump reservoir. 8. Check if hydraulic fl uid level is at the full line (FIG. 71-1). If necessary, remove fi...
-
Page 72: Step 14 - Remove Upper Support Fixtures
STEP 14 - REMOVE UPPER SUPPORT FIXTURES CAUTION Upper support fi xtures are heavy. To prevent injury to installer and damage to Liftgate, use forklift or hoist to hold support fi xtures during removal. 1. Stow the platform as shown in FIG. -
Page 73: Step 15 - Securing Columns
STEP 15 - SECURING COLUMNS METHOD 1 & METHOD 2 NOTE: Skip this step if using the METHOD 3 weld-on version of installation with no mounting plates. 1. Slightly lower and open platform for access to mounting pin. 2. Get (2) lock plates and (2) 1”-8 lock nuts from parts bag. -
Page 74: Method 1 Only
STEP 15 - SECURING COLUMNS - Continued METHOD 1 ONLY NOTE: Skip 3 and 4 if using METHOD 2 or METHOD 3 to install Liftgate on vehicle. 3. Tighten cap screw against bolt guide in LH column (FIGS. 74-1 and 74-1A). Torque cap screw to 170 lb-ft. -
Page 75: Method 1 & Method 2
STEP 15 - SECURING COLUMNS - Continued METHOD 1 & METHOD 2 NOTE: Skip this step if using the METHOD 3 weld-on version of installation with no mounting plates. NOTE: MAXON recommends using the upper bolt hole (FIG. 75-1A) to attach mounting plate. Howev-... - Page 76 STEP 15 - SECURING COLUMNS - Continued METHOD 1 & METHOD 2 NOTE: Skip this step if using the METHOD 3 weld-on installation with no mounting plates. 7. Reinstall RH top column cover, screws, lock washers and fl at COLUMN washers (FIGS.
-
Page 77: Step 16 - Finish Welding Liftgate To Vehicle
NOTE: Skip this step if using METHOD 1 installation where mounting plates and extension plate are preinstalled on vehicle. 1. Check operation of Liftgate before fi nal welding. See BMR-CS Operation Manual. WARNING To prevent accidental personal injury and equipment damage, disconnect (-) battery cable and (+) cable from battery. - Page 78 STEP 16 - FINISH WELDING LIFTGATE TO VEHICLE METHOD 2 & METHOD 3 - WELD LIFTGATE TO BODY - Continued WARNING Recommended practices for welding on steel parts are contained in the cur- rent AWS (American Welding Society) D1.1 Structural Welding Code - Steel. Damage to Liftgate and/or vehicle, and personal injury can result from welds that are done incorrectly.
- Page 79 STEP 16 - FINISH WELDING LIFTGATE TO VEHICLE METHOD 2 & METHOD 3 - WELD LIFTGATE TO BODY - Continued CAUTION To prevent damage to Liftgate components, welder ground must be connected to Liftgate extension plate. 5. Make sure platform is at ground level to provide access to the extension plate.
- Page 80 STEP 16 - FINISH WELDING LIFTGATE TO VEHICLE METHOD 2 & METHOD 3 - WELD LIFTGATE TO BODY - Continued 8. Reconnect power to the pump by reconnecting positive (+) and nega- POSITIVE (+) tive (-) cables to battery (FIG. 80-1). BATTERY CABLE POSTIVE (+) Reinstall and tighten nut when each...
-
Page 81: Step 17 - Check Clearance Of Connector Bar Side Brackets
STEP 17 - CHECK CLEARANCE OF CONNECTOR BAR SIDE BRACKETS & STOP BLOCKS 1. To check for interference between platform connector bar side bracket and stop block (FIG. 81-1A), lower columns to approximately 10” above the ground, then begin to unfold platform (FIG. - Page 82 STEP 17 - CHECK CLEARANCE OF CONNECTOR BAR SIDE BRACKETS & STOP BLOCKS - Continued NOTE: Perform this step only if folding operation is not smooth or there is interference. 3. If LH side bracket fi ts too tight against either side of stop block, operation is not smooth, or if there is interference (FIG.
-
Page 83: Step 18 - Check Clearance Of Runner Pads
STEP 18 - CHECK CLEARANCE OF RUNNER PADS NOTE: Perform the following steps with no load on the platform. 1. Raise the platform to bed height (FIG. 83-1). Then, lower the platform to the ground (FIG. 83-2). Look for the following conditions: •... - Page 84 STEP 18 - CHECK CLEARANCE OF RUNNER PADS - Continued 2. Raise the platform to bed height UPPER PAD INNER (FIG. 84-1). Check clearance of the COLUMN runner pads as follows: BOTTOM PAD • Between upper runner pad and inner LH column. •...
- Page 85 STEP 18 - CHECK CLEARANCE OF RUNNER PADS - Continued FLAT WASHER (6 PLACES) 5. Remove LH runner cover (FIG. 85-1). LOCK WASHER (2 PLACES) LH COLUMN HEX BOLT LH RUNNER (6 PLACES) COVER RH COLUMN REMOVING RUNNER COVERS FIG. 85-1 NOTE: Keep spacer pad in place between column &...
- Page 86 STEP 18 - CHECK CLEARANCE OF RUNNER PADS - Continued 7. Ensure the bottom tandem rollers are seated against inner column (FIG. 86-1). Next, slide the bottom pad down against wedge until there is no INNER COLUMN clearance between inner column and bottom pad (FIG.
- Page 87 STEP 18 - CHECK CLEARANCE OF RUNNER PADS - Continued 11. Bolt upper pad to LH runner with 2 bolts and 2 lock washers (FIG. 87-1). Torque the 2 bolts to 9-14 lb-ft. BOLT & LOCK WASHER (2 PLACES) UPPER RUNNER 12.
-
Page 88: Step 19 - Platform Chain Adjustment
STEP 19 - PLATFORM CHAIN ADJUSTMENT 1. Lower the platform to ground level. Check if tip of the platform and bot- tom of the runners touch the ground at the same time (FIG. 88-1). TIP OF PLATFORM BOTTOM OF RUNNER GROUND TIP AND RUNNER TOUCHING GROUND FIG. -
Page 89: Step 20 - Place "Align Arrows" Decal
STEP 20 - PLACE “ALIGN ARROWS” DECAL NOTE: Make sure RUNNERS are raised all the way up (closest to top of COLUMN) before doing the following steps. Peel backing from alignment tape and place it on LH column as shown in FIG. 89-1. Repeat for RH column. -
Page 90: Decals & Plates
DECALS & PLATES NOTE: Ensure there is no residue, dirt, or corrosion where decals are attached. If necessary, clean surface before attaching decals. NOTE: Decals on the Liftgate are attached at the factory. YELLOW ALIGNMENT TAPE P/N 090175-14 STOW WARNING DECAL P/N 282847-01 SERIAL PLATE DECAL “B”... - Page 91 DECALS - Continued (REFER TO TABLE 91-1) DECAL SHEET FIG. 91-1 MODEL ORDER P/N DECAL “C” BMR-CS35 289163-01 3500 LBS. [1600 KG] BMR-CS44 289163-02 4400 LBS. [2000 KG] DECAL SHEET PART NUMBERS TABLE 91-1...
-
Page 92: Touch Up Galvanized Finish
• If bare metal is exposed on galvanized portions of the Liftgate, touch up the galvanized fi nish. To maintain the protection provided by the original galvanized fi nish, MAXON recommends cold galvanize spray. -
Page 93: Hydraulic System Diagrams
HYDRAULIC SYSTEM DIAGRAMS PUMP & MOTOR SOLENOID OPERATION - POWER DOWN “H” VALVE “E” VALVE “C” VALVE “D” VALVE “M” SOLENOID FIG. 93-1 “B” VALVE “D” VALVES (TOP OF EACH COLUMN) FIG. 93-3 POWER UNIT MOTOR & SOLENOID OPERATION - POWER DOWN SOLENOID OPERATION ( MEANS ENERGIZED) LIFTGATE... -
Page 94: Pump & Motor Solenoid Operation - Gravity Down
HYDRAULIC SYSTEM DIAGRAMS PUMP & MOTOR SOLENOID OPERATION - GRAVITY DOWN “H” VALVE “E” VALVE “B” VALVE “D” VALVE “M” SOLENOID FIG. 94-1 “B” VALVE “D” VALVES (TOP OF EACH COLUMN) FIG. 94-3 POWER UNIT MOTOR & SOLENOID OPERATION - GRAVITY DOWN SOLENOID OPERATION ( MEANS ENERGIZED) -
Page 95: Gravity Down Hydraulic Schematic
HYDRAULIC SYSTEM DIAGRAMS GRAVITY DOWN HYDRAULIC SCHEMATIC FIG. 95-1... -
Page 96: Power Down Hydraulic Schematic
HYDRAULIC SYSTEM DIAGRAMS POWER DOWN HYDRAULIC SCHEMATIC FIG. 96-1... -
Page 97: Electrical System Diagrams
ELECTRICAL SYSTEM DIAGRAMS INTERCONNECTING ELECTRICAL SCHEMATIC - GRAVITY DOWN FIG. 97-1... -
Page 98: Gravity Down Single & Dual Pump Electrical Schematic
ELECTRICAL SYSTEM DIAGRAMS GRAVITY DOWN SINGLE & DUAL PUMP ELECTRICAL SCHEMATIC NOTE: Refer to BMR-CS ELECTRICAL VALUES page. FIG. 98-1... -
Page 99: Interconnecting Electrical Schematic - Power Down
ELECTRICAL SYSTEM DIAGRAMS - Continued INTERCONNECTING ELECTRICAL SCHEMATIC - POWER DOWN FIG. 99-1... -
Page 100: Power Down Single & Dual Pump Electrical Schematic
ELECTRICAL SYSTEM DIAGRAMS POWER DOWN SINGLE & DUAL PUMP ELECTRICAL SCHEMATIC NOTE: Refer to BMR-CS ELECTRICAL VALUES page. FIG. 100-1... -
Page 101: Bmr-Cs Electrical & Hydraulic Valves Torque Values
ELECTRICAL SYSTEM DIAGRAMS BMR-CS ELECTRICAL & HYDRAULIC VALVES TORQUE VALUES MTE PUMP BUCHER PUMP Solenoid Switch: Solenoid Switch: • Coil: 5.4Ω @ 70ºF. ±15% • Coil: 5.4Ω @ 70ºF. ±15% • Ampere: 2.2A @ 12V • Ampere: 2.2A @ 12V •... -
Page 102: Pre-Delivery Inspection Form
Important! This pre-delivery checklist is to aid the installer in confi rming the proper installation of this Maxon product. It is not a comprehensive list and does not replace the use of the installation manual. The installer is responsible for following all instructions in the installation manual.
Need help?
Do you have a question about the BMR-CS and is the answer not in the manual?
Questions and answers