Table of Contents
Advertisement
Quick Links
Advertisement
Table of Contents

Related Manuals for Underground Magnetics MAG 3S


Summary of Contents for Underground Magnetics MAG 3S
-
Page 2: Table Of Contents
Introduction………………………………………...…….1 Caution………………………….…………………...……2 3: FCC Compliance Statement……………………….. 4: Tips for Reading this Manual……………………...….3 Preface………………………………………………...….4 6: System Highlights…………………………………...….6 Receiver……………………………….………………….7 7.1: Specifications……………………………..…...7 7.2: Receiver Operation………………………..….…7 7.3: Icons………………………………………………8 7.3.1: Main Page Icons……………..…………8 7.3.2: Secondary Page Icons……………..…10 7.3.3: Calibration and Depth Forecast Page Icons………….11 7.3.4: Setup Page Icons……………………..11 7.4: Calibration……………………………………..12... - Page 3 Display…………………………………….………..……27 8.1: Specifications……………………………...……27 8.2: Display Operations………………………..……27 8.3: Icons………………………………………..……28 8.3.1: Main Page Icons………………………28 8.3.2: Secondary Page Icons……..…………29 8.3.3: Setup Page Icons…...………………...29 8.3.4: Down Hole Echo Mode Change……. 8.3.5: Radio Channel Selection…….…….…30 8.3.6: Pairing…………………………….… …31 8.3.7: Pitch Unit Selection……………………32 8.3.8: Distance Unit Selection……………….33 8.3.9: Visibility Control………………………..34...
-
Page 4: Manual
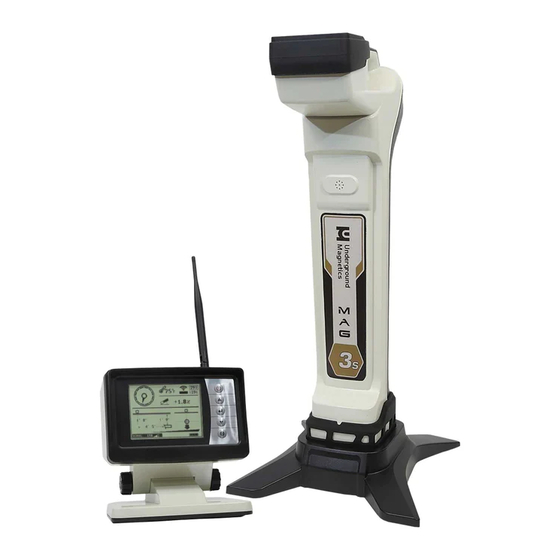
The MAG 3S and 6S are locating systems designed to assist horizontal directional drill machine operators in locating and tracking underground drill head locations and orientations. The systems consist of a transmitter, a receiver, and a remote display. The transmitter sends digital information of the transmitter’s pitch, roll, temperature, and battery status... - Page 5 The operator must understand safety procedures and correct operation methods before operating the HDD and the locating system. HDD machines can cause property damage and personal injury upon striking underground power lines, gas lines, phone lines, television cables, fiber optic cables, or sewage lines. Make sure to confirm and mark all underground utilities before beginning operations.
- Page 6 Changes or modifications not expressly approved by Underground Magnetics Inc. will void the user’s authority to operate the equipment. Note: This product has been tested and found to comply with the limits for a Class B digital device, pursuant to Part 15 of the FCC Rules.
- Page 7 The following two pages contain a short preface. This will be a quick introduction to the steps in which you will most likely use your Mag 3S or 6S System. It will also contain page references for the later sections of the manual that contain more detailed information for the corresponding steps.
- Page 8 When you receive your Mag 3S or 6S System the transmitter will have already been activated, preprogrammed at 19 kHz, and paired and calibrated with the receiver. The receiver and display will have been paired and set to channel 1.
- Page 9 Check calibration by placing receiver 10ft away from housing, Page 13 measured from inside edge of receiver to center of housing. If distance on receiver’s screen Page 13 reads anything other than 10ft, perform calibration. Begin drilling. Locate FLP (Front Locate Point). Page 47 Locate RLP (Rear Locate Point).
-
Page 10: Receiver
High-performance DSP Dual locating system, functioning as two receivers independently tracking to provide better accuracy and reliability Up to 130ft depth range and up to 48 hours continuous usage Receiver: Mag 3S Display: Mag D3 Transmitter: Echo 1 Echo 1 19k... - Page 11 High precision and high anti-interference Faraday shield 3D antenna structure Industrial rated, gold-plated electronic modules High-performance DSP Dual locating system, functioning as two receivers independently tracking to provide better accuracy and reliability Up to 190ft depth range and up to 160 hours continuous usage Receiver: Mag 6S Display:...
- Page 12 Mag 3S and 6S System frequency 4kHz, 19kHz, 30kHz Water resistant IP65 Temperature range -4° to 140°F Telemetry 4 radio channels with range up to 3000 feet Rechargeable 12.5V lithium battery Battery life Up to 50 hours 27” x 5” x 12”...
- Page 13 • Transmitter model, frequency, and power • Transmitter signal strength • Signal to noise ratio bar and noise number • Transmitter battery status • Transmitter temperature (Flashing indicates transmitter is over-heating) • Distance between transmitter and receiver Page 10...
- Page 14 • Roll indicator • Point: direction of transmitter • 24 clock positions • Ball: representation of Locate Point • Direction of • Representation of nearest Locate receiver location Point • Locate Line • Pitch The Locate Line will be seen on screen when further away from the Locate Point.
- Page 15 To enter the Secondary Page, press and hold Radio channel Receiver battery status Transmitter model, frequency, and power Page 12...
-
Page 16: Calibration
A1: 10ft calibration A3: Depth prediction Transmitter activation Transmitter settings Receiver settings Radio channel selection Receiver and display pairing Roll calibration Pitch unit selection Time setting System lock/unlock B10: Visibility control B11: System info B13: Distance unit selection B16: Speed Control Page 13... - Page 17 Warning Even if the transmitter’s roll, pitch, battery status and temperature are displayed correctly, calibration may not be reliable due to a distorted magnetic field. Make sure pitch is at 0% while calibrating. 1. Make sure that the transmitter is working properly. Place it in the housing. 2.
- Page 18 1. Place transmitter housing in a 12 o`clock position. 2. Press and hold 3. Tap to enter Roll enter Setup page and Calibration Page and tap to select B6 until the point is icon. in the 12 o’clock position. twice to start roll calibration and wait for calibration to complete.
- Page 19 1. Tap to enter 2. Tap to enter calibration page and Depth Forecast to select A3 Page. Best-case, icon. average, and worst- case depth forecast values are listed on the right while transmitter model and frequency are listed at the top. Tap to reset forecast.
- Page 20 (For dealer or factory use) (Process must be started within 10 minutes after batteries have been placed in the transmitter.) 2. Tap to scroll through 1. Press and hold the page options until B1 enter Setup Page. is highlighted. Then tap to enter Transmitter Activation Page.
- Page 21 (Process must be started within 10 minutes after batteries have been placed in the transmitter.) 1. Press and hold 2. Tap to enter enter Setup Page and Transmitter Settings to select B2 icon. Page. The receiver and Echo transmitter will automatically pair.
- Page 22 2. Tap to enter 1. Press and hold Receiver Settings enter Setup Page. Page. Tap to select B3 to select icon. transmitter model, frequency, and power. 3. Tap to return to Main Page. Page 19...
- Page 23 1. Press and hold 2. Tap to enter Radio enter Setup Page. Channel Page. Use to select B4 to select icon. radio channel. 3. Tap to return to Main Page. Page 20...
- Page 24 1. Press and hold 2. Tap to enter enter Setup Page. Pairing Page. Tap to select B5 to start pairing. (It is icon. required that these last two steps are performed on the display at the same time.) 4. Tap to return to 3.
- Page 25 1. Press and hold 2. Tap to switch to enter Setup Page pitch mode. and tap to select B7 icon. Tap enter Pitch Unit Selection Page. 3. Tap to return to Main Page. Page 22...
- Page 26 2. Tap to enter 1. Press and hold Distance Unit enter Setup Page. Selection Page. Tap to select B13 to select icon. unit and format. 3. Tap to return to Main Page. Page 23...
- Page 27 (For dealer or factory use) 3. Tap to enter Time 2. Press and hold Settings Page. Tap enter Setup Page. to select year, to select B8 month, day, hour, or icon. minute. Tap to set time. 4. Tap to return to Main Page.
- Page 28 (For dealer or factory use) 1. Press and hold enter Setup Page to input password. and tap to select B9 icon. Tap enter System Unlock Page. 4. Tap to return to Main Page. Page 25...
- Page 29 1. Press and hold 2. Tap enter Setup Page adjust. and tap to select the B10 icon. Tap to enter Visibility Control. Note: By holding both at the same time while turning the receiver on, the visibility control 3. Tap to return to will reset to normal Main Page.
- Page 30 2. Press and hold 3. Tap enter Setup Page adjust speed. and tap to enter the Speed Control Page. Note: Adjusting the speed control allows operators to more easily fine tune the left-right bar and bore 4. Tap to return to indicator for when Main Page.
- Page 31 The receiver uses rechargeable lithium batteries. The receiver will automatically shut off if no key is pressed for over a period of 20 minutes or if there is no information received from the transmitter. It is strongly recommended that the batteries are taken out of the receiver if it is not being used for a long period of time to avoid potential corrosion.
- Page 32 Mag D3 and D6 Radio frequency 915MHz Water resistant IP65 Temperature -4° to 140°F range Telemetry 4 radio channels with range up to 3000 feet Power Rechargeable lithium batteries Battery life Up to 50 hours Screen Industrial rated LCD graphic display 7.5”...
- Page 33 • Transmitter model and frequency • Transmitter signal strength • Signal to noise ratio bar and noise number • Transmitter temperature (Flashing indicates transmitter is over-heating) • Transmitter battery status • Distance between transmitter and receiver • Transmitter pitch Page 30...
- Page 34 To enter the Secondary Page, press and hold Transmitter model, frequency, and power Display battery status Radio channel Radio channel selection Receiver and display pairing Pitch unit selection B10: Visibility control B11: System info B12: Display communication mode B13: Distance unit selection B14: Down hole Echo mode change Page 31...
- Page 35 (Mag 6S only: Echo 2S and Echo 3) 1. Press and hold 2. Use enter Setup Page. select desired to enter frequency and power Down Hole Echo levels. Tap Mode Change Page. begin mode change process. Steps remaining Roll indicator Instructions Target dot Proceed: time left to...
- Page 36 Rotate drill head until roll indicator points toward target dot. Instructions will change from the clockwise arrow to “STOP”. Hold this position until “H” counts down to 0. Rotate drill head to next position in sequence before “P” counts down to 0 or the sequence will be canceled.
- Page 37 1. Press and hold 2. Use to select enter Setup Page. radio channel. to enter Radio Channel Page. 3. Tap to return to Main Page. Page 34...
- Page 38 2. Tap to start 1. Press and hold pairing. (It is required enter Setup Page that the following and tap to select procedure is performed B5 icon. Tap on the receiver at the enter Radio same time) Registration Page. 3. Pairing complete. 4.
- Page 39 2. Tap to switch 1. Press and hold pitch mode. enter Setup Page and tap to select B7 icon. Tap enter Pitch Unit Selection Page. 3. Tap to return to Main Page. Page 36...
- Page 40 2. Tap to enter 1. Press and hold Distance Unit enter Setup Page. Selection Page. Tap to select B13 to select icon. unit and format. 3. Tap to return to Main Page. Page 37...
- Page 41 1. Press and hold 2. Tap enter Setup Page adjust. and tap to select the B10 icon. Tap to enter Visibility Control Page. Note: By holding both at the same time while turning the receiver on, the visibility control 3. Tap to return to will reset to normal Main Page.
- Page 42 2. The default 1. Press and hold communication mode enter Setup Page will be wireless and tap to select communication. B12 icon. Tap enter Communication Mode Page. 3. Press to switch to 4. Tap to return to cable mode. Main Page. Page 39...
- Page 43 The display uses rechargeable lithium batteries. The display will automatically shut off if no key is pressed for over a period of 20 minutes or if there is no information received from the receiver. It is strongly recommended that the batteries are taken out of the display if it is not being used for a long period of time to avoid potential corrosion.
- Page 44 If drilling in adverse soil conditions (i.e. rock), normal C cell batteries will experience battery chatter. This can greatly reduce battery life. To prevent this, use your provided double C lithium cell battery instead. Echo 1 (Mag 3S and 6S) Weight 1.5lbs 1.25” x 15” length Dimensions...
- Page 45 Echo 2S (Mag 6S) Weight 1.5lbs 1.25” x 15” length Dimensions Frequency 4kHz/19kHz/30kHz Depth Range 90ft/130ft/130ft Echo Cell Kit or Lithium Power Battery Echo Cell 3V, 20 hours of continuous usage 3V, 48 hours of Lithium* continuous usage Roll 24 transmitter roll positions Pitch 0.1% resolution Temperature...
- Page 46 Echo 3 (Mag 6S) Weight 2lbs 1.25” x 19” length Dimensions Frequency 4kHz/19kHz/30kHz Depth Range 90ft/130ft/130ft 2 Echo Cell Kits or 2 Power Lithium Battery Packs Echo Cell 3V, 50 hours of continuous usage 6V, 160 hours of Lithium* continuous usage Roll 24 transmitter roll positions Pitch...
- Page 47 Echo ST-DX (Mag 3S and 6S) 1” x 8” length Dimensions Frequency 30kHz Depth Range 60 feet 1 18650 3V rechargeable lithium Power battery Roll 24 transmitter roll positions Pitch 0.1% resolution Temperature Under 250°F Page 44...
- Page 48 Pitch: From -100% to +100% with 0.1% resolution within the range of -45% to +45% and 1.0% resolution outside of that range. Roll: 24 transmitter roll positions Battery: Install batteries positive side down and install battery cap with provided battery cap tool. ▪...
- Page 49 One major advantage of the Mag 3S & 6S systems is their simplicity. Once the receiver and transmitter are paired, the operator is not required to push any buttons to pinpoint the location, direction or depth of the transmitter. The Mag 3S or 6S receiver locates the transmitter by pinpointing three specific locations along the transmitter’s...
- Page 50 The Locate Line does not equal the location of the transmitter. The Locate Line extends left and right of the transmitter. Think of the transmitter as an airplane. The FLP is the nose and the RLP is the tail. You can locate the LL left and right of the body, but that is not the center of the...
- Page 51 Receiver view Actual position of receiver to transmitter In this scenario the transmitter is behind you and you are walking toward the FLP. Notice how the arrow that indicates the nearest locate point is slightly to the right and has a narrow base. Its position lets you know the FLP’s right-left information relative to the receiver.
- Page 52 Walk forward until the base of the arrow is fully filled in. Bore Path Drill Rig Receiver view Actual position of receiver to transmitter Notice how the Locate Line was replaced with a ball. The ball represents the FLP and appears when you are near it.
- Page 53 Walk forward until the arrow shows two arrows on screen or flips. Then walk to the right to center the ball in the cross hairs. This is the exact location of the FLP. Notice the line that is now on top of the ball. This is for single point locating and will be addressed later.
- Page 54 Steps to locate RLP 1. Move the receiver back toward the drill until the arrow flips as shown in the receiver view below. The ball will have disappeared, and the LL indicator will have replaced it. When the arrow flips and the LL indicator lines up with the horizontal axis, you have crossed the LL.
- Page 55 2. Continue to move back toward the drill. Watch the base of the arrow grow wider to indicate how close you are to the RLP. Once the base is completely full and the arrow either flips, or two arrows appear on the screen, you have crossed the RLP.
- Page 56 Now that the FLP and RLP have been marked, you’re ready to locate the transmitter. Steps to Locate LL 1. From the RLP walk toward the FLP. The ball will be replaced by the LL indicator, which will start to center as shown on the receiver view below.
- Page 57 Receiver view Actual position of receiver to transmitter Page 54...
- Page 58 Tracking on the fly may be used once the bore path is established and level. This tracking method will increase locating speed and in turn the speed at which the bore can be completed. As long as the FLP remains on target, there is no need to find the RLP on every rod.
- Page 59 10’ Wait for FLP to come to you Note: Ignore the LL indicator until you are over the transmitter. It’s only purpose when not over the transmitter is to show that you are not close enough to a locate point for the ball to appear. Do not use it to estimate the location of the transmitter when not over or very near to the drill head.
- Page 60 To switch the receiver to Bore-To mode, tap the from the main page. To return to Walkover mode, simply tap again. The display screen on both the receiver and the remote display will look like the screen to the right. Receiver Right/left information Bore head/...
- Page 61 The Bore-To feature on the Mag 6S is very powerful. Operators can expect to receive good right-left steering, pitch, and roll information as far out as 100ft. It is important to note that the depth is only a reference. As distance between the transmitter and receiver decreases, the accuracy increases.
- Page 62 Single Point Locating is the newest and most efficient way to locate the drill head. Simply walk forward until the base of the arrow fills in completely and the ball appears on screen. Once the arrow flips, place the ball in the cross hairs. Notice that the ball has a line on top.
- Page 63 When charging the battery, the red light will shine. When charging is complete, a green light will shine. Underground Magnetics offers standard warranty on parts and labor for all Mag series locating systems and transmitters. Please contact our offices for more details on warranty periods.
Need help?
Do you have a question about the MAG 3S and is the answer not in the manual?
Questions and answers