Advertisement
Quick Links
I N S T A L L A T I O N
Must be installed by a qualified electrician in accordance with all national and local electrical and construction codes and
1
regulations by a person familiar with the construction and operation of the product and the hazards involved. Failure to comply
with the following installation instructions will void the warranty and may result in serious injury or possible death. Ensure power
is off before installation, verify electrical plan first and read all installation instructions prior to installation.
Debe ser instalado por un electricista calificado de acuerdo con todos los códigos y reglamentos eléctricos y de construcción nacionales y locales, por una
persona familiarizada con la construcción y el funcionamiento del producto y los riesgos involucrados. El incumplimiento de las siguientes instrucciones de
instalación anulará la garantía y puede provocar lesiones graves o la muerte. Asegúrese de que la energía esté apagada antes de la instalación, verifique
primero el plan eléctrico y lea todas las instrucciones de instalación antes de instalar.
Doit être installé par un électricien qualifié conformément à tous les codes et réglementations électriques et de construction nationaux et locaux par une
personne connaissant bien la construction et le fonctionnement du produit et les risques encourus. Le non-respect des instructions d'installation suivantes
annulera la garantie et pourrait entraîner des blessures graves ou la mort éventuelle. Assurez-vous que l'alimentation est coupée avant l'installation, vérifiez
d'abord le plan électrique et lisez toutes les instructions d'installation avant l'installation.
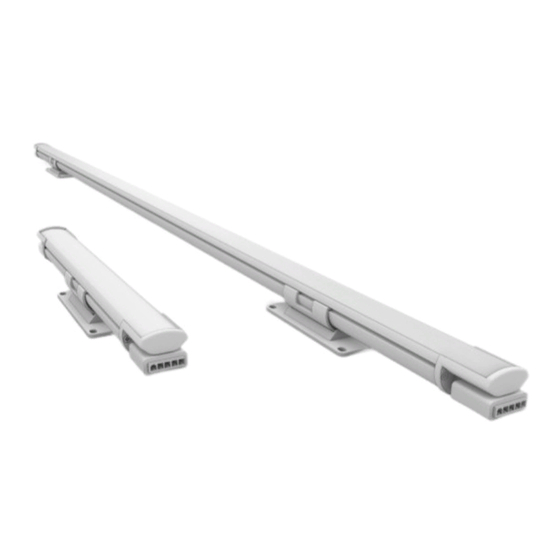
Verify electrical plan and ensure all hardware is present
2
Verificar plan electrico y verifique que todo el equipo esté presente
Vérifier le plan électrique et assurer que tout le matériel est présent
Leader Cable
Dimmer
(Optional)
Mounting Bracket
(Bottom View)
7/32" (5.25mm)
1/8"
(3.5mm)
2 11/16" (68.25mm)
3 5/32" (80mm)
Due to continuous improvements and innovations, specifications may change without notice.
Please refer to our website for current technical data. These figures are provided as a guideline
only and may vary with differing power supplies and installations. All rights reserved. E&OE.
DRY/DAMP LOCATION INSTALL
INSTALACIÓN DE LUGARES SECOS/HÚMEDOS
INSTALLATION EMPLACEMENT SEC/HUMIDE
Jumper
Cable
Max Continuous Run: See section 13
Continuidad Máxima: Vea sección 13
Run continue Max: Voir la section 13
1 7/32"
1 1/2"
(31mm)
(38mm)
Mounting Bracket can be moved to the left or right of the fixture
El soporte se puede mover hacia la izquierda o hacia la derecha del accesorio
Le support de montage peut être déplacé vers la gauche ou la droite de l'appareil
M O DA M I N I G R A Z E
Fixture to
Fixture
Connection
!
1 1/2" (38 MM)
!
955 White Drive Las Vegas, NV 89119 | T: 702 407 7775
I N T C O LO R 0 - 10 V
®
Overall fixture length
with connectors:
1ft - 1' 13/32" (315.26mm)
4ft - 4' 7/16" (1.23m)
VDC 01/2/2019
F: 702 407 7773 | www.modalight.com | © 2019
Terminator
1 / 9
Advertisement

Related Manuals for Moda Light MODA MINI GRAZE INT COLOR 0-10V

Summary of Contents for Moda Light MODA MINI GRAZE INT COLOR 0-10V
- Page 1 M O DA M I N I G R A Z E I N T C O LO R 0 - 10 V ® I N S T A L L A T I O N Must be installed by a qualified electrician in accordance with all national and local electrical and construction codes and regulations by a person familiar with the construction and operation of the product and the hazards involved.
- Page 2 M O DA M I N I G R A Z E I N T C O LO R 0 - 10 V ® I N S T A L L A T I O N Mount to surface using the 4 screw holes on the bracket Monte a superficie utilizando los 4 agujeros para tornillos en el soporte Mont à...
- Page 3 M O DA M I N I G R A Z E I N T C O LO R 0 - 10 V ® I N S T A L L A T I O N Snap Moda Mini Graze into mounting track then slide to connect fixtures Encaje Moda Mini Graze en el canal de montaje y luego deslice para conectar accesorios Accrochez Moda Mini Graze dans la piste puis faites glisser pour connecter les appareils Minimum end to end spacing is 5/16”...
- Page 4 M O DA M I N I G R A Z E I N T C O LO R 0 - 10 V ® I N S T A L L A T I O N Connect leader cable and connect terminator CLICK! Connectar el cable leader y conectar Terminador Branchez le câble leader et connectez Terminateur...
- Page 5 Allumer! Maximum lengths Longitudes máximas Longueurs maximales PRODUCT 120V AC 240V AC 277V AC Moda Mini Graze Int Color 0-10V SO 1ft 120ft 240ft 240ft Moda Mini Graze Int Color 0-10V SO 4ft 120ft 240ft 240ft Moda Mini Graze Int Color 0-10V HO 1ft...
- Page 6 M O DA M I N I G R A Z E I N T C O LO R 0 - 10 V ® I N S T A L L A T I O N Compatible dimmers Atenuadores de luz compatibles Gradateurs compatibles INPUT VOLTAGE: 120V AC, 60Hz OUTPUT VOLTAGE: 41.5V (at non-dimming)
- Page 7 M O DA M I N I G R A Z E I N T C O LO R 0 - 10 V ® I N S T A L L A T I O N FIXTURE Moda Mini Graze Interior Standard Output Silver 0-10V Dimming Red 1FT 30X100 136-1000 Moda Mini Graze Interior Standard Output Silver 0-10V Dimming Green 1FT 30X100 136-1001...
- Page 8 M O DA M I N I G R A Z E I N T C O LO R 0 - 10 V ® I N S T A L L A T I O N FIXTURE Moda Mini Graze Interior High Output Silver 0-10V Dimming Red 4FT 30X100 136-3200 Moda Mini Graze Interior High Output Silver 0-10V Dimming Green 4FT 30X100 136-3201...
- Page 9 M O DA M I N I G R A Z E I N T C O LO R 0 - 10 V ® I N S T A L L A T I O N Do not attempt to install or use the product Max total run using 18 gauge wire is 300ft until installation is fully read and understood! for 0-10V cables.
Need help?
Do you have a question about the MODA MINI GRAZE INT COLOR 0-10V and is the answer not in the manual?
Questions and answers