
Related Manuals for Luxul PDU 8


Summary of Contents for Luxul PDU 8
- Page 1 QUICK INSTALL GUIDE PDU 8 Intelligent Network PDU PDU-08 Includes: PDU 8 9-Outlet Intelligent Network PDU „ Ferrite RF Choke „ Power Cord „...
- Page 2 INSTALLATION AND SETUP Physical Installation The PDU 8 can be easily installed in a standard 19” rack. Two mounting ears are attached for securing the switch to rack rails. Install the device in the desired rack location and ensure it is secure.
- Page 3 Use only the included power supply cord. Connecting Ethernet Connect the PDU 8 to your network with a standard Ethernet cable. Install the provided RF choke on your Ethernet cable as closely as possible to the connector going into the PDU 8.
- Page 4 “PDU-08-78083E,” where the last half of the name represents the last three octects of the device’s MAC address. Once you locate it, make a note of the IP address. If the PDU 8 fails to find a DHCP server the unit will default to the IP address 192.168.0.6...
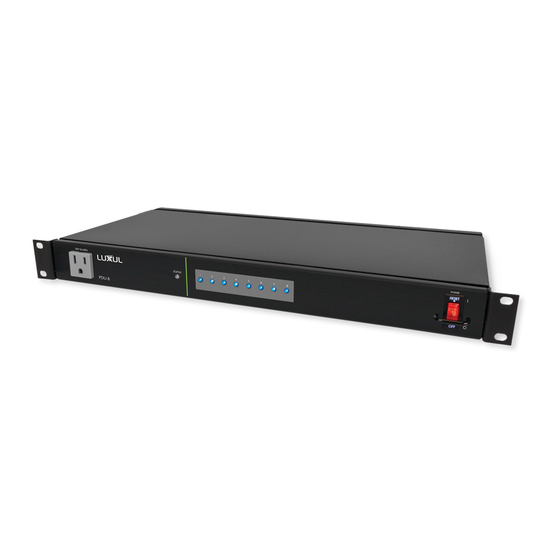
- Page 5 Hardware Operation Front Panel The front panel of the PDU 8 includes a powered unmanaged outlet, a status indicator, eight power status indicators for each one of the controlled outlets and a lighted power switch. PDU 8 Front Panel Rear Panel...
- Page 6 LED Indicators LED indicators on the front panel of PDU 8 show the operating status of the PDU 8 and each outlet. The LED indicators on the PDU 8 include an overall device status LED, and a power status indicator for each of the eight controlled outlets.
- Page 7 The Reset button (located at the lower-left corner of the rear panel) is used to restore the PDU to factory default settings. To Reboot the PDU: Switch the PDU 8 power off, wait a second, then switch the power back on.
- Page 8 Luxul product. © Copyright 2017 Luxul. All rights reserved. The name Luxul, the Luxul logo, the Luxul logo mark and Simply Connected are all trademarks and or registered trademarks of Luxul Wireless, Inc. All other...
Need help?
Do you have a question about the PDU 8 and is the answer not in the manual?
Questions and answers