
Subscribe to Our Youtube Channel
Related Manuals for Doosan P185WDO-T4F


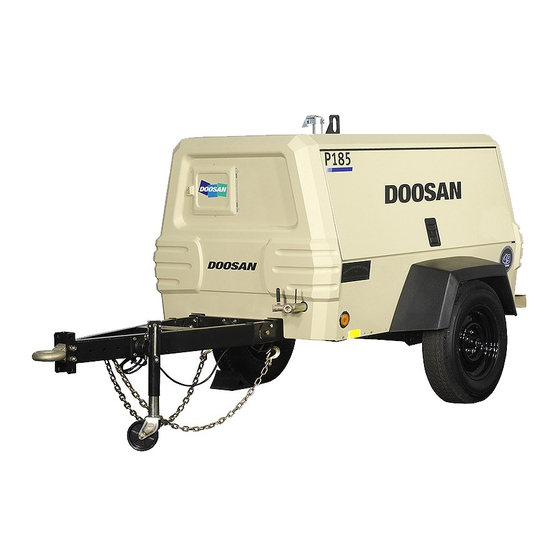
Summary of Contents for Doosan P185WDO-T4F
- Page 1 OPERATION and MAINTENANCE MANUAL COMPRESSOR MODEL P185WDO-T4F (F63) Doosan Infracore Portable Power 1293 Glenway Drive Statesville, N.C. 28625 DoosanPortablePower.com P/N: 46670941 (2014) Rev B...
-
Page 4: Table Of Contents
TABLE OF CONTENTS Operation & Maintenance Manual TITLE PAGE FOREWORD ..........................9 Information ............................. 10 DRAWBAR INFORMATION....................13 Instruction Kit ..........................14 SAFETY ..........................15 Safety Precautions ......................... 16 Compressed Air.......................... 16 Exhaust System ......................... 17 Materials ............................ 18 Battery ............................19 Radiator ............................. 19 Transport ........................... - Page 5 TABLE OF CONTENTS Operation & Maintenance Manual TITLE PAGE Quick View Screens ........................41 Fault and Alert ..........................41 Service Interval Set Up ........................44 Languages and Units Set Up ......................46 Display Setup ..........................47 Compressor ID Set Up ........................48 Before Towing..........................
- Page 6 TABLE OF CONTENTS Operation & Maintenance Manual TITLE PAGE LUBRICATION ........................83 Compressor Oil Chart ........................84 MAINTENANCE ........................87 General Information........................88 Compressor Oil Filters........................91 Receiver Separator System ......................92 Scavenge Line ..........................93 Exterior Finish Care........................93 Field Replacement of Canopy Decals ..................... 95 TROUBLESHOOTING ......................99 Introduction ...........................101 Troubleshooting Chart........................102...
- Page 7 ...
-
Page 8: Foreword
FOREWORD... -
Page 9: Information
Operation & Maintenance Manual FOREWORD Information The contents of this manual are considered to be proprietary and confidential to Doosan Infracore Portable Power (herein referred to as “Portable Power”), and should not be reproduced without the prior written permission of Portable Power. - Page 10 FOREWORD Operation & Maintenance Manual This compressor should not be used: • For direct or indirect human consumption of the compressed air. • Outside the ambient temperature range specified in the General Data Section of this manual. • When an actual or foreseeable risk of hazardous levels of flammable gases or vapors exists.
-
Page 12: Drawbar Information
DRAWBAR INFORMATION... -
Page 13: Instruction Kit
Operation & Maintenance Manual DRAWBAR INFORMATION Instruction Kit... -
Page 14: Safety
SAFETY... -
Page 15: Safety Precautions
Operation & Maintenance Manual SAFETY Safety Precautions Never operate the compressor without first observing all safety warnings and carefully reading the Operation and Maintenance Manual shipped from the factory with this compressor. Ensure the operator reads and understands the decals and consults the manuals before operation or performing maintenance. -
Page 16: Exhaust System
SAFETY Operation & Maintenance Manual All air pressure equipment installed in, or connected to, the compressor must have safe working pressure ratings of at least the compressor safety valve setting. If more than one compressor is connected to one common downstream plant, effective check valves and isolation valves must be fitted and controlled by work procedures, to ensure one compressor cannot accidentally be pressurized or over pressurized by another. -
Page 17: Materials
Operation & Maintenance Manual SAFETY Materials The following substances may be produced during the operation of this compressor: • brake lining dust • engine exhaust fumes Avoid inhalation of material substances. Ensure that adequate ventilation of the cooling system and exhaust gases is maintained at all times. -
Page 18: Battery
SAFETY Operation & Maintenance Manual Should compressor oil come into contact with the eyes, irrigate with water for at least 5 minutes. Should compressor oil come into contact with the skin, wash off immediately. Consult a physician if large amounts of compressor oil are ingested or if compressor oil is inhaled. Never give fluids or induce vomiting if the patient is unconscious or having convulsions. - Page 19 Operation & Maintenance Manual SAFETY Hot engine coolant and steam can cause injury. When adding coolant or antifreeze solution to the engine radiator, stop the engine and allow radiator to cool prior to releasing the Radiator Pressure Cap. Using a cloth to protect the hand, slowly release the pressure cap, absorbing any released fluid with the cloth.
-
Page 20: Transport
SAFETY Operation & Maintenance Manual Transport When loading or transporting the compressor, ensure the specified lifting and tie down points are used. When loading or transporting the compressor, ensure the towing vehicle, its size, weight, towing hitch, and electrical supply are all suitable to provide safe and stable towing at speeds either, up to the legal maximum for the country in which it is being towed, or as specified for the compressor model if lower than the legal maximum. -
Page 21: Decals
Operation & Maintenance Manual SAFETY Safety chains/breakaway cable and their adjustment (where fitted). Ensure breakaway cable is securely coupled to the towed compressor and also to a substantial anchorage point on the towing vehicle. Ensure cable length is as short as possible, while still allowing enough slackness for the towed compressor to articulate without the brake being applied. - Page 22 SAFETY Operation & Maintenance Manual (Blue Background) Indicates important set-up, operating, or maintenance information. FREE SAFETY DECALS To promote communication of Safety Warnings on products manufactured by the Portable Power Division in Statesville, N.C., Safety Decals are available FREE of charge. Safety Decals are identified by the decal heading: DANGER, WARNING, CAUTION, NOTICE.
-
Page 24: Noise Emission
NOISE EMISSION... -
Page 25: Compressor Noise Emission Control Information
Operation & Maintenance Manual NOISE EMISSION Noise Emission This section pertains only to compressors distributed within the United States. Tampering with noise control system prohibited. Federal law prohibits the following acts or the causing thereof: (1) The removal or rendering inoperative by any persons, other than for purposes of maintenance, repair, or replacement, of any device or element of design incorporated into any new compressor for the purpose of noise control prior to its sale or delivery to the ultimate purchaser or while it is in use;... -
Page 26: Introduction
NOISE EMISSION Operation & Maintenance Manual Introduction The compressor for which this Maintenance Log is provided conforms to U.S. E.P.A. Regulations for Noise Emissions, applicable to Portable Air Compressors. The purpose of this book is to provide (1) the Maintenance Performance Schedule for all required noise emission controls and (2) space so that the purchaser or owner can record what maintenance was done, by whom, where and when. -
Page 27: Maintenance Schedule
Operation & Maintenance Manual NOISE EMISSION Maintenance Schedule PERIOD DESCRIPTION As Detected COMPRESSED AIR LEAKS Correct all compressed air leaks during the first shutdown period after discovery. If severe enough to cause serious noise problems and efficiency loss, shut down immediately and correct the leak(s). As Detected SAFETY AND CONTROL SYSTEMS Repair or replace all safety and control systems or circuits as... - Page 28 NOISE EMISSION Operation & Maintenance Manual PERIOD DESCRIPTION 250 HOURS ISOLATION MOUNTS Engine/airend isolation mounts should be inspected after each 250 hours of operation. Those mounts with cracks or splits in the molded rubber or with bent or broken bolts due to operation or storage in severe environments should be replaced with equivalent parts.
-
Page 29: Noise Emission Warranty
Operation & Maintenance Manual NOISE EMISSION Noise Emission Warranty The manufacturer warrants to the ultimate purchaser and each subsequent purchaser that this air compressor was designed, built and equipped to conform at the time of sale to the first retail purchaser, with all applicable U.S. EPA Noise Control Regulations. This warranty is not limited to any particular part, component, or system of the air compressor. -
Page 30: Maintenance Log
NOISE EMISSION Operation & Maintenance Manual Maintenance Log COMPRESSOR MODEL: SERIAL NO: USER UNIT NO: UNIT IDENTIFICATION DEALER / DISTRIBUTOR INFORMATION Engine Make & Model: Purchased From: Serial No: Purchaser or Owner: Address: Date Purchased: The Noise Control Act of 1972 (86 Stat. 1234) prohibits tampering with the noise control system of any compressor manufactured and sold under the above regulations, specifically the following acts or the causing thereof: (1) the removal or rendering inoperative by any persons, other than for purposes of... -
Page 32: General Data
GENERAL DATA... -
Page 33: General Data Information
1700 COMPRESSOR Rated Operating Pressure — psi (kPa) 100 (689) Safety Valve Setting — psi (kPa) 200 (1380) ENGINE (Diesel) Manufacturer Doosan Model D24 DL02 Electrical System 12VDC FLUID CAPACITIES Compressor Lubricant — gallon (litres) 3 (11.4) Engine Crankcase Lubricant — gallon (litres) 2.4 (9.2) -
Page 34: Expendable Service Parts
PRO-TEC® Compressor Fluid (1 gal) 36899698 Tier 4® Engine Fluid (1 gal) 46557017 Modification or alteration of this machine. Can result in severe injury or death. Do not modify or alter without the express written consent of Doosan Infracore Portable Power. -
Page 36: Operating Instructions
OPERATING INSTRUCTIONS... -
Page 37: Control Panel
Operation & Maintenance Manual OPERATING INSTRUCTIONS Control Panel 1. Air Pressure Gauge: Indicates pressure in the Separator Tank. 2. Mini-Port Display: Displays compressor operating parameters, and diagnostic codes. 3. Main Power Button: Turns on and off compressor control system and gauge panel. 4. -
Page 38: Control/Gauge Panel
OPERATING INSTRUCTIONS Operation & Maintenance Manual Control/Gauge Panel STOP: Stops the compressor. START: Initiates engine cranking. SERVICE AIR: Allows operator to load compressor after warm-up. Pressing and releasing the UP button scrolls up through parameter lists and menu choices or increases a value one item/unit at a time. -
Page 39: Auto Power Off
Operation & Maintenance Manual OPERATING INSTRUCTIONS Auto Power Off The compressor control system has a power save feature that is designed to prevent drain on the batteries when the compressor engine is not running. If the Control Panel is powered ON and the engine has not ran for 15 minutes the control system will automatically power OFF. -
Page 40: Quick View Screens
OPERATING INSTRUCTIONS Operation & Maintenance Manual Quick View Screens Engine and Compressor Parameters The Quick View Screens allow for easy viewing of up to 14 commonly used parameters by pressing the UP and DOWN buttons. Pressing the UP and DOWN buttons continuously loops through the Quick View Screens such that when the last screen is reached pressing the Down button displays the first screen and vice versa. -
Page 41: Fault And Alert
Operation & Maintenance Manual OPERATING INSTRUCTIONS Fault and Alert If a FAULT occurs, the display unit will display the SPN, FMI, OC and description for Engine Fault or the CPR Code and Description for Compressor Error. An Engine Fault will be displayed only when the engine is shutdown. - Page 42 OPERATING INSTRUCTIONS Operation & Maintenance Manual When present an ALERT with the number of alert conditions will popup on the screen, the user will press the UP or DOWN button to display the warning or press the ENTER button to acknowledge a warning has occurred.
-
Page 43: Service Interval Set Up
Operation & Maintenance Manual OPERATING INSTRUCTIONS Service Interval Set Up Service will popup on the screen after one of the two hour service channels has decremented to 5 hours. The user will press the UP or DOWN button to display the service channels or press the enter button to acknowledge a service has occurred. - Page 44 OPERATING INSTRUCTIONS Operation & Maintenance Manual The service intervals can be changed by pressing the ENTER button while on the default screen. Using the UP or DOWN buttons to highlight the desired interval and press the ENTER button to select. Use the UP and DOWN buttons to increase or decrease the number of hours.
-
Page 45: Languages And Units Set Up
Operation & Maintenance Manual OPERATING INSTRUCTIONS Languages and Units Set Up The DISPLAY is user configurable to display in English, Spanish, or French languages and in either English or Metric units. These can be changed by accessing the Setup Menu. To access the Setup Menu, press and hold the ENTER button while the Default Screen is displayed until the Main Menu appears. -
Page 46: Display Setup
OPERATING INSTRUCTIONS Operation & Maintenance Manual Display Setup The Display Menu functions give users the ability to configure the LCD. Options for configuring the display include intensity, contrast, and viewing mode. To access the Display Menu, press and hold the ENTER button while the Default Screen is displayed until the Main Menu appears. -
Page 47: Compressor Id Set Up
Screen menu item and press the ENTER button. See Figure 8. Refer to chart below for correct Machine ID. Use Data Plate on compressor to obtain correct compressor model. Compressor ID Number Compressor Model P425/HP375WCU-T4i P600/XP535WCU-T4i HP450/VHP400WCU-T4i 7/125 7/175 C185WDZ-T4F/ P185WDZ-T4F 14/190 P250/HP185WDZ-T4F P185WDO-T4F 12/154 C185WKUBG 7/73... - Page 48 Operation & Maintenance Manual OPERATING INSTRUCTIONS Compressor and Display Gauge Software Versions The Compressor and Display software information can be displayed by accessing the Misc Menu. To access the Misc Menu, press and hold the ENTER button while the Default Screen is displayed until the Main Menu appears.
-
Page 49: Before Towing
OPERATING INSTRUCTIONS Operation & Maintenance Manual Before Towing Failure to follow these instructions CAN cause severe injury or death. • Ensure tow vehicle has towing capacity for weight of this unit as stated on general data decal.Use jack to raise or lower drawbar. •... -
Page 50: Towing
Operation & Maintenance Manual OPERATING INSTRUCTIONS Towing Failure to follow these instructions CAN cause severe injury or death. Disconnect • Engage tow vehicle parking brake. • Chock tires of compressor. • Set the vehicle parking brake. Chock wheels of unit. •... -
Page 51: Starting
OPERATING INSTRUCTIONS Operation & Maintenance Manual • Drain water from fuel/water separator. • Check the compressor lubricating fluid level between bottom and midway of the sight glass on the separator tank. This machine produces loud noise with doors open. Extended exposure to loud noise can cause hearing loss. -
Page 52: Shutdown
Operation & Maintenance Manual OPERATING INSTRUCTIONS Wait for Engine Temperature to reach 150°F (65°C). Press Service Air Button. The third light on the Start Button will illuminate. To ensure an adequate flow of oil to the airend, never allow the discharge pressure to fall below 50 psi. -
Page 53: Pressure Regulator Adjustment Instructions
OPERATING INSTRUCTIONS Operation & Maintenance Manual Since the service valve is closed, air downstream of the valve may be trapped. A vent hole in the service valve will slowly bleed air from the hose. Do not disconnect hoses until all pressure has been vented. Do NOT wire around or bypass a shutdown sensor or switch. -
Page 54: Engine Operation
ENGINE OPERATION... -
Page 55: Engine Operation And Maintenance
In the event that a part must be replaced, only genuine parts as defined by the parts the list (PARTS BOOK) should be used. Doosan shall not be held liable for any critical damage or faults which may be caused by the use of unauthorized or remanufactured parts. -
Page 56: Instructions
ENGINE OPERATION Operation & Maintenance Manual Workers must follow this instruction. Failing to do so may result in the death or serious bodily harm of workers or others. Workers must observe this instruction since failing to do so may cause critical faults which can have impact on the engine performance and operation. - Page 57 Operation & Maintenance Manual ENGINE OPERATION 6. Exhaust gas is poisonous. Fully ventilate before starting engine. If the space is airtight, ensure that it is well ventilated. Cautions for Inspection and Repair 1. Inspection and repair of engine should be performed only when the engine is shut down, otherwise, burns or safety accidents may occur.
-
Page 58: General Repair
ENGINE OPERATION Operation & Maintenance Manual 7. Follow the instructions provided by the battery manufacturer when checking or handling batteries. Battery fluid is corrosive and dangerous because of its explosiveness and toxicity. Therefore, it should only be handled by a skilled technician who specializes in battery fluid. -
Page 59: Environmental Pollution
Operation & Maintenance Manual ENGINE OPERATION 8. Group and store disassembled parts in disassembling order. Due to the fact that bolts and nuts vary in strength, shape and torque according to their assembly position. Please divide and store them accordingly to these characteristics. 9. -
Page 60: Engine Management
Using an engine for any purposes other than the designed purpose may cause critical faults to the engine for which Doosan shall not be held liable. For details concerning the usage and purpose of the engine, please direct questions to our Sales Team. Do NOT adjust, convert, or change the ECU without our authorization. -
Page 61: Prevention Of Pollution
Operation & Maintenance Manual ENGINE OPERATION If the radiator cap is opened while the engine is still hot, hot water will spurt out and may cause burns. 7. Check the engine oil level on a flat surface. Do not exceed the maximum of the oil level gauge. -
Page 62: Start And Shutdown
3. Be careful not to mix foreign substances in fuel, engine oil, or coolant while injecting the fluid. Keep the fluid clean while it is not in use. Use fuel, oil, and coolant recommended by Doosan. Otherwise, critical damage to the engine may occur. Starting the Engine Observe the following when starting the engine. -
Page 63: Break-In Period Of Engine
Break-in Period of Engine Doosan engines are subjected to a final approval test to ensure the provision of high quality engines before being shipped. However, engines are not operated for a long period of time in this test. -
Page 64: Inspection After Starting The Engine
4. Replace engine oil and oil filter after the break-in period. If engine oil and oil filter need to be replaced, use only genuine engine oil and parts recommended by Doosan. Operation after Break-in Slowly preheat the engine when starting up during cold weather or in areas with cold climate. -
Page 65: Operation In Winter
To prevent this, replace oil to engine oil for cold weather or areas with cold climate. When replacing engine oil, use only genuine engine oil recommended by Doosan. -
Page 66: Regular Inspection
SAE 10W40 API CI-4 (ACEA-E5) DL02 SAE 15W40 API CJ-4 (ACEA-E9) Note: Use Doosan genuine recommended oil. Engine Oil Capacity Please replenish the engine oil based on the following recommended oil injection amount. Engine Model Engine Oil Capacity (1) Inside the Oil Pan Total * Max. -
Page 67: Checking The Engine Oil
Operation & Maintenance Manual ENGINE OPERATION Checking the Engine Oil 1. Move the unit to a flat surface to maintain the engine level. 2. Start the engine and then shut down when it reaches the normal temperature. 3. Wait for 5 ~ 10 minutes. 4. - Page 68 ENGINE OPERATION Operation & Maintenance Manual 1. Check if the oil is smeared between the upper limit (A) and the lower limit (B) of the oil level gauge. 2. If engine oil is smeared below the lower limit (B) or not smeared on the gauge at all, replenish engine oil.
-
Page 69: Replacement Of Engine Oil
Operation & Maintenance Manual ENGINE OPERATION Replacement of Engine Oil Special Tools Tightening Torque Component Tightening Torque Drain Plug 3 kgf.m Oil Capacity Engine Model Engine Oil Capacity (L) Inside the Oil Pan Total * Max. Min. DL02 DL02 Note: Including 0.6 Liter in the engine Prolonged and repeated contact of skin with engine oil may lead to shrinking, dryness of skin and even cause dermatitis. - Page 70 ENGINE OPERATION Operation & Maintenance Manual Discard exchanged oil according to the regulations set forth by the relevant authorities. Disposing of discharged oil into the ground, sewers, drains, rivers, or the sea will cause serious environmental pollution. Violation of regulations regarding discard of engine oil without observing the handling regulations, will be punished.
- Page 71 6. Add the engine oil. 1. Connect the drain plug B at the torque of 3.0 kgf•m. 2. Disassemble the oil level gauge. 3. Inject genuine oil recommended by Doosan. 4. Assemble the oil cap A. 5. Assemble the oil level gauge.
-
Page 72: Coolant
ENGINE OPERATION Operation & Maintenance Manual Adding oil which exceeds the upper limit of the oil level gauge may cause engine faults. If you have injected engine oil far over the upper limit of the oil level gauge, drain it until the engine oil level indicates somewhere between the upper and lower limit of the oil level gauge. -
Page 73: Checking The Coolant
Operation & Maintenance Manual ENGINE OPERATION Checking the Coolant If the radiator cap is opened to exchange or replenish coolant while the engine is overheated, hot water will spurt out and may cause serious burns. If it is absolutely necessary to open the radiator cap while the engine is overheated, wrap the radiator cap with a cloth and slowly open the cap in two steps until the steam pressure has been released from the inside. - Page 74 ENGINE OPERATION Operation & Maintenance Manual Measurement time should not exceed 75 seconds. The color changes as time passes. 4. Check the color on test sheet. 1. Compare the color of part A on the test sheet to the color of GLYCOL/FREEZEPOINT (End pad) of the standard color table.
-
Page 75: Replenishment Of Coolant
Operation & Maintenance Manual ENGINE OPERATION 1. Compare the changed pink color part A of the test sheet with the GLYOOL/FREEZEPOINT (End pad) of the standard color table on top of the container and confirm the concentration. The concentration indication has to be within the color scope of 33~50%. -
Page 76: Replacement Of Coolant
ENGINE OPERATION Operation & Maintenance Manual 4. Remove the supplementary tank cap. 5. Replenish coolant until its level is between the upper and lower limit of the supplementary tank. 6. Install the supplementary tank cap. If the radiator cap is opened while the engine is hot, hot water will spurt out and may cause serious burns. - Page 77 Operation & Maintenance Manual ENGINE OPERATION Note: Slowly pour coolant in to let the air be discharged from radiator and press the hose connected to it to discharge the air inside. 8. Start the engine to let the cooling fan rotate 2 or 3 times. When the engine is warmed up, increase the engine RPM two or three times.
- Page 78 ENGINE OPERATION Operation & Maintenance Manual Discard exchanged coolant to the regulations set forth by the relevant authorities. Disposing of exchanged coolant into the ground, sewers, drains, rivers or the sea will cause serious environmental pollution. Violation of regulations regarding discard of coolant without observing the handling regulations will be punished.
-
Page 80: Lubrication
LUBRICATION... -
Page 81: Compressor Oil Chart
Operation & Maintenance Manual LUBRICATION Lubrication is an essential part of preventive maintenance, affecting to a great extent the useful life of the compressor. Different lubricants are needed and some components require more frequent lubrication than others. Therefore, it is important that the instructions regarding types of lubricants and the frequency of their application be explicitly followed. - Page 82 LUBRICATION Operation & Maintenance Manual Preferred Oil - Use of these oils with Doosan branded filters can extend airend warranty. Refer to the warranty policy for details or contact your representative. Preferred Oil 1 gal. (3.8 Liter) 5 gal. (19.0 55 gal.
-
Page 84: Maintenance
MAINTENANCE... -
Page 85: General Information
Operation & Maintenance Manual MAINTENANCE General Information Any unauthorized modification or failure to maintain this equipment may make it unsafe and out of factory warranty. If performing more than visual inspections, disconnect battery cables and open manual blowdown valve. Use extreme care to avoid contacting hot surfaces (engine exhaust manifold, piping, air receiver, and air discharge piping, etc.). - Page 86 MAINTENANCE Operation & Maintenance Manual 4. Pull out safety element if installed. 5. Install new filters in air cleaner body. 6. Re-install cover on air cleaner body. 7. Close the 2 latches after securing to air cleaner body. Make sure that all clamps and flange joints are tight. Make sure the pre-cleaner dirt dump is pointed within 30°...
- Page 87 Operation & Maintenance Manual MAINTENANCE Radiator The use of water alone in this engine can result in major engine failure. Refer to engine section for coolant recommendation. Hoses Each month it is recommended that all of the intake lines to and from the air cleaners, the engine cooling system hoses and all of the flexible hoses used for air, oil, and fuel be inspected.
-
Page 88: Compressor Oil Filters
MAINTENANCE Operation & Maintenance Manual Compressor Oil Filters The oil filter must be replaced every 500 hours of operation or six (6) months, whichever comes first. To service oil filters it will first be necessary to shut the unit down. Wipe off any external dirt and oil from the exterior of the filter to minimize any contamination from entering the lubrication system. -
Page 89: Receiver Separator System
Operation & Maintenance Manual MAINTENANCE oil cooler core so that the entire cooling area can transmit the heat of the lubricating and cooling oil to air stream. In the event foreign deposits, such as sludge and lacquer, accumulate in the oil cooler to the extent that its cooling efficiency is impaired, a resulting high discharge air temperature is likely to occur, causing shut down of the unit. -
Page 90: Scavenge Line
MAINTENANCE Operation & Maintenance Manual Scavenge Line High pressure air can cause severe injury or death from hot oil and flying parts. Always relieve pressure before removing caps, plugs, covers or other parts from pressurized air system. The scavenge line originates at the manifold and terminates at the compressor airend near the oil filter element. - Page 91 Operation & Maintenance Manual MAINTENANCE 6. Blow and tack the area to be painted. 7. Apply a smooth coat of Duponts 1854S Tuffcoat Primer to all bare metal areas and allow to dry. 8. Apply 2 medium - wet coats of Duponts 222S Adhesion Promoter over the entire area to be painted, with a 5 minute flash in between coats.
-
Page 92: Field Replacement Of Canopy Decals
MAINTENANCE Operation & Maintenance Manual Field Replacement of Canopy Decals Field Replacement of Enclosure Decals 1. The decal area should be wiped with 70% isopropyl alcohol and a lint free cloth, in a well ventilated area. 2. Allow sufficient time for drying, but not enough time for dust to resettle on surface. 3. - Page 93 Operation & Maintenance Manual MAINTENANCE...
- Page 94 MAINTENANCE Operation & Maintenance Manual...
-
Page 96: Troubleshooting
TROUBLESHOOTING A PDF version of the Electronic Service Manual is available for free download on the Distributor Portal in Passport under the Aftermarket Tab/Downloads. - Page 97 Operation & Maintenance Manual TROUBLESHOOTING...
-
Page 98: Introduction
TROUBLESHOOTING Operation & Maintenance Manual Introduction Troubleshooting for a portable air compressor is an organized study of a particular problem or series of problems and a planned method of procedure for investigation and correction. The troubleshooting chart that follows includes some of the problems that an operator may encounter during the operation of a portable compressor. -
Page 99: Troubleshooting Chart
Operation & Maintenance Manual TROUBLESHOOTING Troubleshooting Chart Complaint Cause Correction 1. Compressor has Out of Fuel. Add clean fuel. stopped unexpectedly Compressor Oil Temp. too See Complaint #6. high. Engine Coolant Temp. too Check coolant level. If low, high. add coolant. See Complaint Engine Oil Pressure too low. - Page 100 TROUBLESHOOTING Operation & Maintenance Manual 2. Compressor won’t start Low battery voltage. Check battery condition, or run recharge if necessary. Check electrolyte level, add if necessary. Check cable connections, clean and tighten as needed. Blown fuse. Identify and replace fuse. See Electronic Service Manual.
- Page 101 Operation & Maintenance Manual TROUBLESHOOTING 3. High Engine Coolant Low coolant level. Check coolant level. If low, Temperature add coolant. Loose or broken belts. Tighten or replace belt set. Ambient temperature above Operate in cooler rated ambient temp. range. environment. Dirty operating conditions.
- Page 102 TROUBLESHOOTING Operation & Maintenance Manual 5. Low electrical system Loose or broken belts. Tighten or replace belt set. voltage Loose wire connection. Check wires at switches and connectors to find loose connection. Make repairs. See Electronic Service Manual. Low battery voltage. Check battery condition, recharge if necessary.
- Page 103 Operation & Maintenance Manual TROUBLESHOOTING Blocked or restricted oil lines. Clean by flushing, or replace lines. Airend malfunctioning. See Complaints #11, #12. 7. Low engine speed Clogged fuel filters. Service fuel filters. See Engine Manual. Drain and clean fuel tanks. Add clean fuel.
- Page 104 TROUBLESHOOTING Operation & Maintenance Manual 10. Short air filter life Dirty operating conditions. Move compressor to cleaner environment. Wrong air filter element(s). Install correct air filter element(s). Inadequate air filter element Install new air filter cleaning. element(s). Incorrect stopping Comply with procedure in procedure.
- Page 105 Operation & Maintenance Manual TROUBLESHOOTING Compressor Diagnostic Codes The MiniPort displays Diagnostic Codes for the compressor system and the engine. Listings of these codes are provided in this section. The Engine Diagnostic Codes can also be read with the engine manufacturer’s service tool. A service tool connector is provided in the electrical harness, providing access to the J1939 CAN network.
- Page 106 TROUBLESHOOTING Operation & Maintenance Manual CPR CODE 28 Incorrect Engine Engine ECU has a different ALERT ECU Calibration calibration that what is expected (Engine will not crank) CPR CODE Engine Shutdown Engine stopped without an engine FAULT diagnostic code. 29 ENGINE Unknown SHUTDOWN ?? CPR CODE 30...
- Page 107 Operation & Maintenance Manual TROUBLESHOOTING CPR CODE 51 Compressor ID The Titan controller and Engine FAULT COMPRESSOR Invalid Tachometer with MidPort display do not have a valid compressor ID INVALID CPR CODE 52 IQ Filter Restricted IQ filters restricted past usable FAULT IQ FILTERS level.
-
Page 108: Engine Diagnostic Codes
ENGINE DIAGNOSTIC CODES Reduced FAULT DESCRIPTION P‐CODE Engine Stop / Limphome Torque EGR control error (airflow error too high) P0402 Level1 EGR control error (airflow error too low) P0401 Level1 EGR actuator position feedback signal high error P0406 Level1 EGR actuator position feedback signal low error P0407 Level1 EGR actuator position feedback signal ADC error P0409 Level1 EGR actuator position feedback noisy signal P046D Level1 Failure during EGR position learning (drifted) P0C17 Level1 Failure during EGR position learning (wrong range) P0C18 Level1 J1939 CAN pedal fault U0140 Limphome Rail pressure control error P0088 Delay engine stop Level2 Water in Fuel sensor electrical fault (OC or SCVBATT) P2267 Level1 Water in Fuel sensor electrical fault (SCGND) - Page 109 Rail Pressure Sensor high fault P0193 Delay engine stop Level2 Rail Pressure Sensor low fault P0192 Delay engine stop Level2 Rail Pressure Sensor fault (pressure build up during cranking too slow) P0087 Rail Pressure Sensor fault (Sensor drift at key‐on) P0191 Delay engine stop Level2 PID controller not able to stablise the RPC value (RPC using IMV only and error is positive) P0002 Delay engine stop Level2 PID controller not able to stablise the RPC value (RPC using Rail Discharge and error is positive) P0089 Delay engine stop Level2 Battery voltage monitoring signal fault (OVER 16V) P0563 Level1 Battery voltage monitoring signal fault (UNDER 9V) P0562 Level1 IAT sensor gradient fault P0074 Level1 IAT sensor high fault P0073 Level1 IAT sensor low fault P0072 Level1 IAT sensor ADC fault P0070 Level1 Exhaust over temperature fault P2428 Level1...
- Page 110 Minimum drive pulse drift (Injector #2) P02A7 Glow plug relay electrical fault (SCVBAT) P0384 Glow plug relay electrical fault (SCGND) P0383 Glow plug relay electrical fault (OC) P0380 1076 Rail pressure control error (IMV resistance which is evaluated the trim value is too high) P0007 Delay engine stop Level2 1076 Rail pressure control error (IMV resistance which is evaluated the trim value is too low) P0006 Delay engine stop Level2 1076 Rail pressure control feedback error (OC or SC2VBATT) P0004 Delay engine stop Level2 1076 Rail pressure control feedback error (SCGND) P0003 Level1 1076 Rail pressure control feedback error (ADC) P0001 Level1 1076 Rail pressure control error (IMV current trim drift) P0259 Level1 1076 Rail pressure control error (IMV current trim drift) P0254 Level1 1076 Rail pressure control error (IMV current trim drift) P0253 Level1...
-
Page 112: Revision History
TROUBLESHOOTING Operation & Maintenance Manual Revision History REV. CN Number Comments CN037321 Original Release Added Prop 65 Calif Warning... - Page 114 Doosan Infracore Portable Power 1293 Glenway Drive Statesville, N.C. 28625 DoosanPortablePower.com © Doosan Infracore Portable Power Printed in the U.S.A.
Need help?
Do you have a question about the P185WDO-T4F and is the answer not in the manual?
Questions and answers