Table of Contents
Advertisement
Quick Links
Advertisement
Table of Contents

Related Manuals for Monnit ALTA Wireless Carbon Dioxide Sensor


Summary of Contents for Monnit ALTA Wireless Carbon Dioxide Sensor
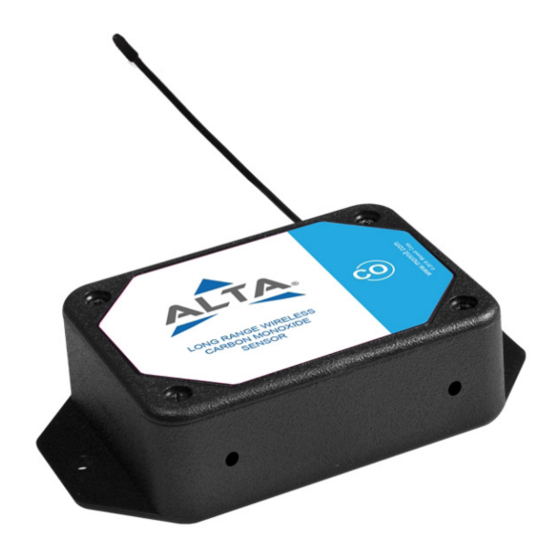
- Page 1 ALTA Wireless Carbon Dioxide Sensor User Guide...
-
Page 2: Table Of Contents
Table of Contents I. ABOUT THE WIRELESS CO SENSOR ALTA WIRELESS CO SENSOR FEATURES EXAMPLE APPLICATIONS II. SENSOR SECURITY SENSOR COMMUNICATION SECURITY DATA SECURITY ON THE GATEWAY iMONNIT SECURITY III. ORDER OF OPERATIONS SET-UP STEPS IV. REGISTRATION REGISTERING AN CO SENSOR IV. -
Page 3: About The Wireless Co
I. ABOUT THE WIRELESSS CO SENSOR The ALTA Wireless Carbon Dioxide (CO ) Sensor measures the amount of CO in the ambient air surrounding the element. It is programmed to take readings at a set interval to accurately calculate CO levels, then send the time-stamped data to the iMonnit Online Sensor Monitoring and Notification System at user-specified time intervals (sensor heartbeat). -
Page 4: Alta Wireless Co 2 Sensor Features
Hacking from botnets are in the headlines, Monnit Corporation has taken extreme measures to ensure your data security is handled with the utmost care and attention to detail. The same methods utilized by financial institutions to transmit data are also used in Monnit security infrastructure. -
Page 5: Order Of Operations
III. ORDER OF OPERATIONS It is important to understand the order of operations for activating your ALTA CO Sensor. If done out of place, your meter may have trouble communicating with iMonnit. Please consult the steps below to make sure you are performing your setup correctly. SET UP STEPS 1. -
Page 6: Registration
If this is your first time using the iMonnit online portal, you will need to create a new account. If you have already created an account, start by logging in. For instructions on how to register for an iMonnit account, please consult the iMonnit User Guide viewable at monnit.com/support/documentation. REGISTERING THE CO SENSOR... -
Page 7: Sensor
Wireless CO Sensors are powered by AA batteries. INSTALLING BATTERIES ALTA commercial sensors are powered by AA batteries. Monnit encourages customers to recycle all old batteries. The standard version of this sensor is powered by two replaceable 1.5 V AA sized batteries (included with purchase). -
Page 8: Antenna Orientation
ANTENNA ORIENTATION In order to get the best performance out of your ALTA Wireless Sensors, it is important to note proper antenna orientation and sensor positioning. Antennas should all be oriented in the same direction, pointing vertically from the sensor. If the sensor is mounted flat on its back on a horizontal surface, you should bend the antenna as close to the sensor housing as possible giving you the most amount of antenna pointing vertical. -
Page 9: Sensor Overview
VI. SENSOR OVERVIEW Select Sensors from the main navigation menu on iMonnit to access the sensor overview page and begin making adjustments to your CO Sensors. MENU SYSTEM Details - Displays a graph of recent sensor data. Readings - List of all past heartbeats and readings. Actions - List of all actions attached to this sensor. - Page 10 Readings View Selecting the “Readings” tab within the tab bar allows you to view the sensor’s data history as time stamped data. • On the far right of the sensor history data is a cloud icon. Selecting this icon will export an excel file for your sensor into your download folder.
- Page 11 State The integer presented here is generated from a single byte of stored data. A byte consists of 8 bits of data that we read as Boolean (True (1)/False (0)) fields. Using a temperature sensor as an example. If the sensor is using factory calibrations the Calibrate Active field is set True (1) so the bit values are 00010000 and it is represented as 16.
- Page 12 Settings View To edit the operational settings for a sensor, choose the “Sensor” option in the main navigation menu then select the “Settings” tab to access the configuration page. A. Sensor Name is a unique name you give the sensor to easily identify it in a list and in any notifications.
- Page 13 Calibrate View If a sensor type has readings that need to be reset, the “Calibrate” tab will be available for selection in the sensor tab bar. There are three steps to calibrating your CO sensor. They must performed in order: 1.
- Page 14 Creating a Calibration Certificate Directly below the calibrate button is the selection to "Create Calibration Certificate.” Creating a sensor calibration certificate will mask the calibration tab from those who should not have permissions to adjust these settings. Permissions for self-certifying a calibration must be enabled in user permissions.
-
Page 15: Support
If any software or firmware incorporated in any Product fails to conform to the warranty set forth in this Section, Monnit shall provide a bug fix or software patch correcting such non-conformance within a reasonable period after Monnit... - Page 16 (c) Monnit’s sole obligation under the warranty described or set forth here shall be to repair or replace non-conforming products as set forth in the immediately preceding paragraph, or to refund the documented purchase price for non-conforming Products to Customer. Mon- nit’s warranty obligations shall run solely to Customer, and Monnit shall have no obligation...
-
Page 17: Certifications
• Connect the equipment into an outlet on a circuit different from that to which the receiver is connected. • Consult the dealer or an experienced radio/TV technician for help. Warning: Changes or modifications not expressly approved by Monnit could void the user’s authority to operate the equipment. RF Exposure... - Page 18 Canada (IC) English Under Industry Canada regulations, this radio transmitter may only operate using an anten- na of a type and maximum (or lesser) gain approved for the transmitter by Industry Canada. To reduce potential radio interference to other users, the antenna type and its gain should be so chosen that the Equivalent Isotropically Radiated Power (E.I.R.P.) is not more than that necessary for successful communication.
- Page 19 All the relevant information’s is available on the European Community website: http://ec.europa.eu/enterprise/sectors/rtte/documents/ Additional Information and Support For additional information or more detailed instructions on how to use your Monnit Wireless Sensors or the iMonnit Online System, please visit us on the web at monnit.com/support. Monnit Corporation...
Need help?
Do you have a question about the ALTA Wireless Carbon Dioxide Sensor and is the answer not in the manual?
Questions and answers