Advertisement
Available languages
Available languages
Quick Links
Advertisement

Related Manuals for Roav C1 PRO


Summary of Contents for Roav C1 PRO
- Page 1 Owner’s Manual Model: R2120-INT DASHCAM C1 PRO 51005000626 V01...
- Page 2 English 日本語 简体中文 العربية...
- Page 3 简体中文 日本語 DashCam DashCam 电源线 充電ケーブル 车充 カーチャージャー 底座(2片) 取り付けマウント(2個) 小撬棍 調整用バール 用户手册 取扱説 明書 microSD 卡 Owner’s Manual DASHCAM C1 microSDカード Car charger Manual العربية English DashCam DashCam كابل الشحن Charging cable DashCam Mount (2 pcs) microSD card شاحن السيارة Car charger )التركيب...
-
Page 4: Safety Instructions
Safety Instructions At a Glance Please read and understand all instructions before using this product. If damage is caused by failure to follow the instructions, the warranty does not apply. • Keep these instructions. • Do not drop, puncture or disassemble this product. •... -
Page 5: Inserting Memory Card
Inserting Memory Card Installing Your DashCam Do not remove or insert microSD / TF card when this Never install this product while driving. product is powered on, which may damage the card. Install this product near the rear-view mirror to obtain the best open-field view. -
Page 6: Connecting To Power
Select a location (A or B) on the windshield behind the rear- Connecting to Power view mirror, clean with clear water and wait until fully dry. Remove 3M adhesive sticker and firmly affix the mount onto the windshield. Connect the car charger and DashCam by using the Use the crowbar to press and hide the charging cable charging cable. -
Page 7: Downloading Roav App
To protect the current recording manually, tap Enable WiFi on your smartphone, find “Roav DashCam C1 Pro” on the list and connect it, enter password (initial password: goroavcam) if required. The locked video clips will be saved in “RO” folder under Follow the instructions on your smartphone to complete the root directory of the memory card. -
Page 8: System Setup
Playback Videos System Setup The DashCam stops recording while viewing videos To adjust DashCam’s settings, tap or settings. Menu Options Description Available Options 720P 30FPS / 720P to view all saved videos. Set a desired video 60FPS / 1080P 30FPS Resolution Select a video to playback. -
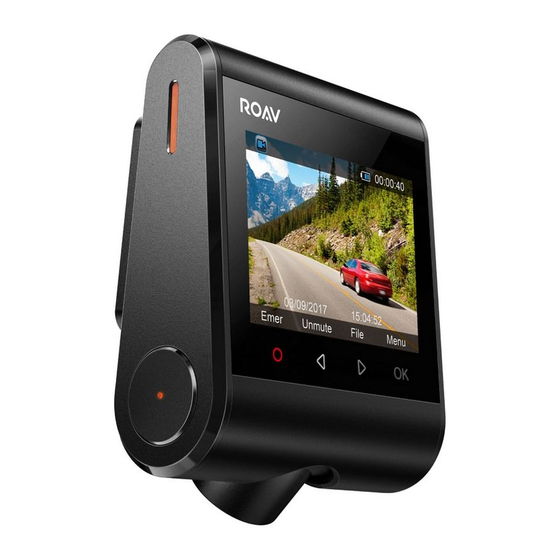
Page 9: Specifications
Enable / disable GPS Specifications positioning module to record On / Off the complete driving path. Turn off the screen backlight 30 Seconds / LCD Auto Off after a period of inactivity. 60 Seconds / Off Specifications are subject to change without notice. Machine Sound Mute or unmute. - Page 10 Notice Can not record? This product complies with the radio interference • Check if the memory card is inserted properly and there is requirements of the European Community. enough free capacity. Operating Frequency Range: 2400-2483.5 MHz; • Check the battery level. Max Output Power: 15 dBm Blurred image? This product is designed and manufactured with...
- Page 11 Note: This equipment has been tested and found to comply with 安全上のご注意 the limits for a Class B digital device, pursuant to Part 15 of the FCC Rules. These limits are designed to provide reasonable protection against harmful interference in a residential installation. 本製品をご使用になる前に必ず本説明書内の全ての項目に目を通して...
- Page 12 外観 メモリーカードの挿入方法 故障の原因となりますので、本製品の電源が点いている時にメモ リーカード(マイクロSDやTFカード)を抜き差ししないでください。 信頼性のある動作を保証するため、Class 10のマイクロSDまた はTFカードをお使いください。64GB / 128GBのメモリーカー ドはご使用前にフォーマットしてください。また、定期的に カードをフォーマットすることを推奨します。 メモリーカー 32 GB 64 GB 128 GB ド容量 220 分間 440 分間 880 分間 1440P 30FPS 240 分間 480 分間 960 分間 1080P 60FPS 320 分間 640 分間 1280 分間 スピーカー...
- Page 13 フロントガラスのバックミラーに近い位置(A または B) DashCamの設置方法 に設置箇所を決め、水拭きし、十分に乾燥させください。 取り付けマウント上のステッカーを剥がして、取り付けマウ ントをフロントガラス上にしっかりと固定してください。 運転中に本製品を取り付けないでください。 調整用バールを使い、充電ケーブルをダッシュボードの端 視界の開けたアングルを確保するため、バックミラーの 付近の継ぎ目やウェザーストリップ部分に押し込み、隠し 近くに取り付けてください。運転の視界の妨げとなるよ てください。 うな場所には設置しないでください。 前方の道路が映るようにカメラのアングルを調節してく 雨天時でもクリアな映像を撮れるように、カメラレンズ がフロントガラスのワイパーが届く範囲内に設置してく ださい。 ださい。 レンズを直接指で触らないでください。手の油等がつい て、クリアな映像を撮れなくなる場合があります。 取り付けマウントは粘着性があるので、フロントガラス から取り外すと壊れてしまう場合があります。 DashCam本体を取り付けマウントの上に取り付けてください。 日本語 日本語...
- Page 14 電源への接続方法 Roav Appのダウンロード方法 充電ケーブルを使って、カーチャージャーとDashCam本体 またはGoogle Playで「Roav」と検索してアプリをダ App Store を接続してください。 ウンロードしてください。 カーチャージャーを車のシガーソケットに挿入してくださ い。 DashCamとスマートフォンの接続 本製品の内蔵Wi-Fiを通してお使いのスマートフォンと正しく 接続すると、録画した映像をスマートフォンで再生、保存で きます。Roavのアプリを用いて本製品の設定を変更すること もできます。 正しく接続されると、録画が中断されます。 車のエンジンがかかると、自動的に電源が入り、録画が開 始されます。エンジンが切れると、録画を保存し、60秒以 Android端末の場合、本製品の内蔵Wi-Fiに接続時は インターネットにアクセスすることができません。 内に電源が切れます。 iOS端末の場合は問題なくアクセス可能です。 をタップし、「WIFI」を選択して、「オン」を選択す ると本製品のWiFiが起動します。 お使いのスマートフォン上で「設定」内の「Wi-Fi」に進 み、起動してください。「Roav DashCam C1 Pro」を選択 し、パスワードを入力してください(初期設定時、パスワ ードは「goroavcam」に設定されています。) スマートフォン上の指示に従い、接続を完了してください。 日本語 日本語...
- Page 15 映像の再生 DashCamの使用方法 映像の再生時や設定時は録画が停止します。 交通法規を遵守し、安全に留意して運転を行って ください。 保存されている映像を閲覧するには を押してください。 ビデオの録画 再生する映像を選択してください。 カーチャージャーに接続すると、自動的に録画が開始されま タッチボタン バーチャルボタン 意味 す。録画中は画面に が表示され、赤いランプが点滅し、 録画中の映像の継続時間と日付と時刻が映し出されます。 再生/停止 録音のオン/オフを切り替える場合は を押してください。 最新の映像を削除する/ 全ての映像を削除する 映像の保護 最新の映像を保護する/ 保護を解除する 本製品は衝突事故を感知するセンサーを搭載しており、衝突 前のメニューに戻る を感知すると30秒間の映像を保護し、 が表示されます。 この表示がされると映像が保護され、新たな映像に上書きさ れることはありません。 マニュアル操作で現在録画中の映像を保護する際は を押し てください。 保護された動画はメモリーカードのルートディレクトリ 内にあるROフォルダに保存されます。 日本語 日本語...
- Page 16 システム設定 走行履歴を記録するため にGPS位置情報を有効 / 無 オン / オフ 効にする。 を押してください。 一定時間使用しないと、 DashCamの設定を行う際は、 液晶画面自動 30 秒 / 60 秒 / スクリーンのバックライ オフ オフ メニュー 説明 設定オプション トが自動で消灯します。 ミュートまたはミュート 720P 60FPS / 720P 解像度 映像の解像度の設定。 機械音 オン / オフ 解除。 30FPS / 1080P 30FPS ループ録画の...
- Page 17 仕様 よくあるご質問 録画できません。 仕様は予告なく変更されることがあります。 • メモリーカードが正しく挿入されているか、また十分な 容量があるか確認してください。 • 電池残量を確認してください。 スクリーン:2.4” LCD color TFT (320 x 240) 映像が不鮮明です。 カメラセンサー: OV 4689 • 清潔で柔らかいレンズ清掃用の布などでレンズを優しく カメラレンズ:wide-angle lens 145° 拭いてください。 誤作動しているか、故障したようです。 チップセット: Novatek NT96660 • 細いピンを使用し、リセットボタンを2秒以上押し続け 入力:5V て、リセットしてください。 最高解像度(動画):1440P 30FPS 画面が真っ白です。 映像フォーマット:. • スクリーンセーバーが作動しています。必要でなければ 「オフ」に設定を変更してください。...
- Page 18 安全须知 注意 使用本产品之前请仔细阅读以下注意事项。如果因违反以下注 リサイクル・再利用可能な、高品質の素材および 意事项而造成损害,本公司概不提供售后保障。 部品で設計・製造されています。 • 请妥善保管此手册。 製品または梱包物にあるこのマークは、家庭ごみ • 请勿摔跌、损坏、拆装本产品。 として廃棄できないことを示しています。その • 避免将本产品至于漏水或溅水环境下。 ためリサイクルのため適切な回収施設に渡して廃 • 避免长时间阳光曝晒,以免损害产品。 棄する必要があります。適切な処分とリサイクル • 接触明火可能会引发爆炸。 は、天然資源、人々の健康および環境を保護する • 仅限使用原装配件。 のに役立ちます。本製品の廃棄およびリサイクル • 请 勿 将 本 产 品 安 装 在 遮 挡 驾 驶 员 视 线 或 弹 出 安 全 气 囊 的 については、各自治体、処分場、または本製品を...
- Page 19 概览 插入记忆卡 开机状态下请勿拔出或插入记忆卡,以免损坏记忆 卡。 为确保可靠运行,请使用 Class 10 以上的记忆卡。若使用 64G / 128GB 的记忆卡,请先将其格式化。建议定期格式化以保护 记忆卡。 记忆卡容量 32 GB 64 GB 128 GB 220 分钟 440 分钟 880 分钟 1440P 30FPS 240 分钟 480 分钟 960 分钟 1080P 60FPS 320 分钟 640 分钟 1280 分钟...
- Page 20 在后视镜背部的挡风玻璃上选择一个安装位置(A 或 B) , DashCam 安装指南 用清水洗净并待其完全干燥。 揭掉底座上的 3M 胶保护层,将底座粘贴在挡风玻璃上。 使用小撬棍将充电线按压并隐藏在仪表板边缘的接缝和密封 请勿在行驶途中安装本产品。 条中。 将本产品安装在后视镜附近,确保最佳视角。请勿安 调整镜头角度以获得最佳视角。 装在影响视线的位置。 将本产品安装在挡风玻璃刮水器的擦拭范围内,确保 雨天也能清晰观察。 请勿用手指直接触摸镜头,防止脏污。 底座具备粘性,从挡风玻璃上移除底座可能导致损坏。 将 DashCam 安装在底座上。 简体中文 简体中文...
- Page 21 连接电源 下载 Roav App 用充电线将 DashCam 和车充连接。 请在 App Store 或 Google Play 中搜索 Roav 并下载。 将车充插入汽车的点烟器插座。 连接 DashCam 和智能手机 DashCam 通过内置 WiFi 成功和智能手机连接后,您可以在手 机上保存和回看行车记录视频。您还可以在 Roav App上更改 一 旦 启 动 汽 车 引 擎 , D a s h C a m 将 会 自 动 开 机 并 开 始 录...
- Page 22 回看视频 使用您的 DashCam 当回看视频或进入设置时,DashCam 将停止录像。 您有责任安全驾驶以及遵守交通法规。 点击 预览所有保存的视频。 录像 选择一个视频回看。 触摸按键 虚拟按键 选项 连接车充后,DashCam 将自动开始录像,屏幕上会显示 , 并且有红点闪烁;屏幕上也会显示当前的录制时长和当前时间。 播放/暂停 。 若要在录像时静音或录音,点击 删除当前视频 / 删除全部 锁定当前视频 / 解锁当前 保护当前录像 视频 DashCam使用重力传感器自动检测碰撞,一旦检测到碰撞, 返回上一层菜单 将保护当前视频且继续录制30秒,屏幕上显示 。这表示当 前视频已被锁定且不会被循环覆盖。 若要手动保护当前视频,点击 。 锁定的视频会被保存在记忆卡根目录下的“RO”文件夹里。 简体中文 简体中文...
- Page 23 系统设置 开启/关闭GPS定位模式 开/关 记录完整的行驶路线。 一段时间内未操作, 要调整 DashCam 设定,请点击 。 屏幕保护 30 秒 / 60 秒 / 关 屏幕自动熄屏。 系统声音 静音/录音。 开 / 关 菜单选项 描述 选项 恢复默认 重置所有软件设置。 取消 / 确认 720P 30FPS / 720P 60FPS 分辨率 选择合适的分辨率。 设置 / 1080P 30FPS / 1080P 清空记忆卡内所有数...
- Page 24 • 屏保已激活。可以将设置改为“关” 。 视频格式:.MP4 无法在手机上回看视频? • 确认手机是否连接上了 DashCam。 Wi-Fi:2.4GHz Band 如何打开停车监控? 电池容量:470mAh • 点击 ,选择“停车守卫” > “开” 。 工作温度:-10°C 至 65°C 记忆卡满了怎么办? 存储温度:-29°C 至 71°C • 循环录制功能将会把最老的视频删除。 重量:约 119 克 使用 Roav App 会消耗流量嘛? 尺寸:86*66*36 毫米 • 不会,当你用社交应用程序分享录制视屏的时候才会。 简体中文 简体中文...
- Page 25 声明 تعليمات السالمة 本产品采用可回收利用的高性能材料和组件制造 يرجى قراءة جميع التعليمات وفهمها قبل استخدام هذا المنتج. في حال حدوث تلف بسبب عدم اتباع .التعليمات، يعتبر الضمان الغ ي ًا 而成。 .اتبع هذه التعليمات بعناية 切勿将本产品与其它生活垃圾一起处理。请自行 .ال تسقط المنتج أو تثقبه أو تفككه 了解当地关于分类收集电子、电气产品及电池的 .يجب...
- Page 26 المحتويات إدراج بطاقة الذاكرة ﻋﻧدﻣﺎ ﯾﻛون ھذا اﻟﻣﻧﺗﺞmicroSD / TF ﻻ ﺗﻘ ـ ـم ﺑﺈزاﻟ ـ ـﺔ أو إدراج ﺑطﺎﻗ ـ ـﺔ .ﻗﯾ ـ ـد اﻟﻌﻣل ﻣﻣ ـ ـﺎ ﻗد ﯾﻠﺣق اﻟﺿرر ﺑﺎﻟﺑطﺎﻗﺔ . من الفئة العاشرةmicroSD / TF للحصول على تشغيل موثوق به، استخدم بطاقة للبطاقة...
- Page 27 قم بتحديد موقع (أ أو ب) على الزجاج األمامي خلف المرآة الخلفية، وقم DashCam تثبيت .بتنظيفها بالمياه وانتظر حتى تجف تما م ًا .قم بإزالة الالصق 3 م وتركيب وحدة التثبيت بإحكام على الزجاج األمامي استخدم العتلة لضغط كابل الشحن وإخفاؤه في الدرز وشريط الح َ ب ْك حول حافة .ﻻ...
- Page 28 توصيل الطاقة Roav تنزيل تطبيق . للتنزيلGoogle Play أوApp Store " فيRoav" ابحث عن كلمة . باستخدام كابل الشحنDashCamقم بتوصيل شاحن السيارة و قم بتوصيل الطرف اآلخر من شاحن السيارة بمقبس والعة السجائر في .سيارتك بهاتفك الذكيDashCam قم بتوصيل...
- Page 29 تشغيل ملفات الفيديو DashCam استخدام ﻋن اﻟﺗﺳ ـ ـﺟﯾل ﻋﻧد ﻋرض ﻣﻠﻔﺎت اﻟﻔﯾدﯾو أوDashCam ﯾﺗوﻗف .اﻹﻋدادات ﻛﺳ ـ ـﺎﺋق، ﻋﻠﯾك اﻟﻣﺳ ـ ـؤوﻟﯾﺔ اﻟﻛﺎﻣﻠﺔ ﻟﻠﻘﯾﺎدة ﺑﺄﻣﺎن، واﻟﺗﻘﯾد ﺑﺟﻣﯾﻊ أﻧظﻣﺔ .اﻟﻣرور اﻟﻣطﺑﻘﺔ .لعرض جميع الملفات المحفوظة اضغط فوق ..حدد فيديو لتشغيله تسجيل...
- Page 30 تمكين / تعطيل وحدة تحديد المواقع إعداد النظام تشغيل / إيقاف تشغيل .لتسجيل مسار القيادة الكامل إيقاف التشغيل / 03 ثانية / 06 ثانية قم بإيقاف تشغيل اإلضاءة الخلفية التلقائي لشاشة ، اضغط علىDashCam لضبط إعدادات قيد إيقاف التشغيل .للشاشة بعد فترة من عدم النشاط قيد...
- Page 31 المواصفات األسئلة المتداولة هل ال يمكنك التسجيل؟ .ﻣﻼﺣظﺔ: ﺗﺧﺿﻊ اﻟﻣواﺻﻔﺎت ﻟﻠﺗﻐﯾﯾر دون ﺳ ـ ـﺎﺑق إﺧطﺎر تحقق إذا كان قد تم إدراج بطاقة الذاكرة بشكل صحيح وأن هناك سعة حرة .كافية (240 x 320) LCD لونTFT "2.4 :الشاشة .تحقق من مستوى البطارية الصورة...
- Page 32 مالحظة 12-month limited warranty 18ヶ月保証 ص ُمم هذا المنتج و ص ُنعت من مواد عالية الجودة من المكونات التي 12个月质保期 .يمكن إعادة تدويرها وإعادة استخدامها ضمان محدود لثمانية عشر شهرً ا ويعني هذا الرمز أن المنتج يجب أال يتم التخلص منه مثل النفايات Lifetime technical support .المنزلية،...
Need help?
Do you have a question about the C1 PRO and is the answer not in the manual?
Questions and answers