Advertisement
Quick Links
Manual Type 1.1.0.9-RF
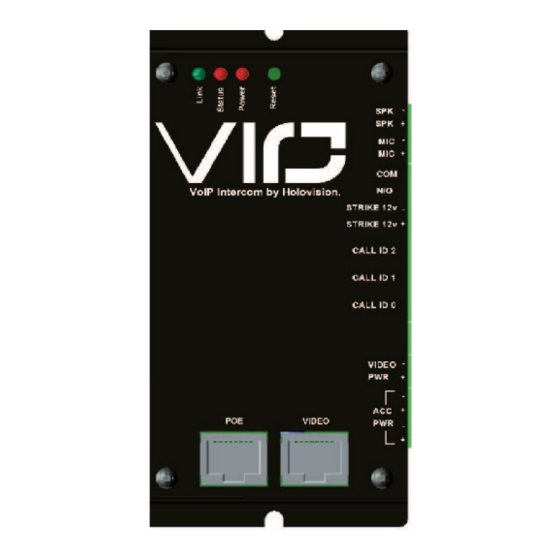
Holovision VIO with Essex 265 Controller
For Models
201-VIO
203-VIO
Communication
Holovision VIO is a SIP enabled intercom module
developed specifically with the custom integrator in
mind. It works with Crestron RAVA/SIP and most SIP
enabled VoIP phone systems and servers.
PoE+ Switch
301-VIO
302-VIO
Specifications
Access Control
Essex 5 button keypad
2 relays
5-6 users
16.5 VAC power supply included
Internal rectifier gives optional ''dc out'' for strikes
Speaker
Microphone
Push Button
IP Camera
INSTALLATION
INSTRUCTIONS
501 E. Goetz Ave.
Santa Ana, Ca 92707
www.eholovision.com
Ph. 714-434-6904
Fax 800-362-0002
HOLOVISION
Advertisement

Summary of Contents for HOLOVISION VIO
- Page 1 203-VIO Specifications Access Control Communication Essex 5 button keypad Holovision VIO is a SIP enabled intercom module 2 relays developed specifically with the custom integrator in 5-6 users mind. It works with Crestron RAVA/SIP and most SIP 16.5 VAC power supply included enabled VoIP phone systems and servers.
- Page 2 Essex Keypad Wiring AC Out for Strike Holovision Entry System with Keypad Essex Model 265 NC 2 NO 2 Gate Strike COM 2 NC 1 NO 1 COM 1 - OUT 16.5 Earth **NOTE: Jumper Wire is Required DC out for strike...
- Page 3 Essex Keypad Wiring Contact Closure for Gate Motor Holovision Entry System with Keypad “Open” Terminals on Gate Motor Essex Model 265 NC 2 NO 2 COM 2 NC 1 NO 1 COM 1 - OUT 16.5 Earth NOTE: Jumper Wire is Required The 265 module comes with jumpers and MOVs prewired to the left side of the terminal stirp.
- Page 4 Set Essex Relay Options GOAL: To use jumper pins on circuit board to configure standard relay options. In this configuration, Codes 1 and 2 operate Relay 1. Codes 3, 4, 5 operate Relay 2. Step Action Relay 1 and 2 activate. Only Relay 1 latch* Relay 1 Relay 2 Relay 1...
- Page 5 Programming of Essex Keypad Set Master Code Step Action Press “Program” switch once. (keypad will beep 4 times) Once “Program” switch is pressed, you have 2 minutes to complete Step 5. Press “1119”. (you will hear 3 beeps) Step 5 must be completed within 5 seconds of Step 3. Enter “Master Code”...
- Page 6 Programming of Essex Keypad Set User Code 4 Step Action Enter “Master Code”. Enter 117 (3 beeps). Enter User Code 4. Wait 5 seconds for 3 reset beeps. Set User Code 5 Step Action Enter “Master Code” Enter 119 (3 beeps). Enter User Code 5.
- Page 7 Programming of Essex Keypad Set Activation Time Of Relay 2 (User codes 3, 4& 5 - see note below) Step Action Press “Program” switch (keypad will beep 4 times). Enter 1115 (3 beeps). Enter 1 for every 1 second latch time, and 5 for every 5 seconds. Examples: 6 seconds = 5, 1 8 seconds = 5, 1, 1, 1...
- Page 8 VIO RAVA Quick Start 1. Plug the device into the network. Device will speak it’s IP address. 2. Navigate to device IP on a web browser. 3. Under “Configuration” please enter SIP ID for the name to be displayed, and enter the extension of the Main RAVA Touchscreenunder “Input Call ID 0 Default is CALL:CRESTRON”...
- Page 9 5. Configure the relay setting under “Inbound Calls”. Configure the powered relay and the dry contact closure. Choose any 2 to 4 digit combination Note; By configuring the request to exit feature you can configure for either relay. 6. Once the device has been configured you can initiate the call by pressing the button Page 9 TYPE 1.1.0.9-RF...
- Page 10 & " " "...
- Page 12 501 E. Goetz Ave. Santa Ana, Ca 92707 Ph. 714-434-6904 Fax 800-362-0002 www.eholovision.com...


Need help?
Do you have a question about the VIO and is the answer not in the manual?
Questions and answers