Advertisement
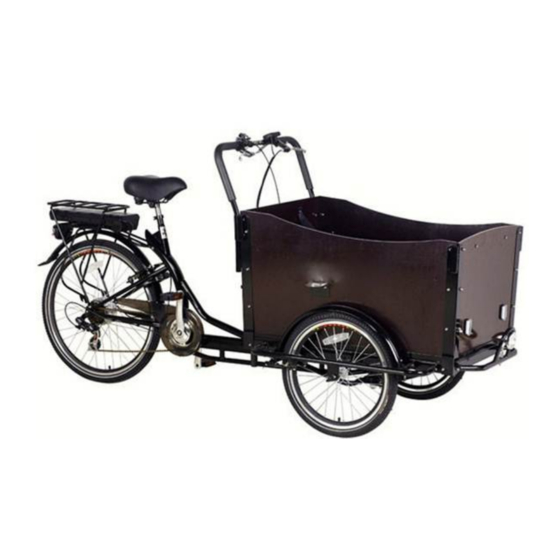
ELECTRIC CARGO BIKE
SAMLEMANUAL(
ASSEMBLE INSTRUCTIONS
Read(and(understand(these(instruc5ons(before(you(begin(the(assembly.(The(bike(
comes(partly(assembled,(and(it(is(important(to(read(the(manual(carefully(before(
star5ng(assembly,(so(the(bicycle(will(be(assembled(in(the(correct(order.(It(is(
recommended(to(be(two(people(to(assemble(the(cargo(bike.(Be(aware(that(the(bike(
must(be(reE5ghtened(aFer(some(weeks(of(use.(Make(sure(to(check(all(parts(of(the(
bike(and(reE5ghten(all(screws(and(bolts.(
!
!
!
!
!
!
!
!
!
Page(1(
Advertisement
Table of Contents

Related Manuals for AMLAD CYKLER Electric Cargo Bike


Summary of Contents for AMLAD CYKLER Electric Cargo Bike
- Page 1 ELECTRIC CARGO BIKE SAMLEMANUAL( ASSEMBLE INSTRUCTIONS Read(and(understand(these(instruc5ons(before(you(begin(the(assembly.(The(bike( comes(partly(assembled,(and(it(is(important(to(read(the(manual(carefully(before( star5ng(assembly,(so(the(bicycle(will(be(assembled(in(the(correct(order.(It(is( recommended(to(be(two(people(to(assemble(the(cargo(bike.(Be(aware(that(the(bike( must(be(reE5ghtened(aFer(some(weeks(of(use.(Make(sure(to(check(all(parts(of(the( bike(and(reE5ghten(all(screws(and(bolts.( Page(1(...
- Page 2 Step!1:!Assembly!of!the!back!and!front!frame! • When(the(parts(have(been(taken(out(of(the(boxes(and(wrapping,(place(the(front(frame(upside(down(on( two(chairs.( • Place(the(back(frame(upside(down("on(top”(of(the(front(frame.(Avoid(taking(the(plas5c(on(the(luggage( carrier(off(to(avoid(scratches(in(the(paint.(( • The(main(bolt(is(mounted(from(below(as(shown(in(picture(1A,(1B,(and(1C(by(using(a(hammer(or(something( similar.(It(should(fit(5ghtly.(The(bearings(and(main(bolt(should(be(lubricated(with(grease.(Do(not(5ghten( the(nut(yet.( Picture!1A! Picture!1B! Picture!1C! • With(the(7(large(bolts,(washers(and(nuts(mount(the(bowEshaped(and(the(two(straight(metal(rods(as(shown( on(image(1D,(1E,(1F,(and(1G.(The(metal(rods(must(be(placed(below(the(trazezodial(plate(and(above(on(the( frame(as(shown(in(picture(1F(and(1G.(In(order(to(avoid(that(the(stainless(steel(locknuts(get(stuck(halfway( down(on(the(bolt,(use(some(grease(at(the(end(of(the(bolts,(before(the(nut(is(5ghtened.(Only(when(these( are(5ghtened,(5ghten(the(large(nut(on(the(main(bolt(as(hard(as(possible,(and(insert(the(split.( 7(pcs.(14(mm(bolts( (length:(25(mm)( 7(pcs.(big(washers( 7(pcs.(13(mm(nuts( Picture!1D! Picture!1E! Page(2( Picture!1F! Picture!1G!
- Page 3 Step!2:!Fenders,!front!wheels!and!brake!pads! • One(of(the(chairs(is(moved(to(the(end(of(the(front(frame(and(the(second(chair(is(removed.( • The(front(fenders(are(mounted(with(8(small(bolts,(washers,(and(nuts(+(the(four(brackets((see(picture(2A( and(2B).(To(make(sure(that(the(fenders(are(just(above(the(wheels,(the(nuts(are(5ghtened(aFer(the( wheels(are(mounted.( • Mount(the(front(wheels(as(shown(in(the(picture(2C(and(2D.( • Loosen(the(four(brake(pads(on(the(front(wheels(and(adjust(them(so(they(are(properly(placed(visEaEvis( the(rim((picture(2E).( • Finally,(the(chair(is(removed(and(the(bike(is(turned(around((see(picture(2F).( 4(pcs.(display(brackets( 8(pcs.(8(mm(bolts( (length:(12(mm)( 8(pcs.(washers( 8(pcs.(8(mm(nuts( Picture!2A! Picture!2B! Picture!2C! Picture!2F! Picture!2D! Picture!2E! Step!3:!Assemble!the!box! • The(corner(brackets(for(the(box(are(mounted(as(shown(in(picture(3A.( • The(correct(posi5on(of(the(four(different(corner(fiangs(is(shown(on(picture(3B,(3C,(3D,(and(3E.( Page(3(...
- Page 4 8(pcs.(10(mm(bolts( (length(30(mm)( 8(pcs.(washers( 8(pcs.(10(mm(flat(locknuts( Picture!3A! Picture!3B! Picture!3C! Picture!3D! Picture!3E! • The(front(and(back(panels(are(mounted((see(picture(3F).( • The(side(panels(are(mounted((see(picture(3G).(The(four(canopy(holders(are(mounted(with(the(long(bolts( in(the(holes(in(the(middle((see(pictures(below)( • The(base(panel(is(mounted((see(picture(3H)( 20(pcs.(10(mm(bolts((length( 18(mm)(and((4(pcs.(10(mm( 2(pcs.(10(mm(bolts( bolts((length(30(mm)( (length(70(mm)( 24(pcs.(washers( 2(pcs.(washers( 24(pcs.(10(mm(round(nuts( 2(pcs.(10(mm(flat(locknuts( Picture!3H! Picture!3F! Picture!3G! 4(pcs.(canopy(holders( Page(4(...
- Page 5 Step!4:!The!rest!of!the!equipment! • The(two(stepEboards(are(mounted((see(picture(4A(and(4B)( 2(pcs.(stepEboards( 4(pcs.(10(mm(bolts( (length(18(mm)( 4(pcs.(washers( 4(pcs.(10(mm(locknuts( Picture!4B! Picture!4A! • The(front(and(sideEreflectors(are(mounted((see(picture(4C(and(4D)( 2(pcs.(front(reflectors( 4(pcs.(side(reflectors( Picture!4C! Picture!4D! • The(headlight(is(mounted((see(picture(4E(and(4F)( 1(pcs.(8(mm(bolt(((((( 1(stk.(8(mm(bolt( (length:(12(mm)( (længde:(12(mm)( Picture!4F! Picture!4E! Page(5(...
- Page 6 • The(four(mouldings,(which(keep(the(child(seats(in(place(are(secured(with(the(four(long(bolts.((see(picture( 4H(and(4I).(( 4(pcs.(10(mm(bolts( (length(35(mm)( 4(pcs.(washers( 4(pcs.(10(mm(round( nuts( Picture!4H! Picture!4I! • The(child(seats(are(mounted(with(four(screws.( • The(seat(belts(are(mounted(on(the(outside(of(the(box((frontE(and(back(panel)(and(below(the(child(seat( (see(picture(4J,(4K,(4L(and(4M)(( 4(pcs.(screws( (length(24(mm)( 8(pcs.(10(mm(bolts( (length(20(mm)( 8(pcs.(washers( 8(pcs.(10(mm(round(( nuts( Picture!4L! Picture!4J! Picture!4K! • The(pedals(are(mounted((see(picture(4N(and(4O)( Picture!4M! Picture!4N! Picture!4O! Page(6(...
- Page 7 • The(saddle(is(mounted(on(the(saddle(post(and(this(is(mounted(on(the(bike((see(picture(4P).( • The(protec5ve(caps(are(mounted(on(the(wheel(nuts((see(picture(4Q).(( • The(handlebar(is(mounted(and(the(break(handles,(gear(shiFer,(display(and(bell(are(mounted(on(the( handlebar((see(picture(4R).( Picture!4Q! Picture!4P! Picture!4R! Step!5:!Brake!cables!and!adjustment!of!breaks!and!gear! • The(brake(cables(are(pulled(through(the(handlebar(to(the(leF((see(picture(5A).( • The(brake(cables(for(the(front(breaks(are(mounted(in(the(leF(break(handle(as(shown(on(picture(5A(and( 5B.( Picture!5A! Picture!5B! Page(7(...
- Page 8 • The(brake(cables(are(secured(via(the(cable(holders((see(picture(5C).( • The(brake(cables(are(mounted(on(the(two(front(breaks((see(picture(5D(and(5E):( • The(umbraco(screw(on(the(right(hand(side(brake(lever(is(loosened(( • Ensure(that(the(break(pad(sits(straight(visEàEvis(the(rim( • The(screws(on(the(side(of(the(break(levers(are(adjusted(so(that(the(two(break(levers(have(equal( suspension(/(are(equally(hard(to(push(in(towards(the(rim( • The(brake(cables(are(pulled(through(the(quarterEcircular(shaped(cable(holders(and(are(mounted( in(the(break(lever.(The(rubber(suspension(is(amached.(( • Ensure(that(there(is(a(couple(of(mm(movement(flexibility(and(then(5ghten(the(umbraco(screw.( Ensure(that(the(break(pads(do(not(touch(the(rim(on(both(sides(when(the(wheel(is(turned( • Follow(the(same(procedure(for(the(back(break((see(picture(5F).( Picture!5D! Picture!5C! Picture!5E! Picture!5F! • The(gear(is(tested.(If(the(gear(“clicks”(or(it(feels(difficult(to(change(gear(for(some(of(the(six(levels,(please( use(the(plas5c(handEscrew(located(where(the(gear(cable(meet(the(gear(to(adjust(it.( IMPORTANT:** • The*frame*number*is*stamped*into*the*frame*on*the*le;*side*of*the*bike*–*just*in*front*of*the*le;* pedal.* • Remember*to*adjust*and*re@Aghten*all*moving*parts*on*the*bike*a;er*some*weeks*of*use.*If*re@ Aghtening*of*the*spokes*are*needed,*please*use*a*spoke*Aghtener.( ENJOY(YOUR(NEW(CARGO(BIKE…!( Page(8(...
Need help?
Do you have a question about the Electric Cargo Bike and is the answer not in the manual?
Questions and answers